How to access the Queue Manager
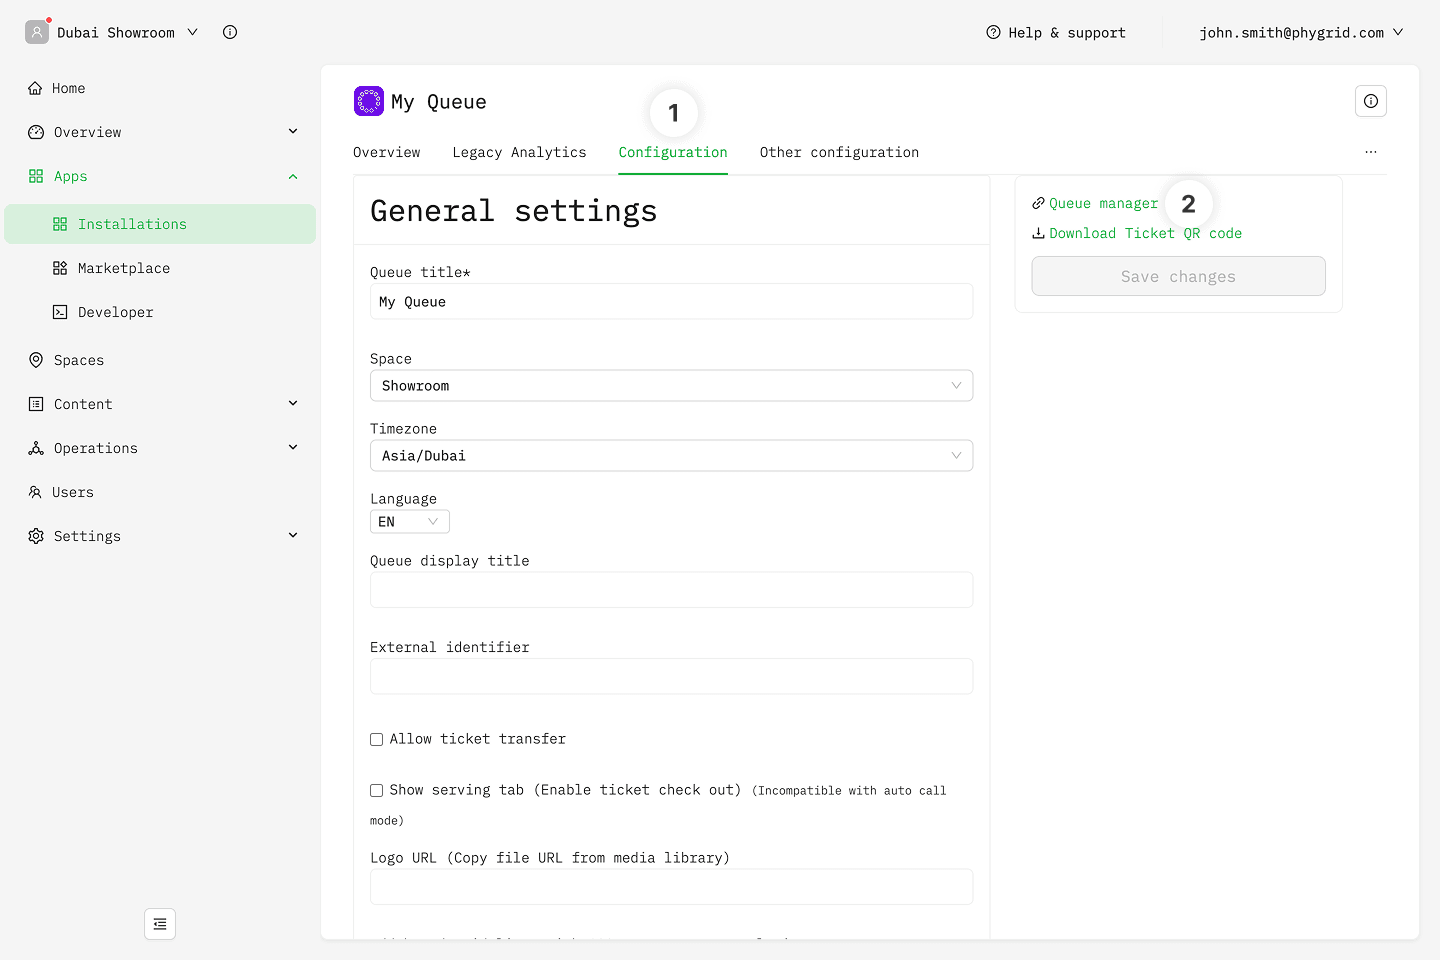
- In the Console, open your Queue Management installation and go to the Configuration tab
- Copy the link for Queue manager from the sidebar and share it with staff responsible for queue management and visitor flow
- Depending on the configured login method, you might also need to share the access pin number
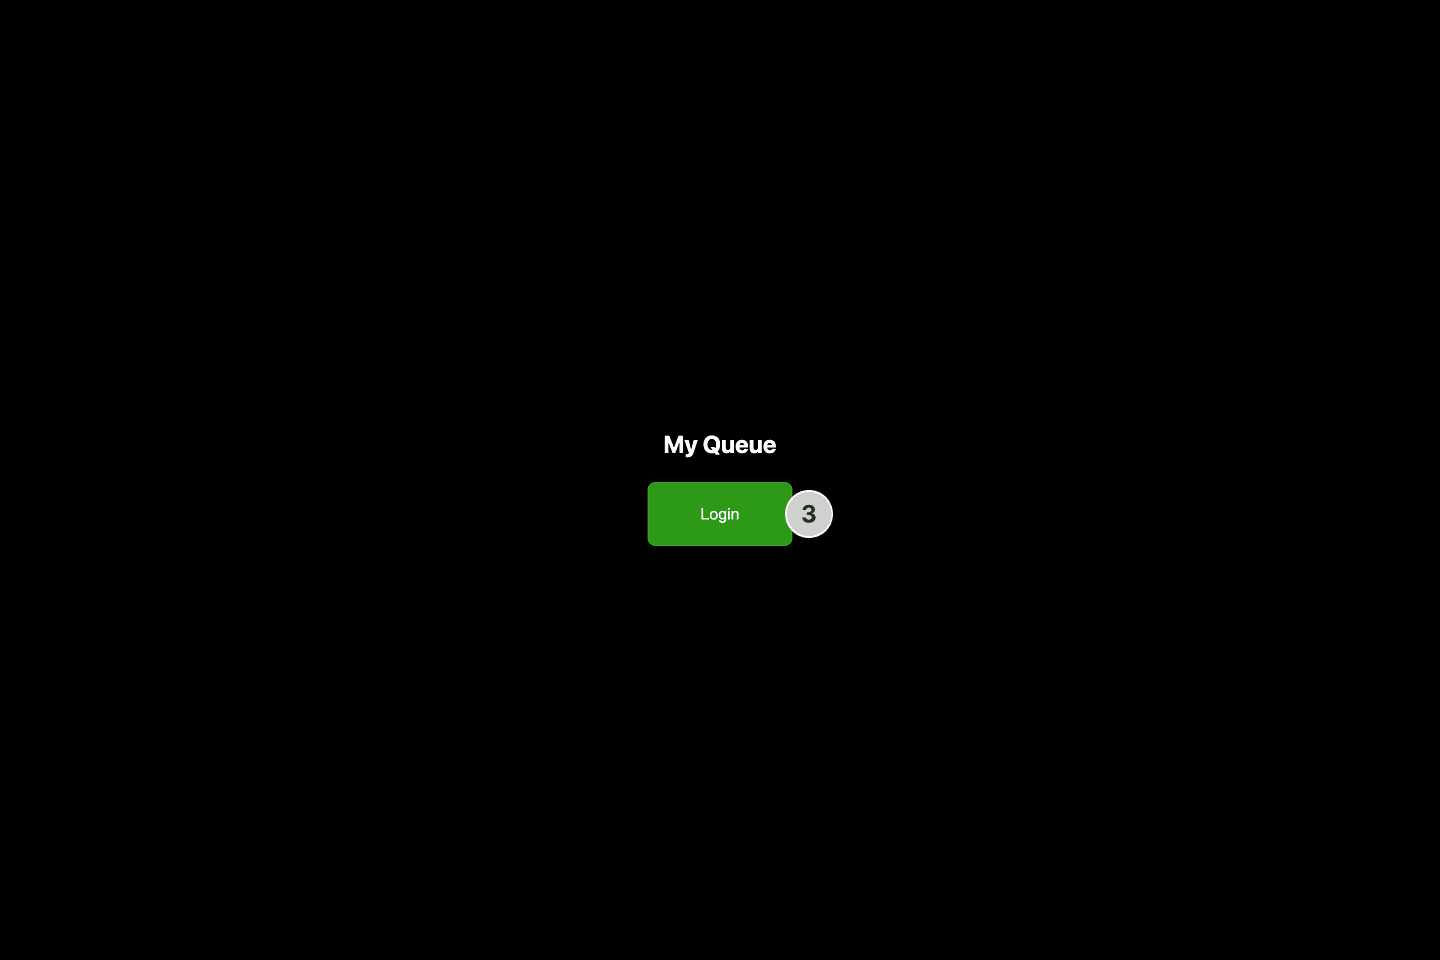
- On the staff side, open the link you just received, and enter the pin or log in using your email
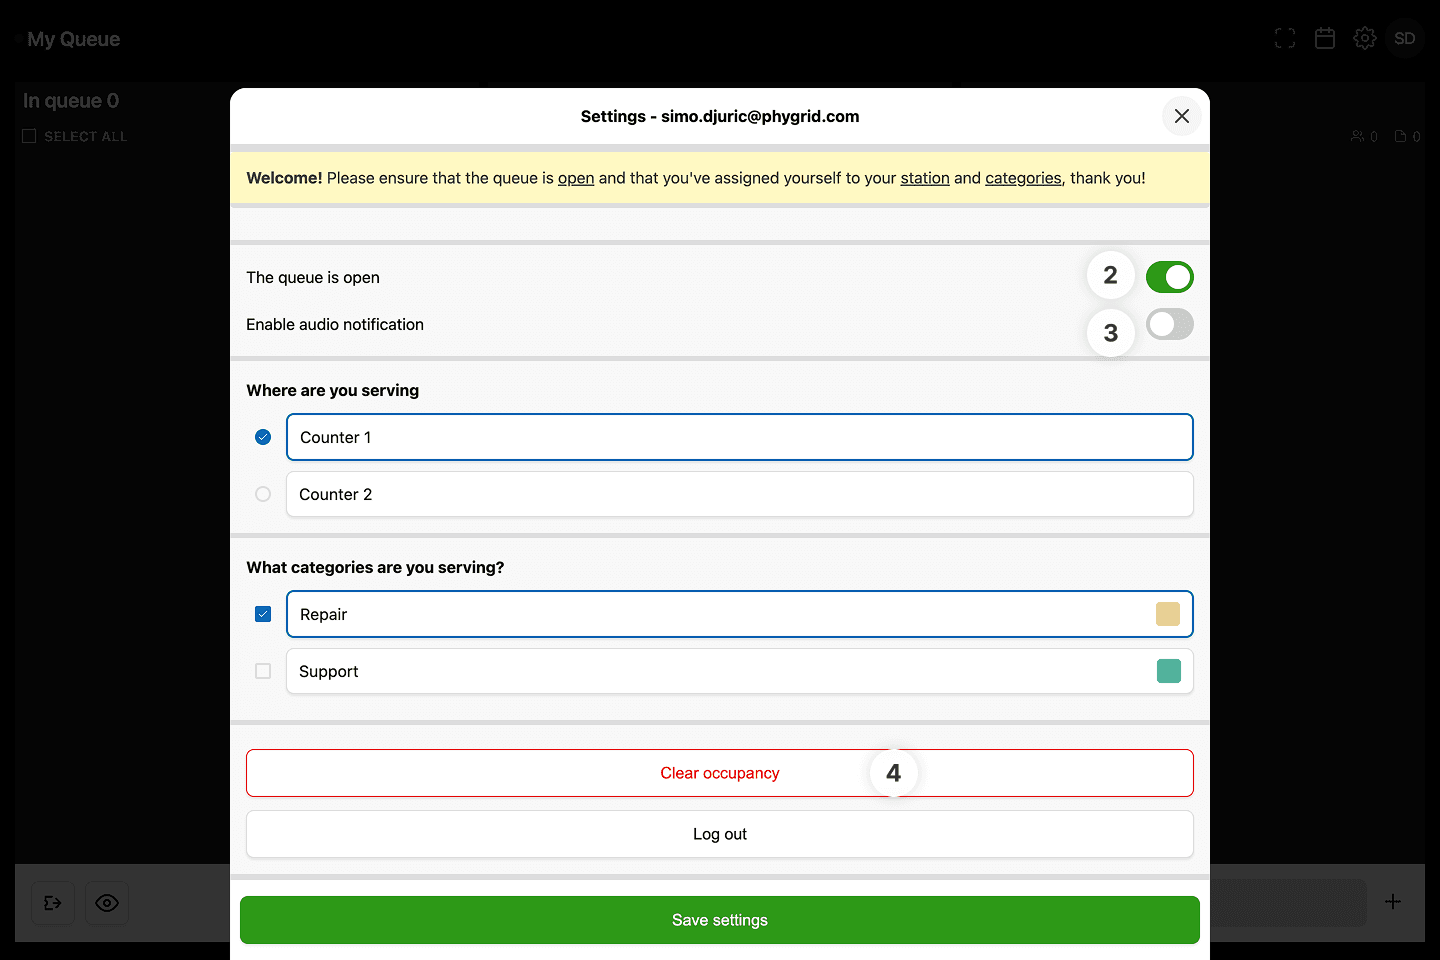
How to set your station and category
This option is only relevant and will only be displayed if your queue is configured to use categories and stations.
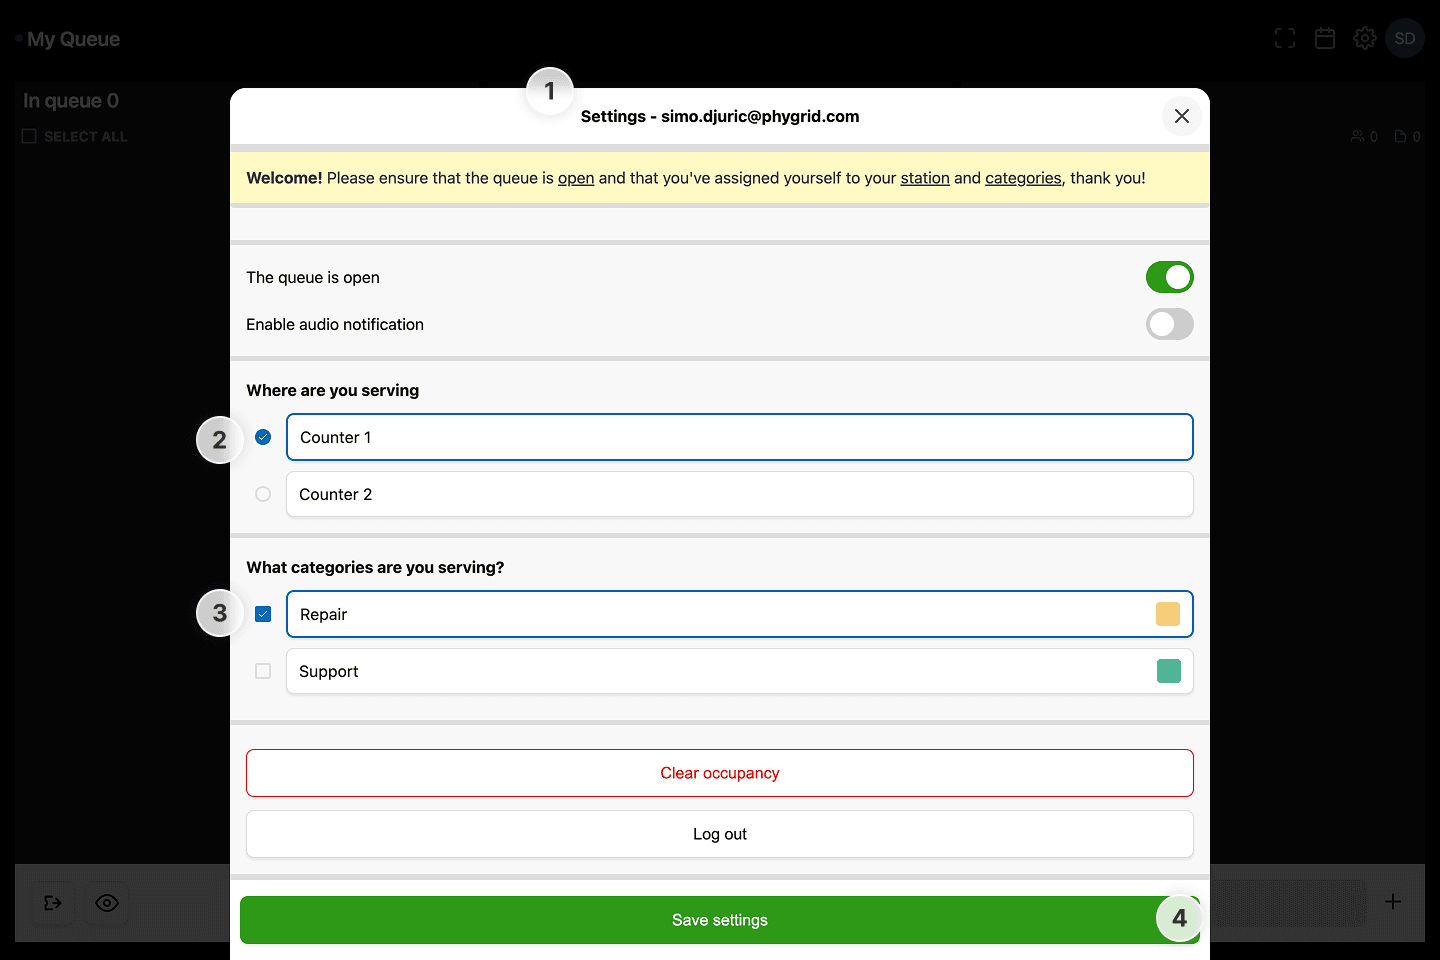
- On your first login, Settings screen will open automatically to prompt you to select your station and categories
- Select the station you are positioned at, such as your desk, counter, service area
- Select the categories you are serving. Items that are not selected will not have their tickets shown in your Queue Manager session
- Click on the Save settings button to save your settings
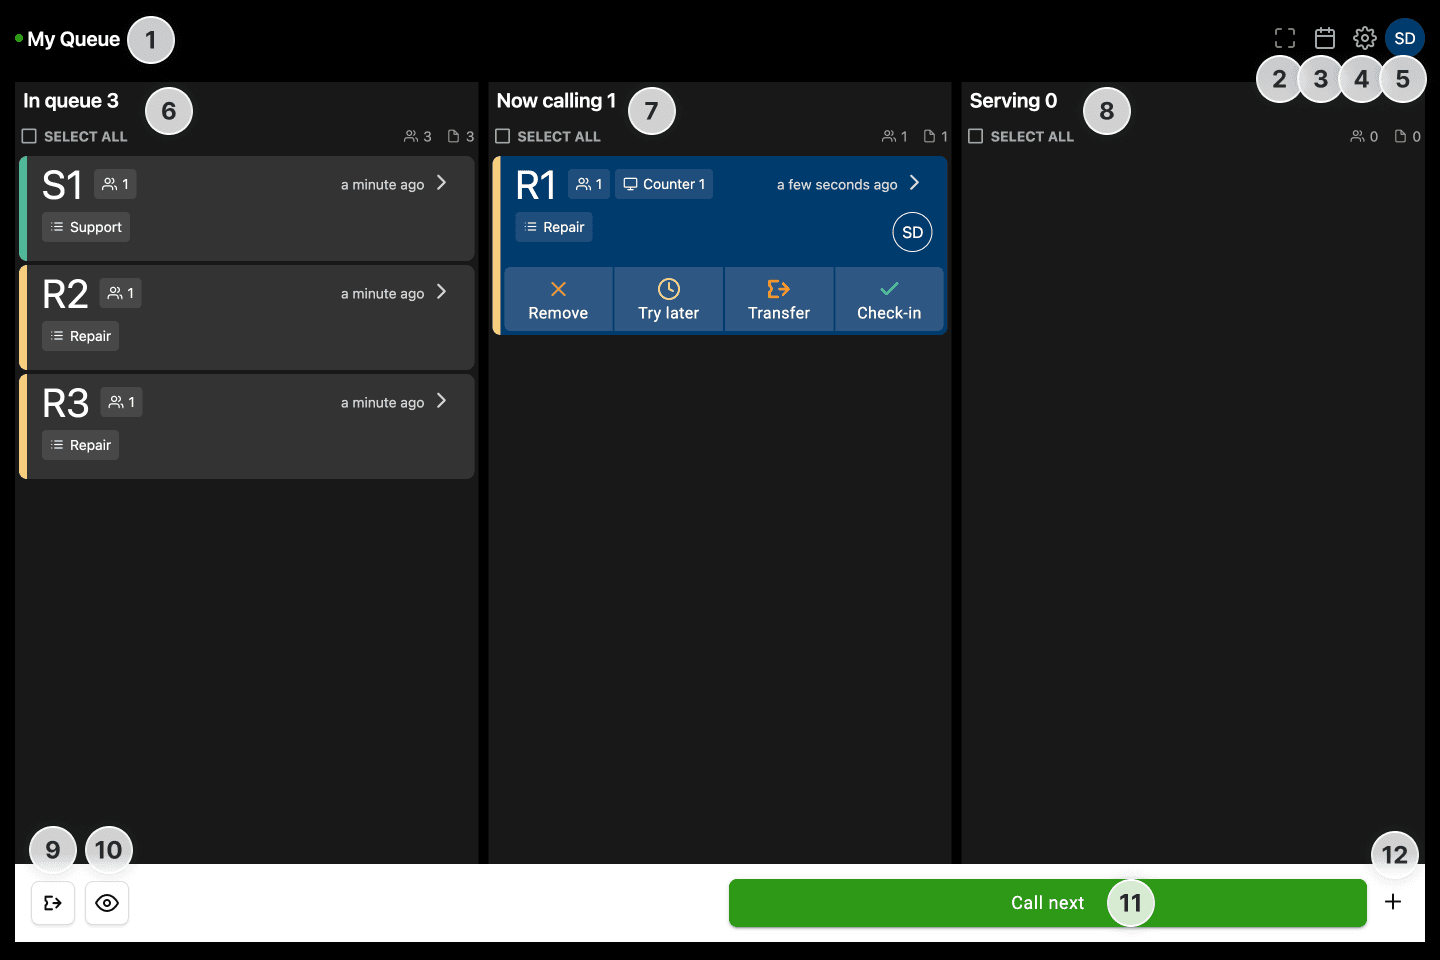
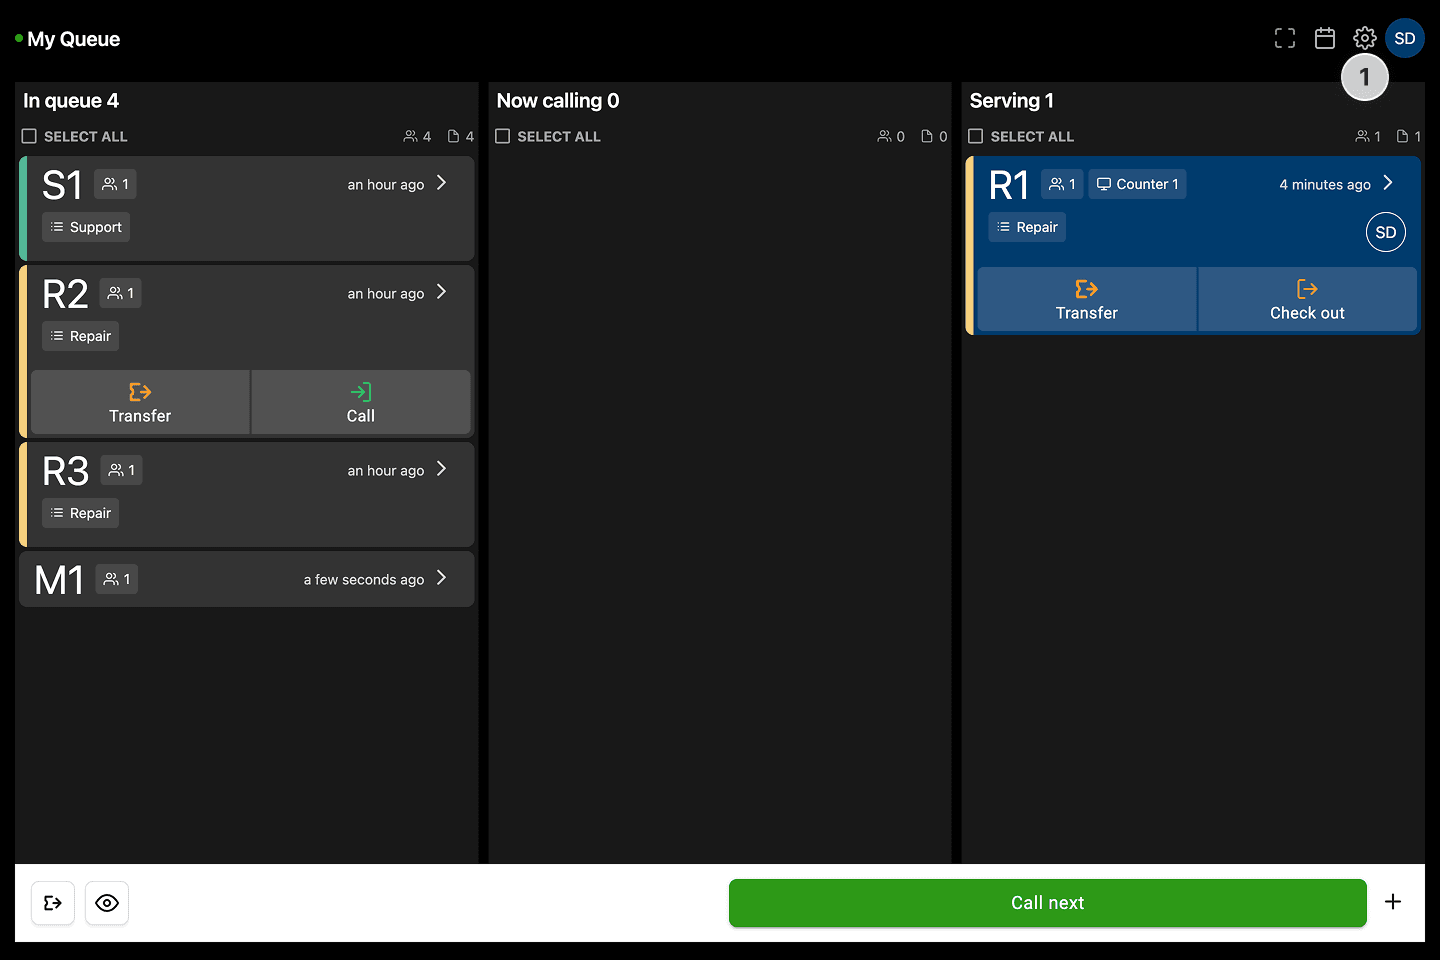
Queue Manager interface
- Queue title and status indicator. Green means the queue is open
- Scanner button lets you scan the QR code on the visitor's ticket to check them in. This option can be enabled/disabled in queue settings
- Calendar view is used if you have bookings enabled
- Settings lets you customize options for the queue
- Your initials If you are using email login, your initials are displayed to indicate current user session. You can click on the initials to show the option to log out
- In queue list showing incoming visitors - people who have created a ticket by scanning the QR code or using the kiosk
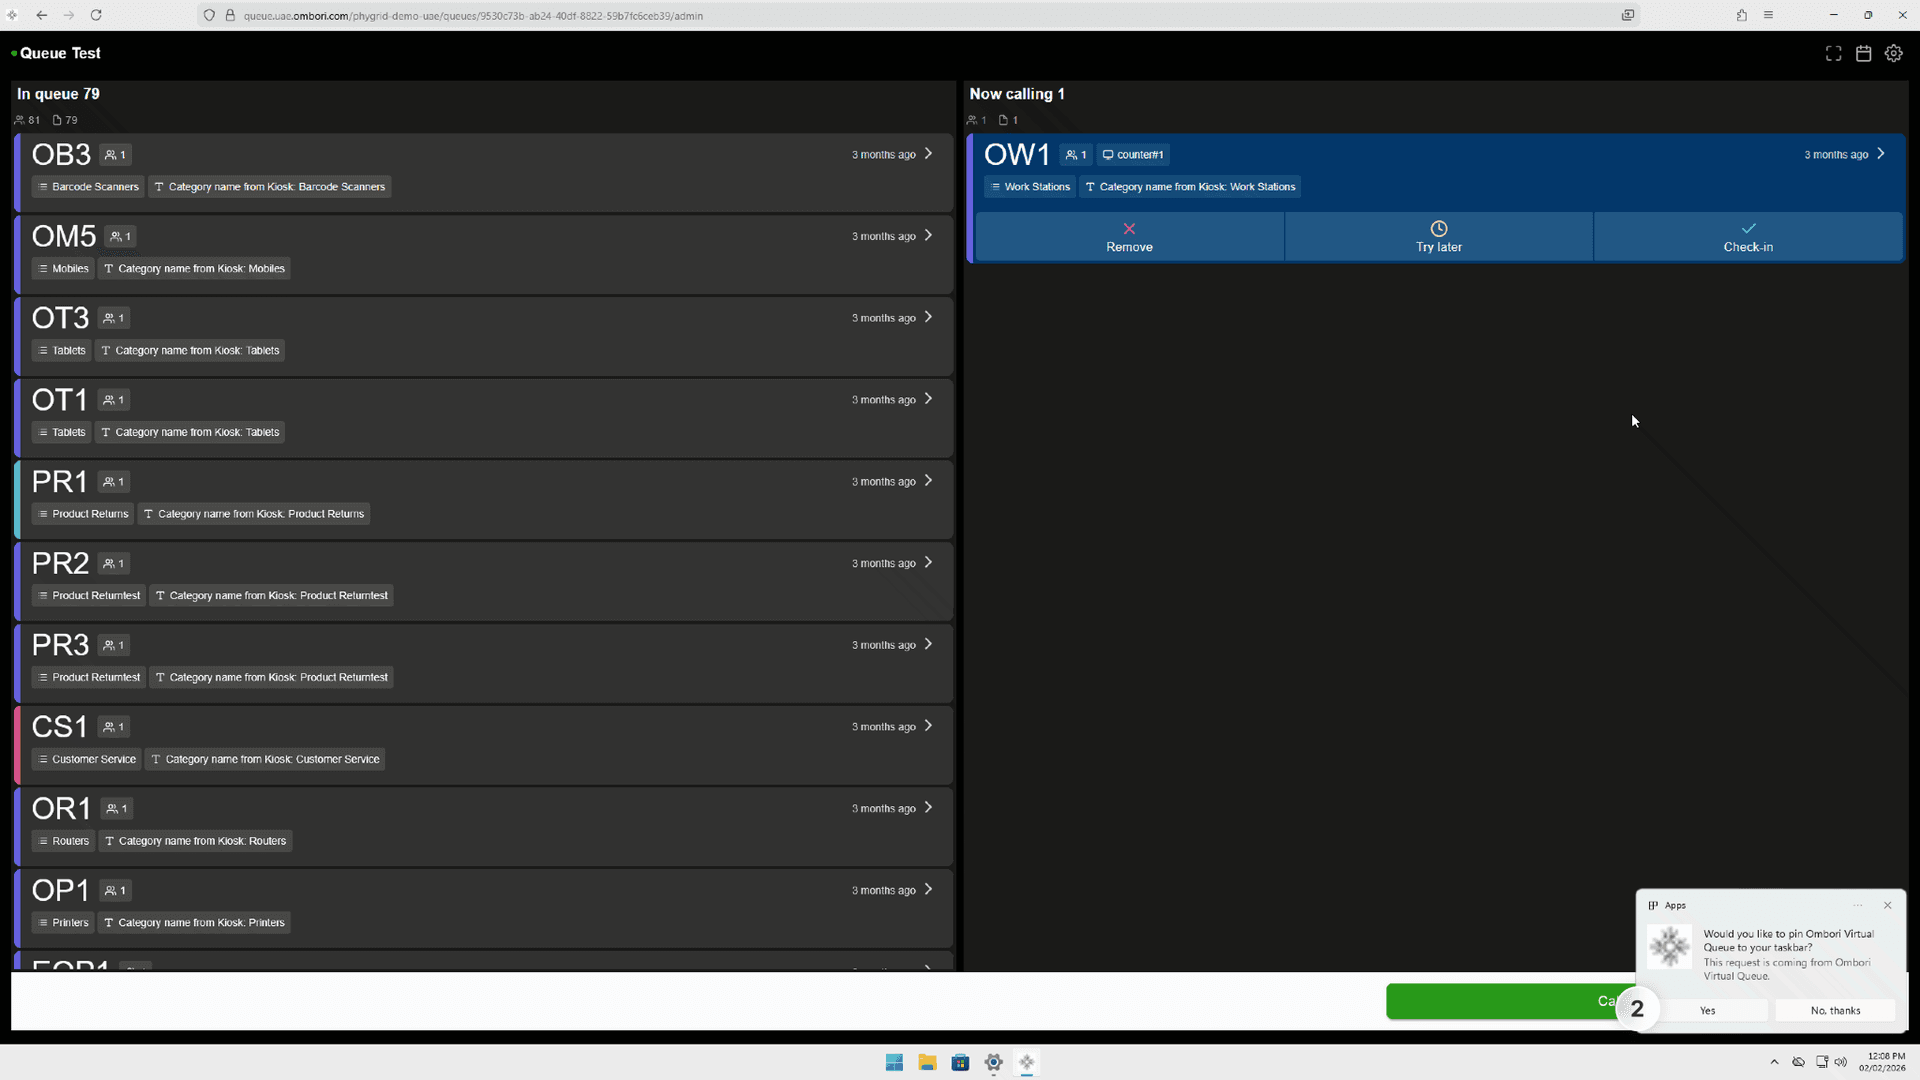
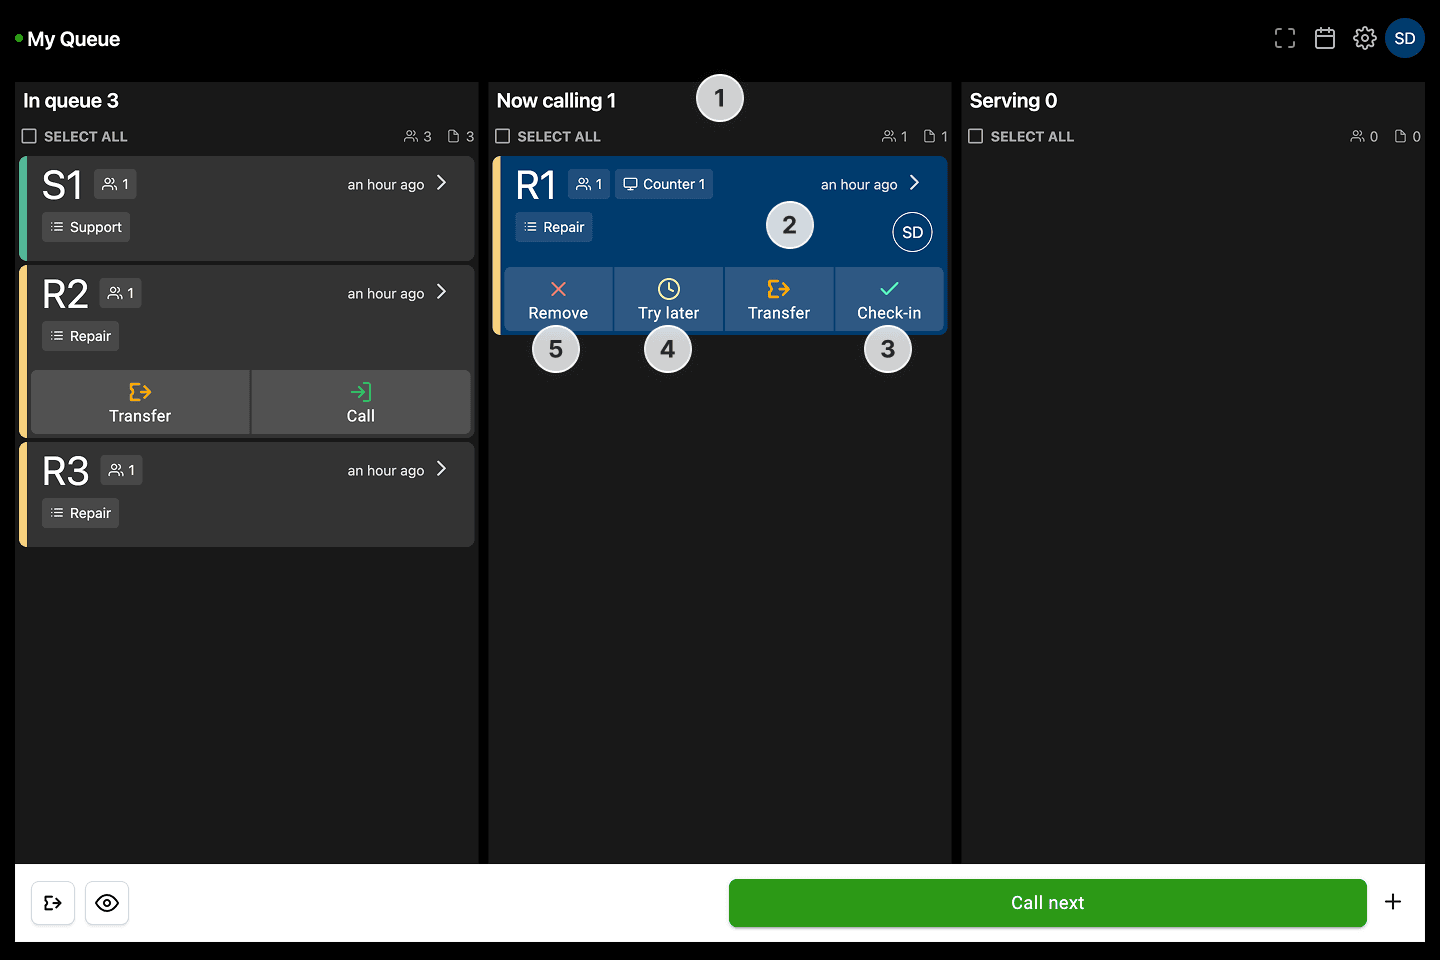
- Now calling tab shows the tickets that you have called to approach your station
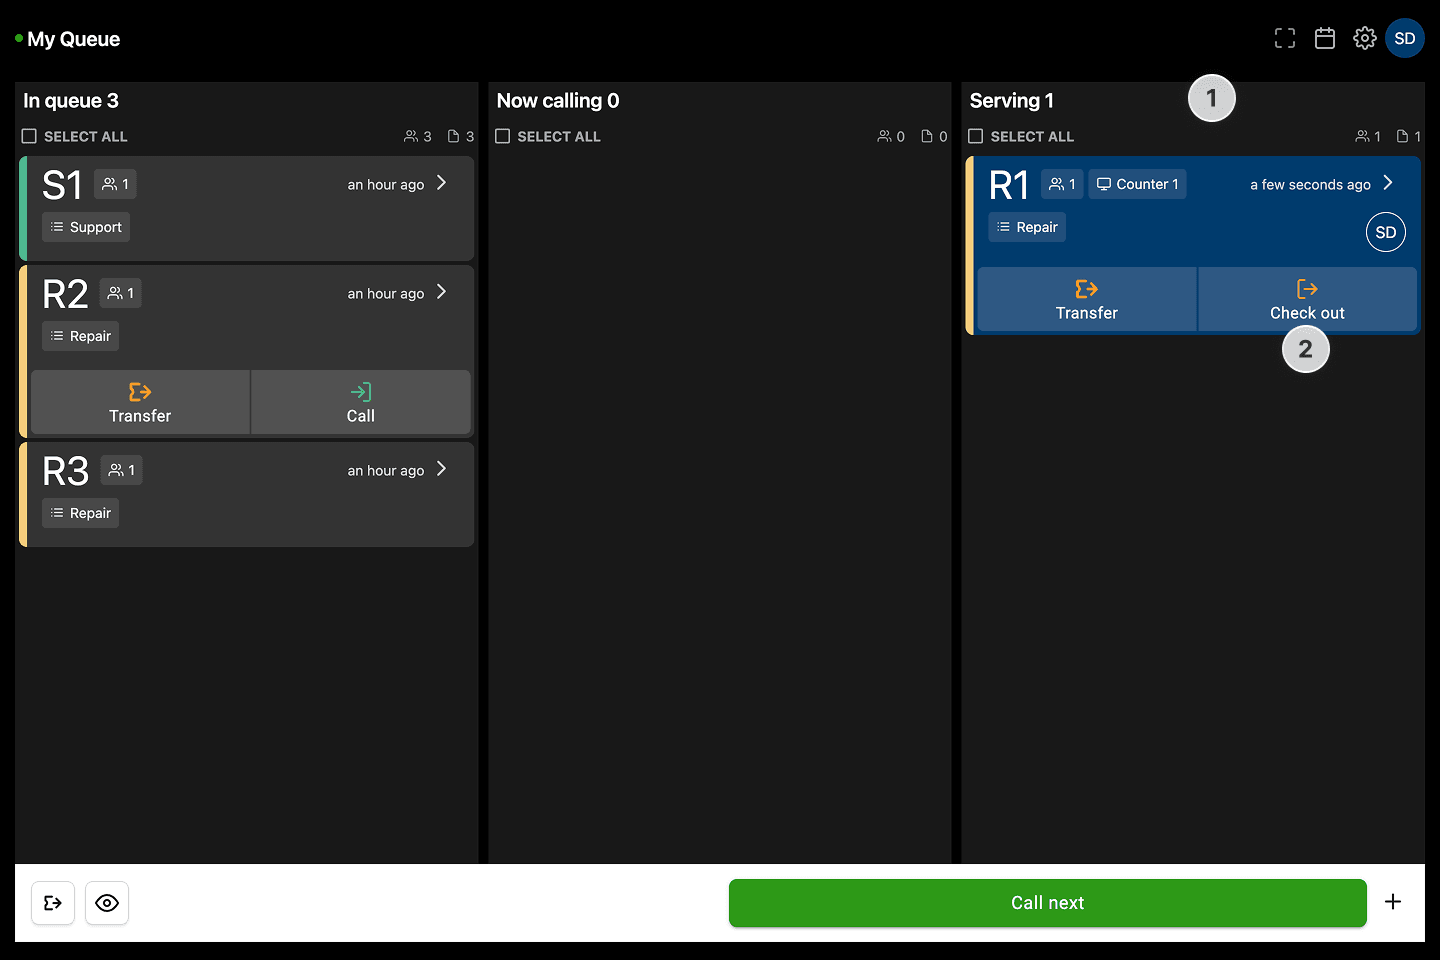
- Serving tab shows the visitor that is being served at the moment. Serving tab can be disabled in queue settings
- Transfer button lets you select then transfer ticket(s) to a different queue, counter, or category
- Filter button will hide tickets in Now calling and Serving tabs that are managed by other staff members. Email login needs to be enabled for this option to work, otherwise all tickets will be shown
- Call next button will call the next ticket in line in order of time joined, or based on category priority option
- Create manual ticket lets you create a ticket for people who aren't able to scan the QR code
How to manage visitor flow
How to view incoming visitors
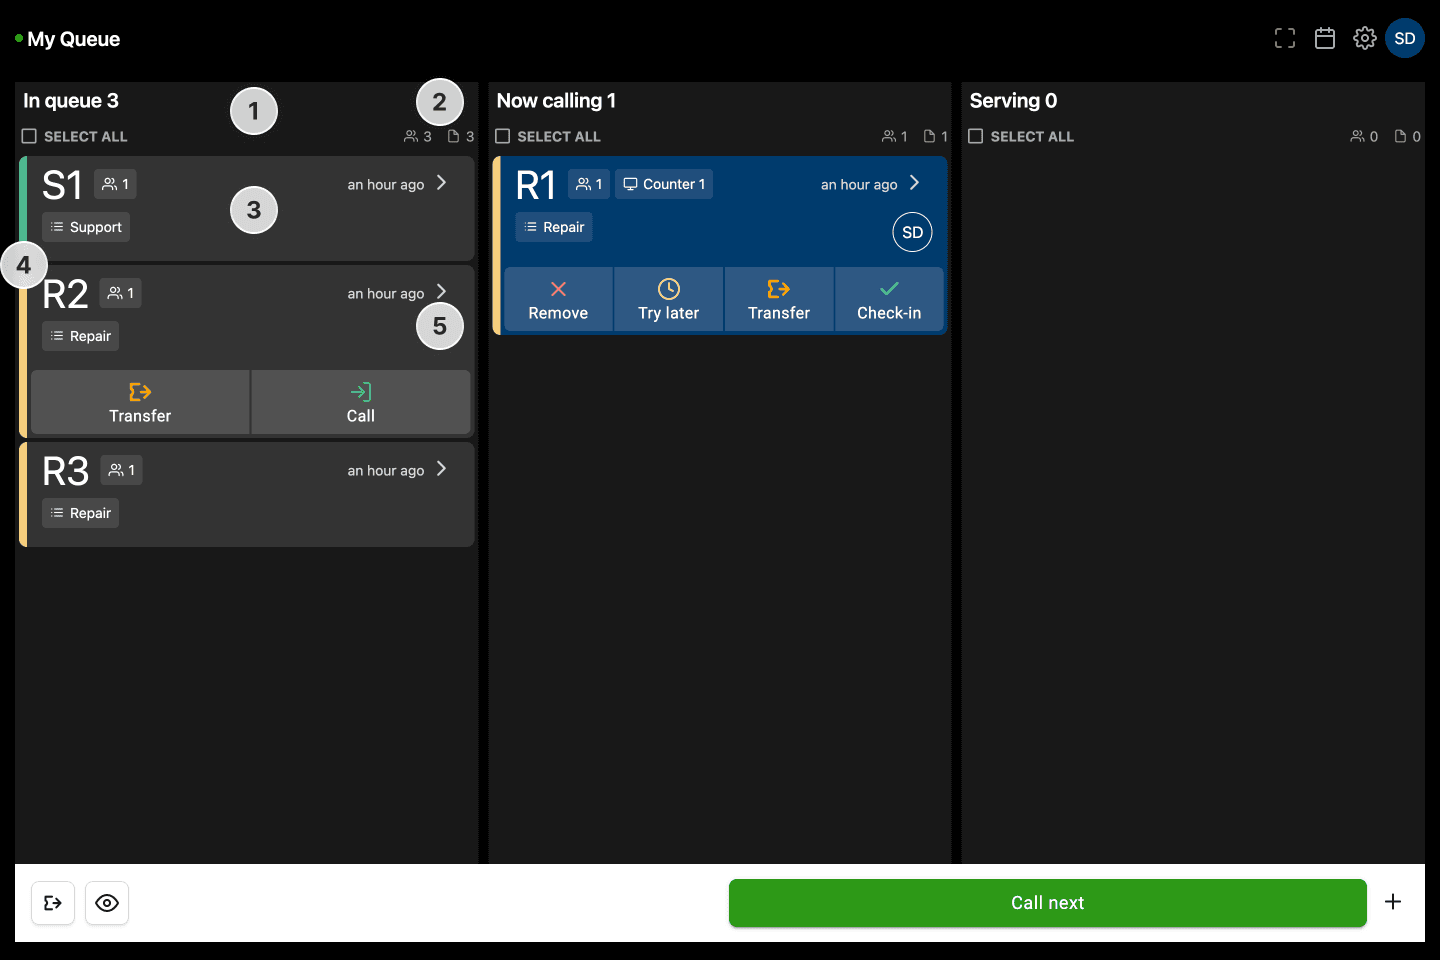
- Visitors who join the queue automatically appear in the In queue list, with the oldest ticket (first in line) at the top
- Column indicators gives you a quick overview of the number of tickets and number of people waiting in that particular column
- Each ticket displays ticket details suchs as ticket number, number of visitors, time of creation, as well as user registration details, such as selected category. Other user registration details can be set up by adjusting queue settings in Console
- The category color indicator helps differentiate ticket types when you serve more than one category
- Click the expand arrow to reveal the option to transfer a ticket, or call that specific ticket out of order
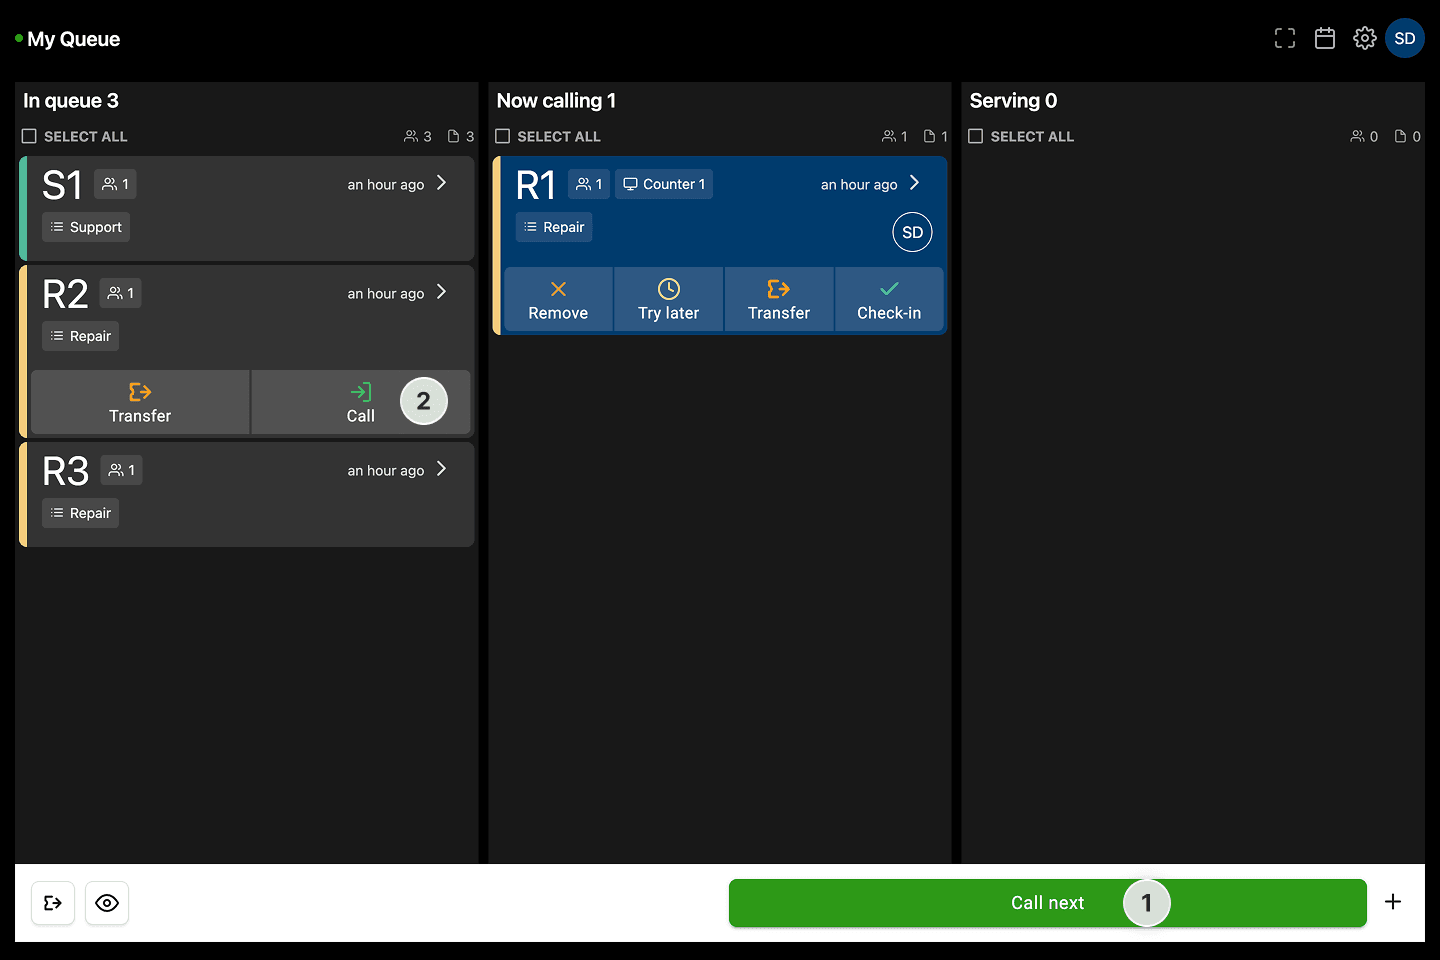
How to call a visitor to your station
- Click the Call next button to call the next visitor in line based on time joined or category priority
- To call a specific visitor, expand their ticket in the In queue list and click Call
How to check a visitor in
- Once called, the ticket moves to the Now calling tab and the visitor is notified via signage, digital ticket, or if configured, SMS and email
- The ticket now shows your station and initials
- When the visitor arrives at your station, click Check-in to move them to the Serving tab
- If the visitor does not respond, click Try later to move the ticket back to the queue
- To remove a no-show, click Remove to cancel the ticket
How to check a visitor out after serving them
- Once checked in, the ticket will be moved to the Serving tab. Keep the ticket in the serving tab as long as you are providing service for the visitor
- Click Check out on their ticket to mark the visit as complete and remove the ticket from the queue
How to create a ticket for a visitor
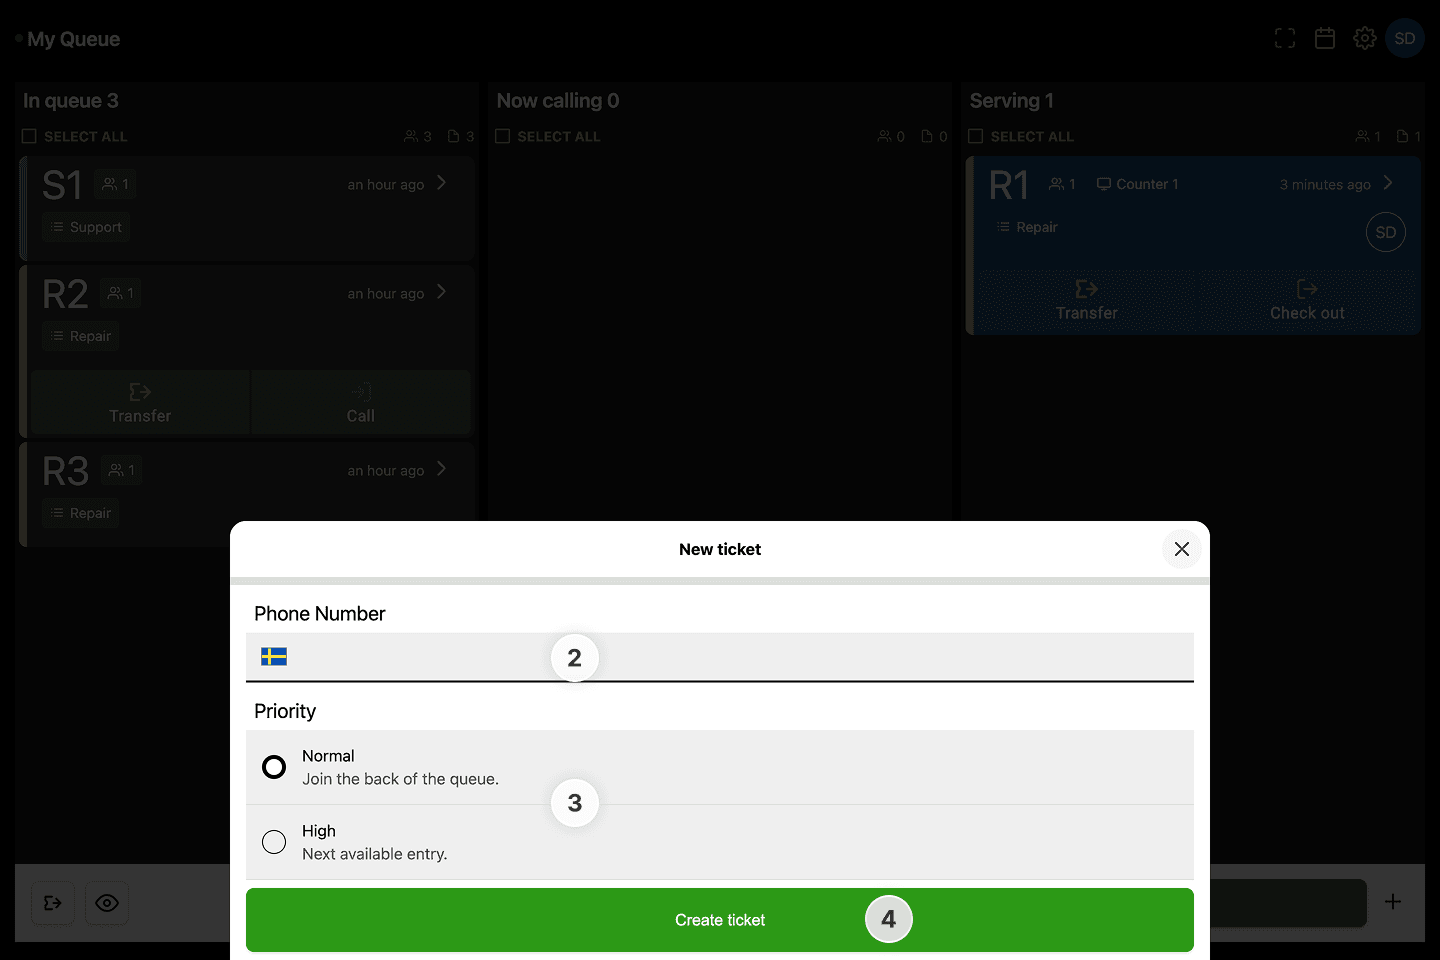
If the visitor cannot create a digital ticket due to phone or internet issues, you can create a manual ticket for them. If you have SMS notifications enabled, you can also enter the visitors phone number.
- Click the plus button on the right side of the bottom bar
- Optionally enter the visitor's phone number if SMS notifications are enabled
- Select the priority level: Normal to join the back of the queue, or High for next available entry
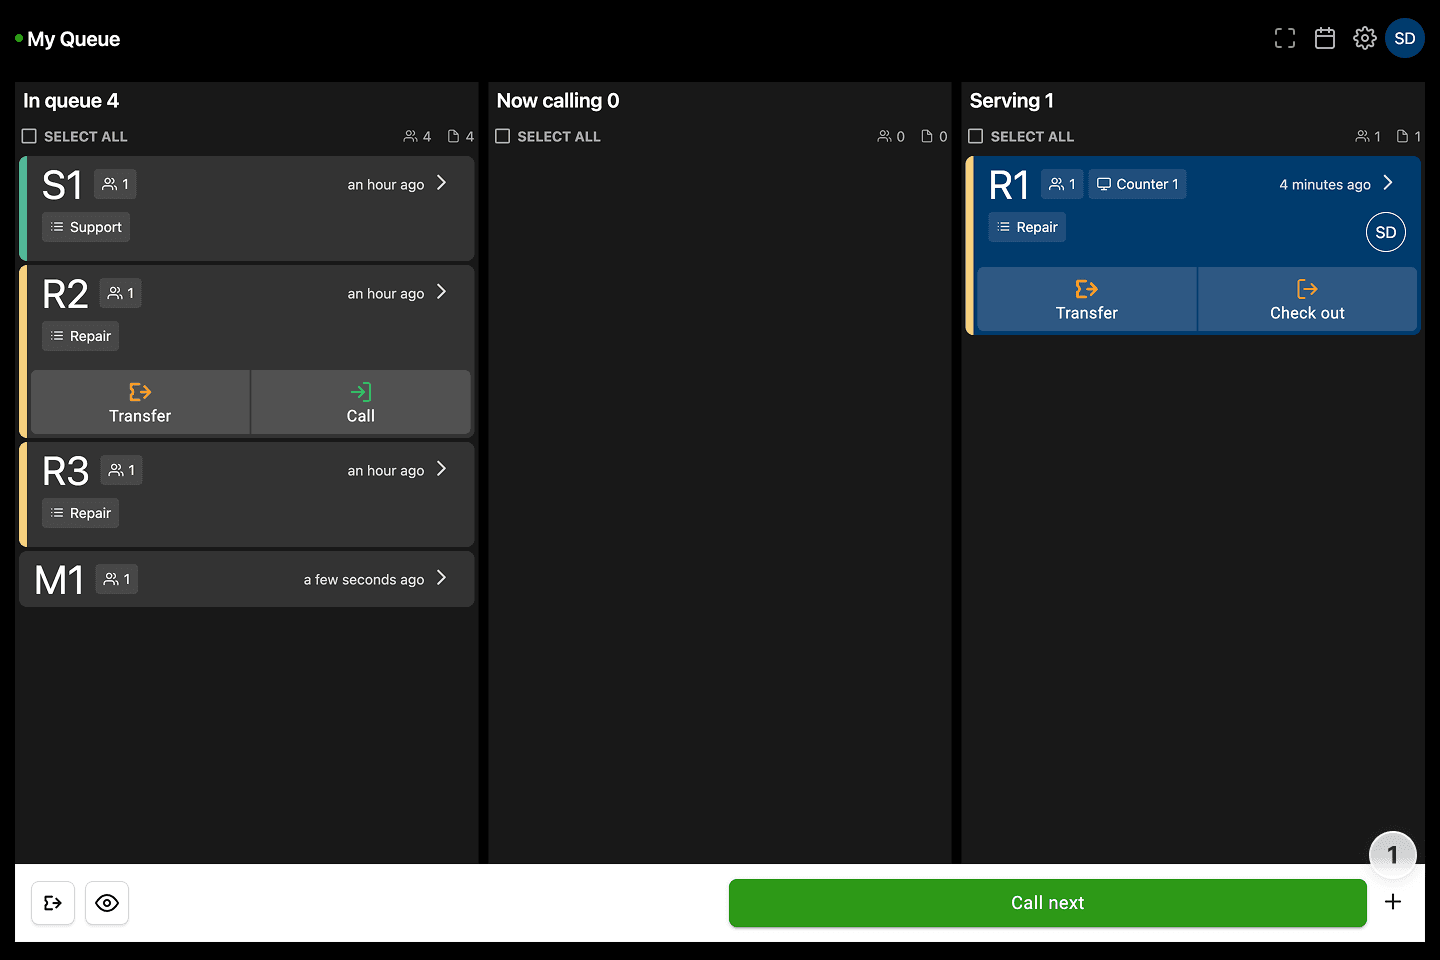
- Click Create ticket and ticket will be created and shown in the In queue list
How to customize Queue Manager settings
- Open Settings by clicking the gear icon in the top bar
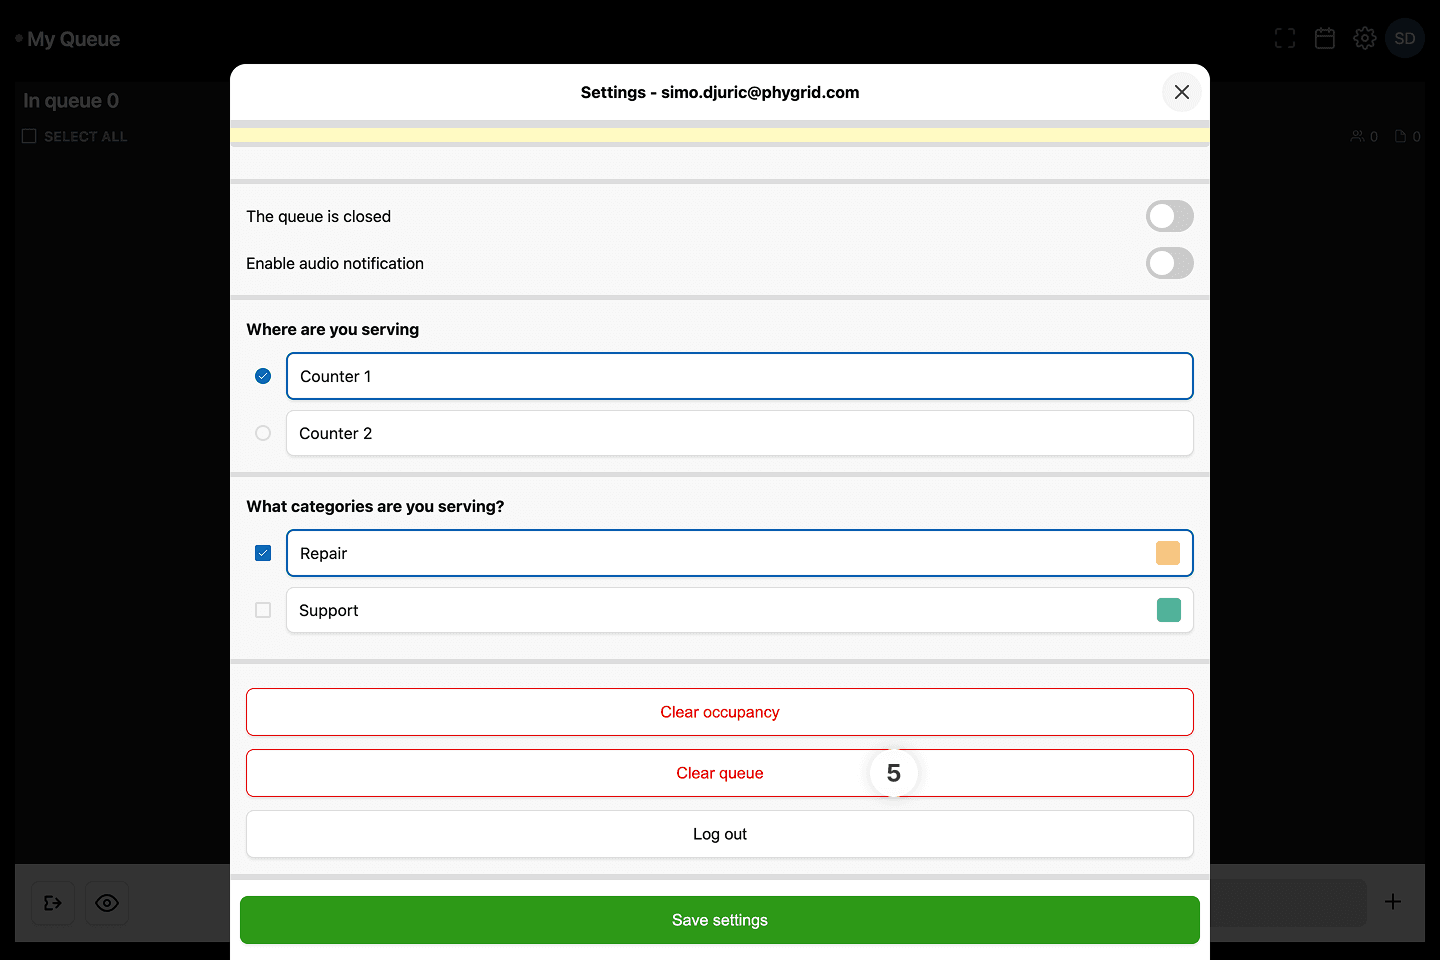
- Toggle The queue is open/closed to control whether new tickets can be created. Existing tickets can still be managed when the queue is closed
- Toggle Enable audio notification to play a sound when a new ticket enters the queue
- Click Clear occupancy to reset the occupancy count
- When the queue is closed, a Clear queue button appears. Use it to cancel all existing tickets and clear the queue completely
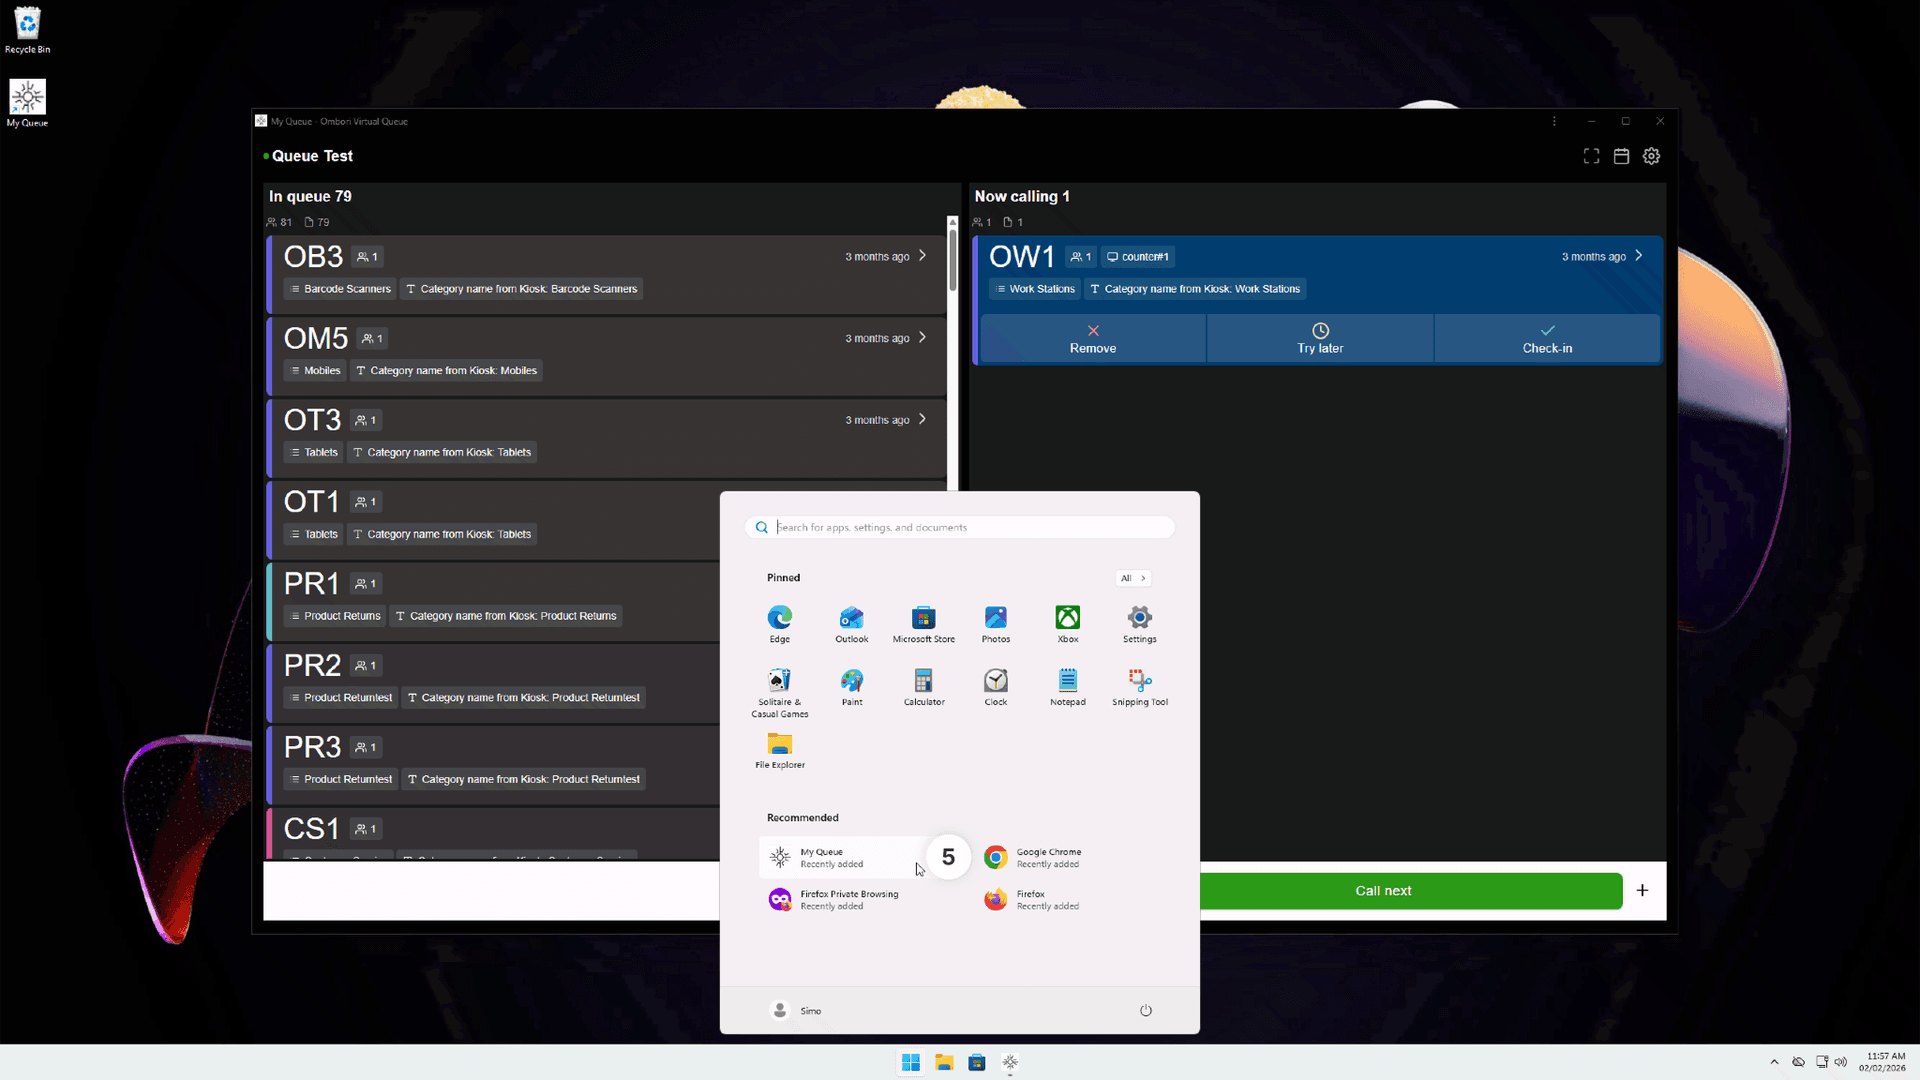
How to create a desktop shortcut
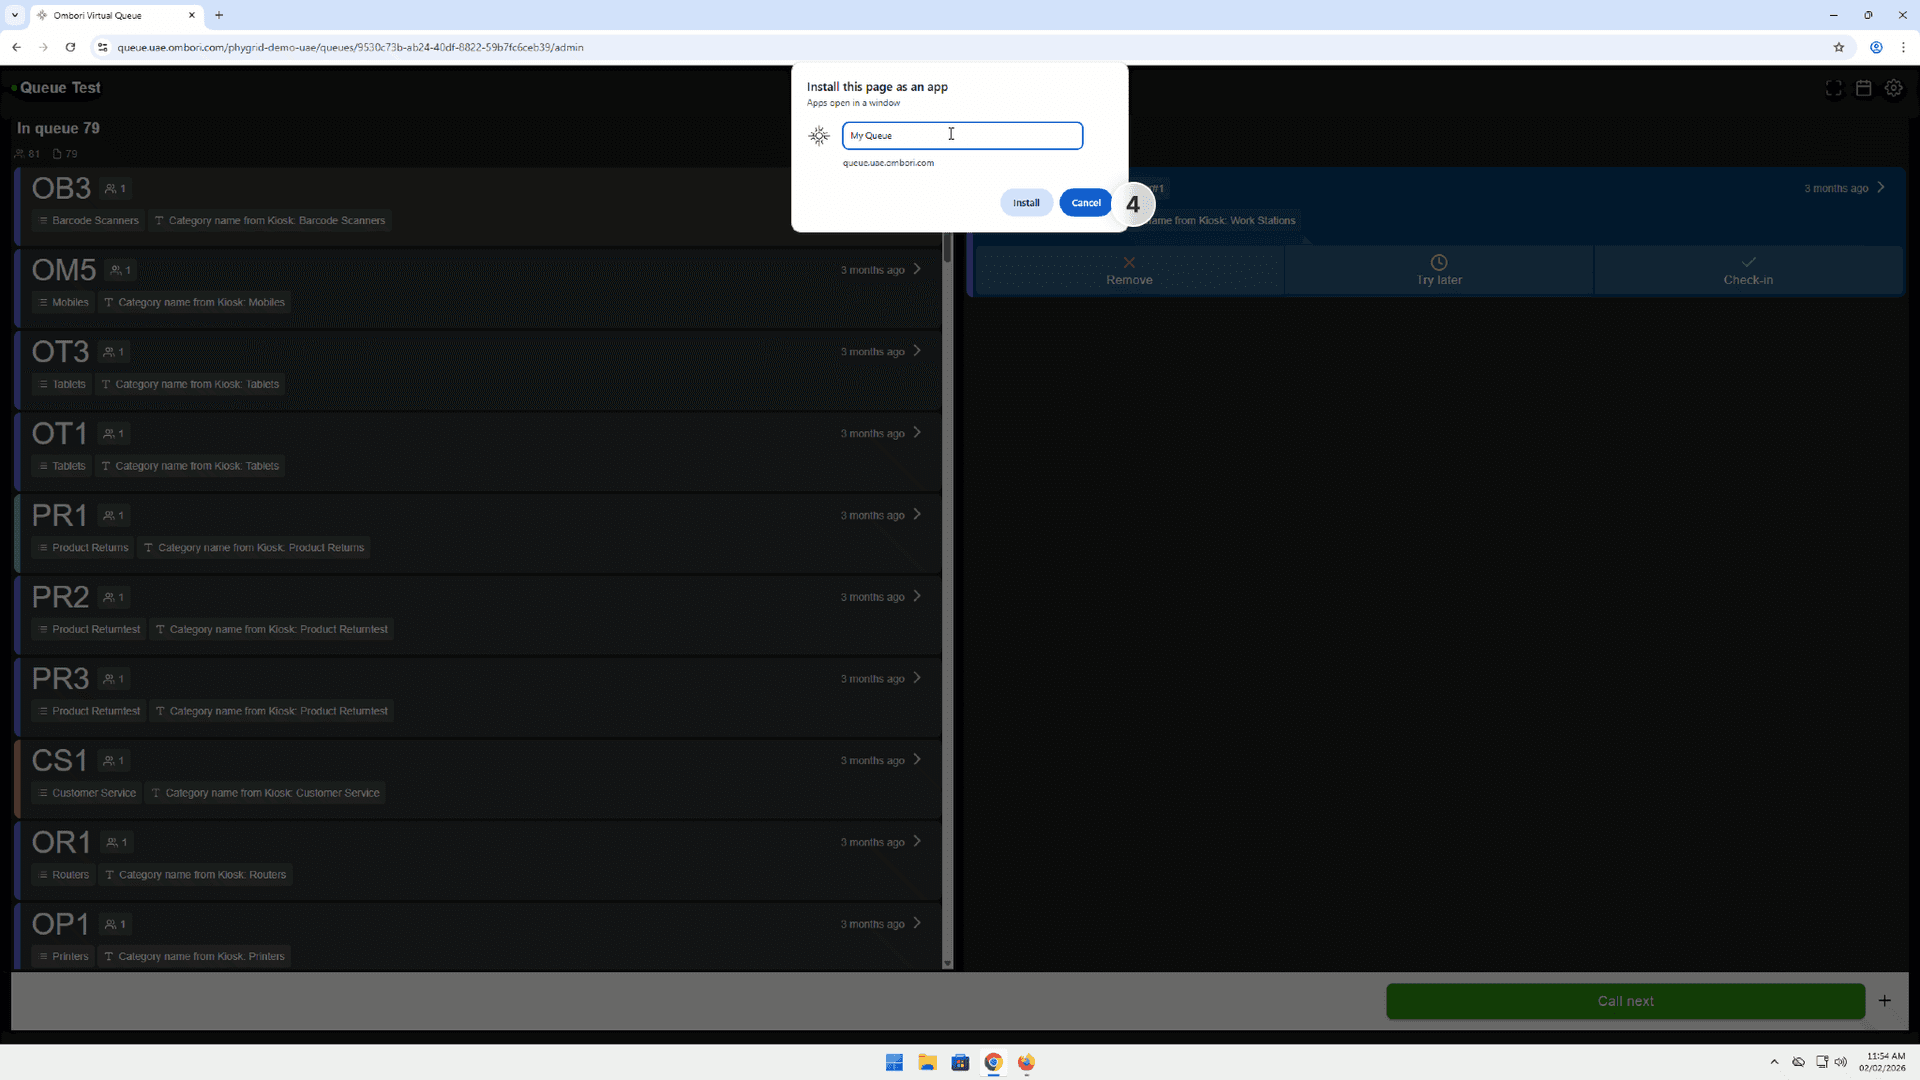
How to install Queue Manager as an app in Google Chrome
- Click the More menu (...) in Google Chrome
- Go to Cast, save and share
- Select Install page as app
- Name your shortcut and click Install
- Queue Manager opens in its own app window and a shortcut is added to the desktop and start menu

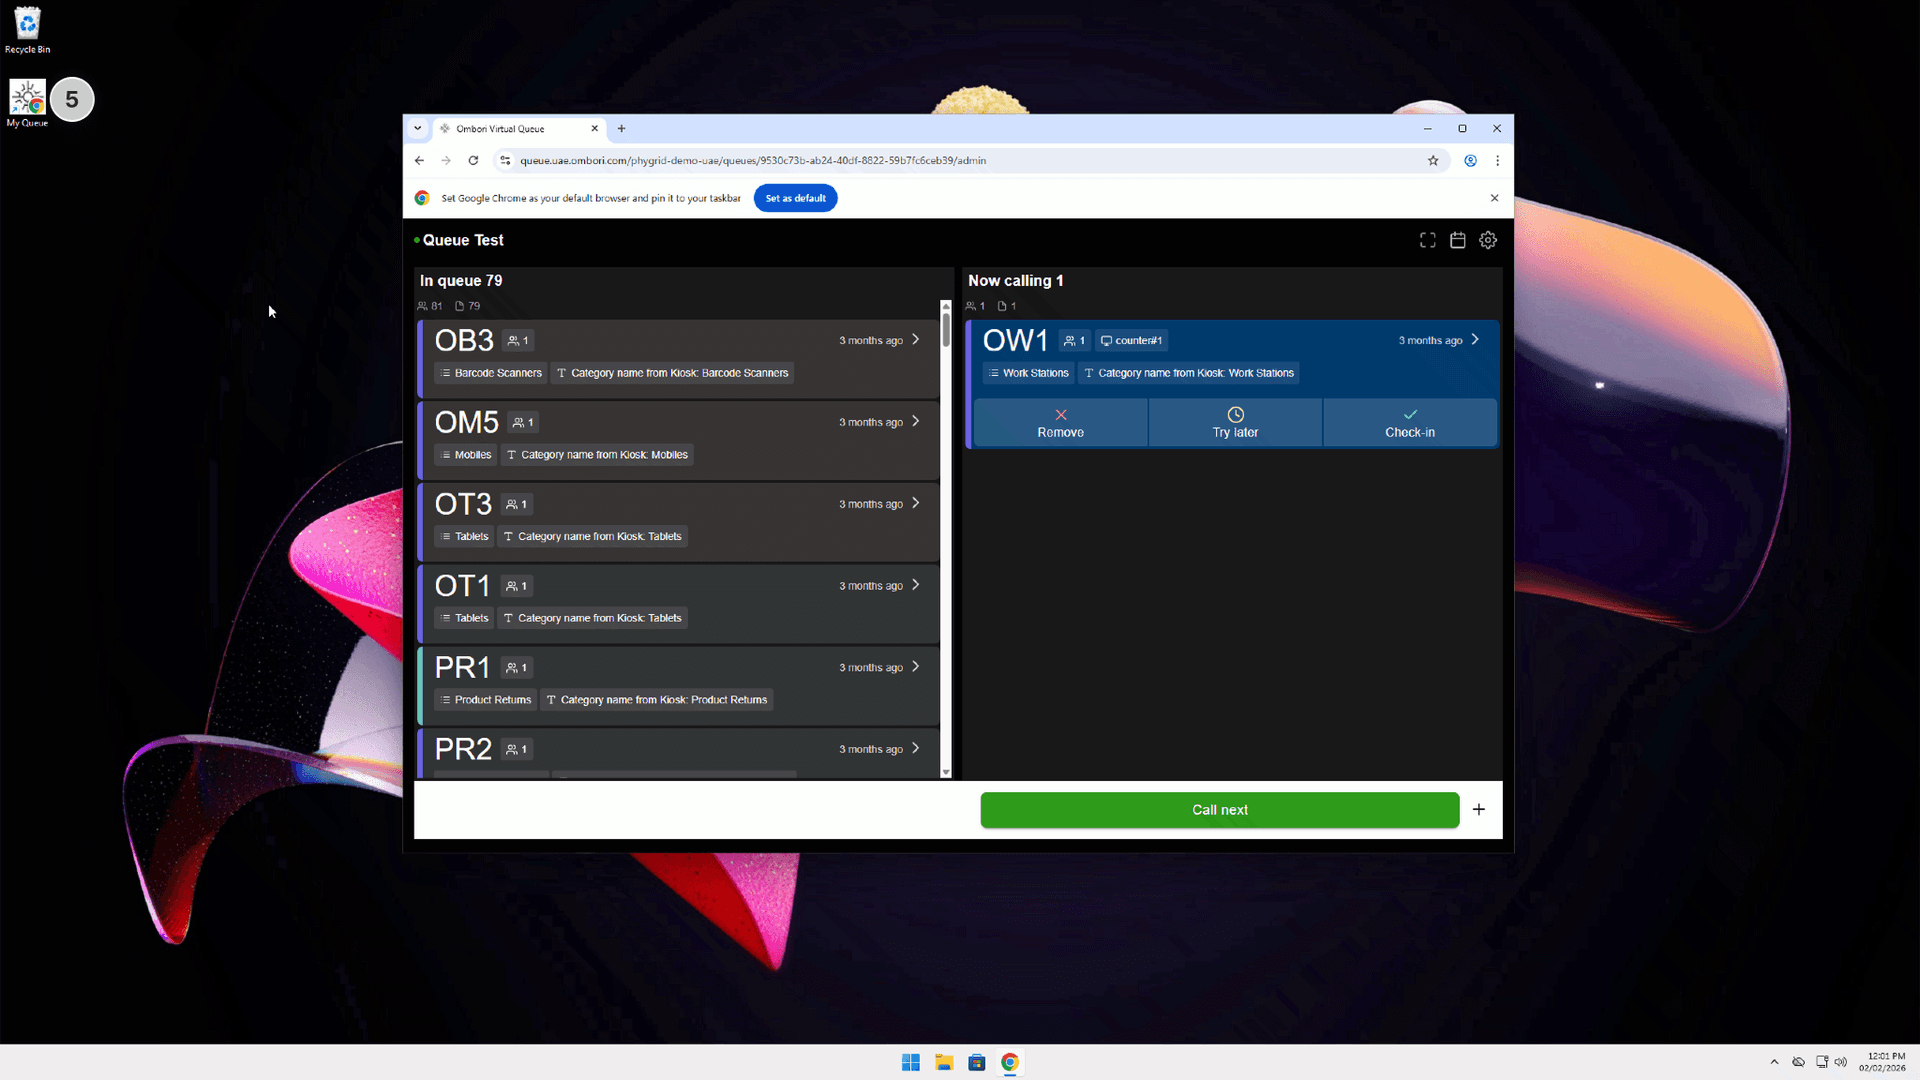
How to add a desktop shortcut for Queue Manager in Google Chrome
- Click the More menu (...) in Google Chrome
- Go to Cast, save and share
- Select Create shortcut...
- Name your shortcut and click Create
- The new desktop shortcut opens Queue Manager as a new tab in Chrome


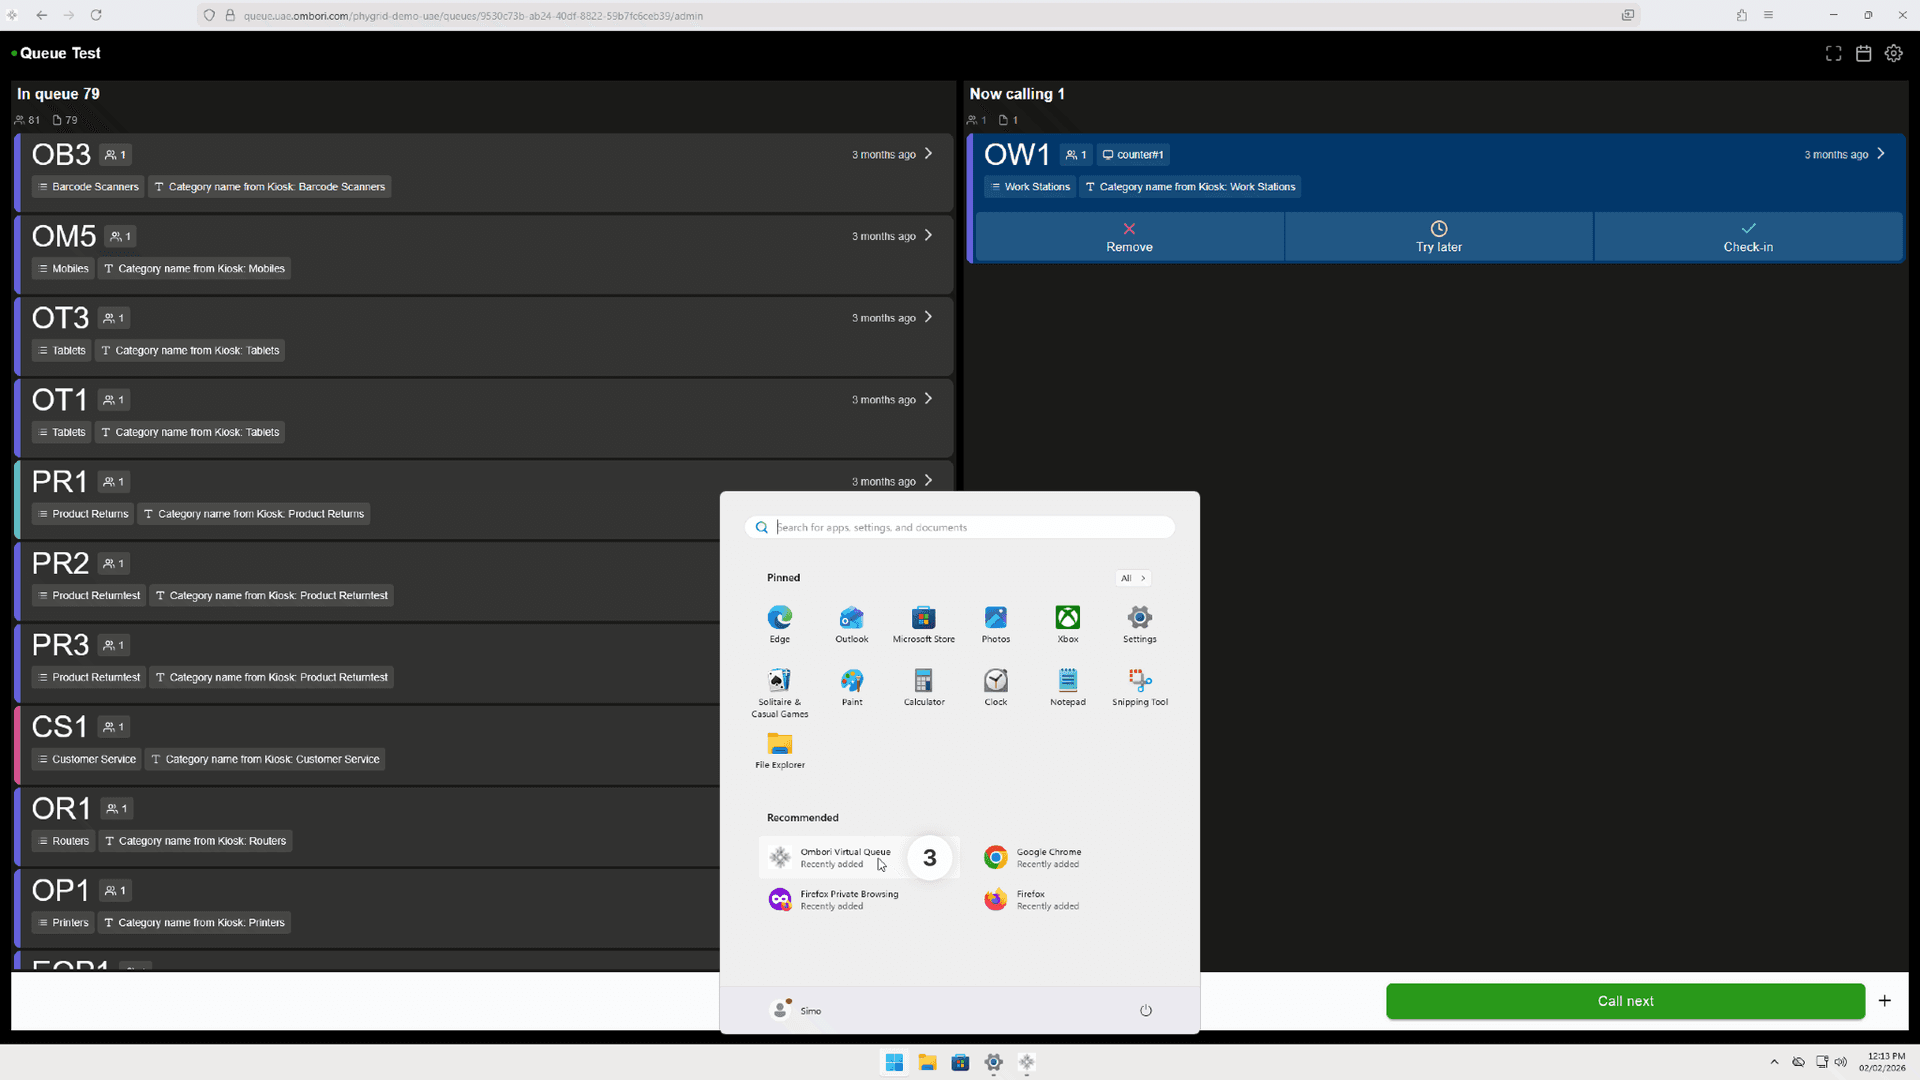
How to pin Queue Manager to taskbar and add to start menu in Firefox
- In the address bar, click Add tab to taskbar
- Confirm to pin the app to the taskbar
- The shortcut is also added to the start menu automatically