How to install Queue Ticket Signage
This guide references Queue Ticket Signage but the current display name for the application is Counter Signage (package name: counter-signage). Marketplace listings will be updated soon.
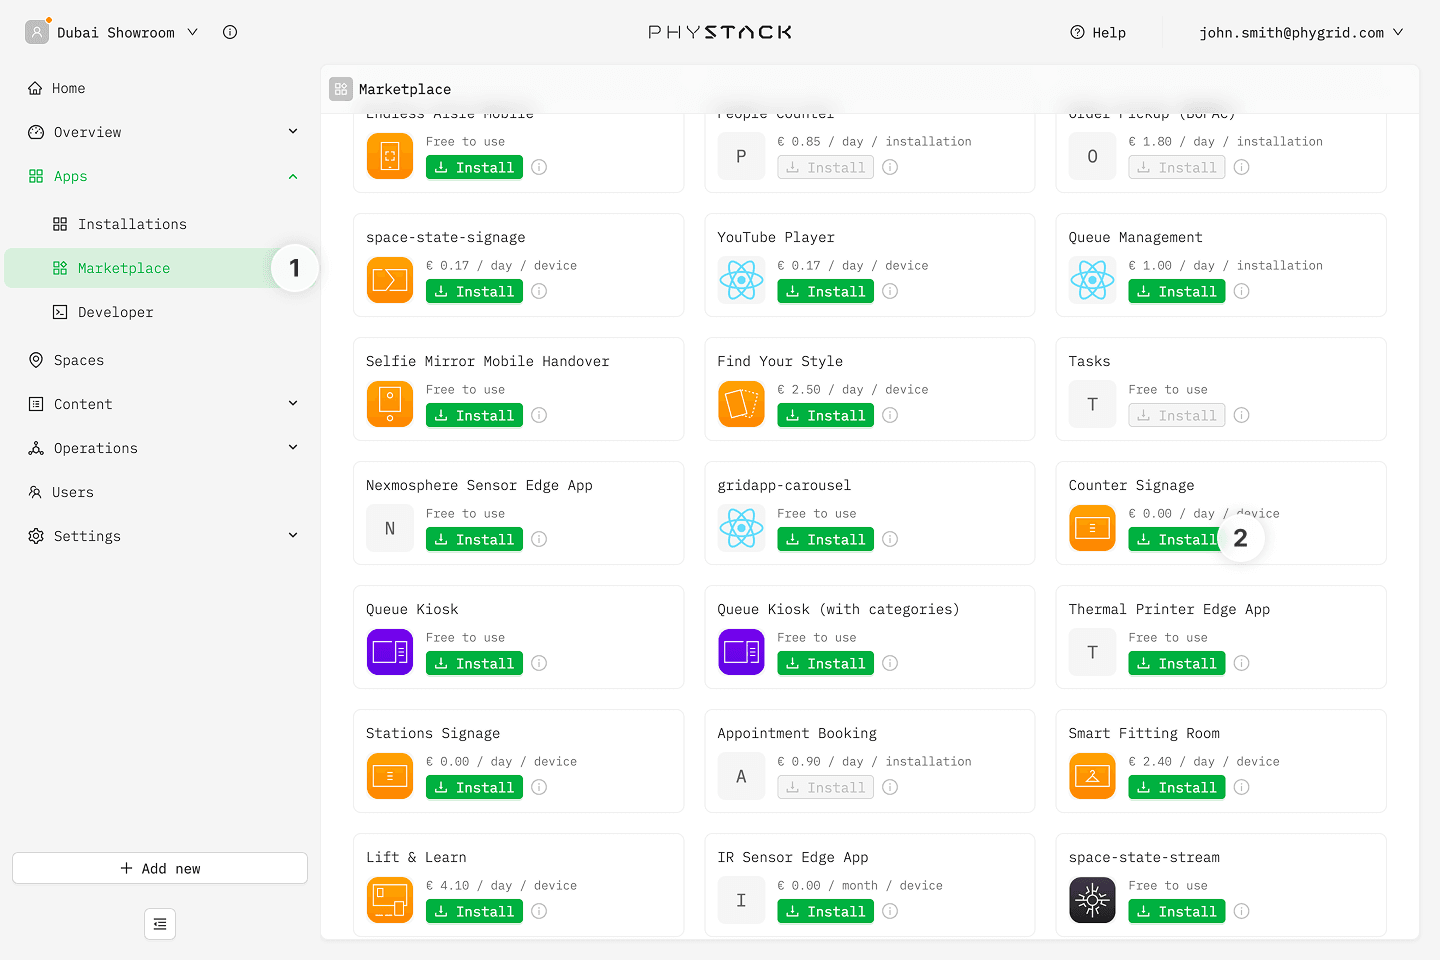
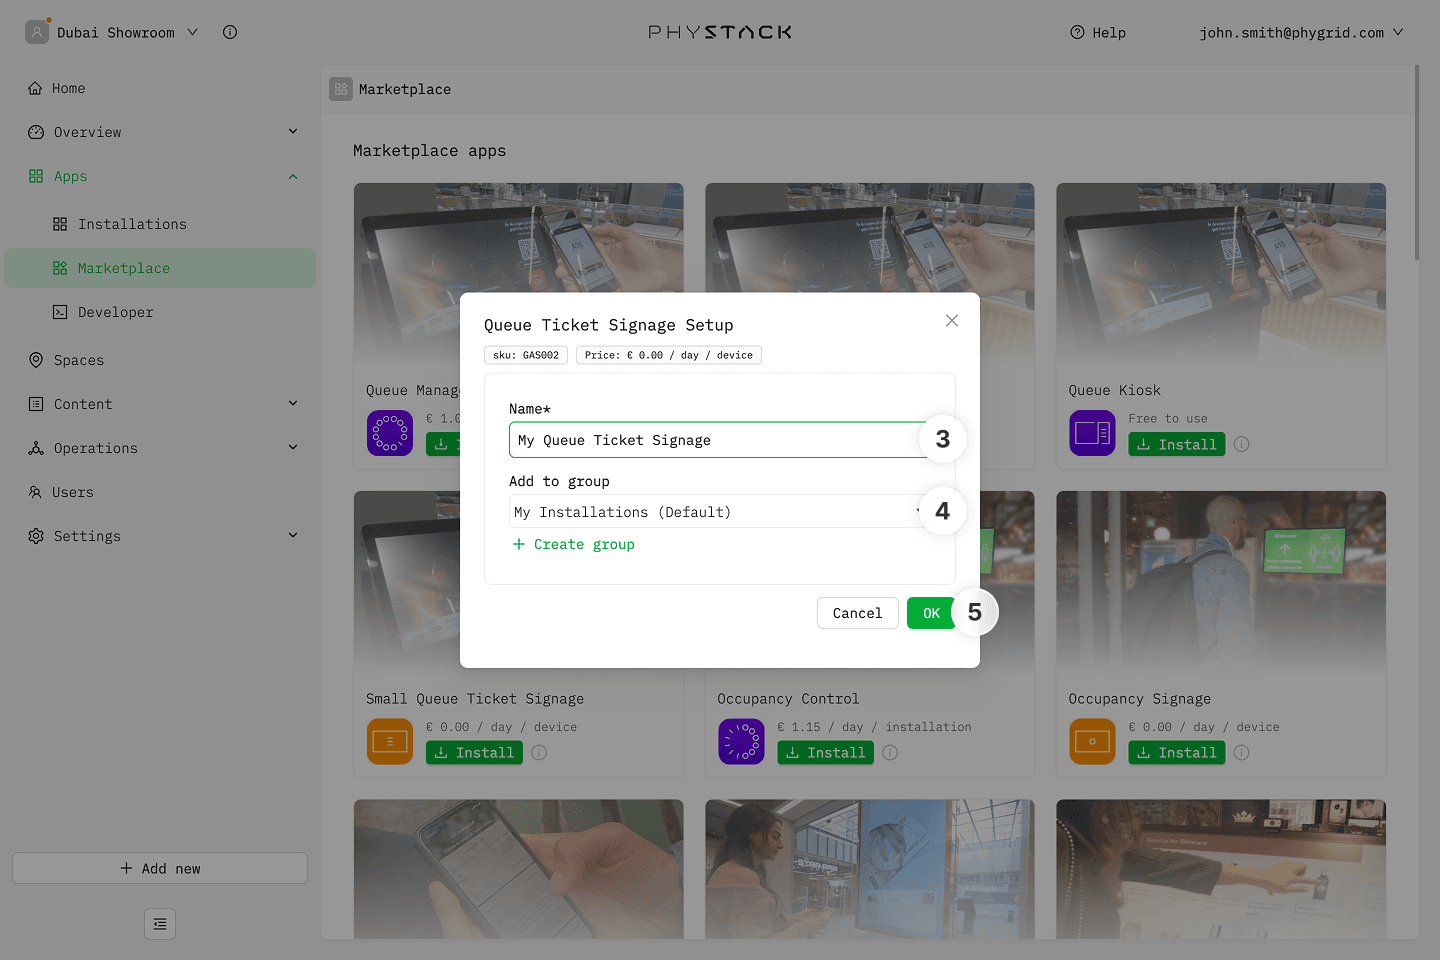
- In the sidebar, navigate to Apps → Marketplace
- Look for Counter Signage in the list of applications and click on the Install button to open the installation dialog
- In the installation form, enter a Name for your Queue Ticket Signage installation
- Optionally, select a Group to organize your installations
- Click OK to create the Queue Ticket Signage installation
How to access Queue Ticket Signage settings
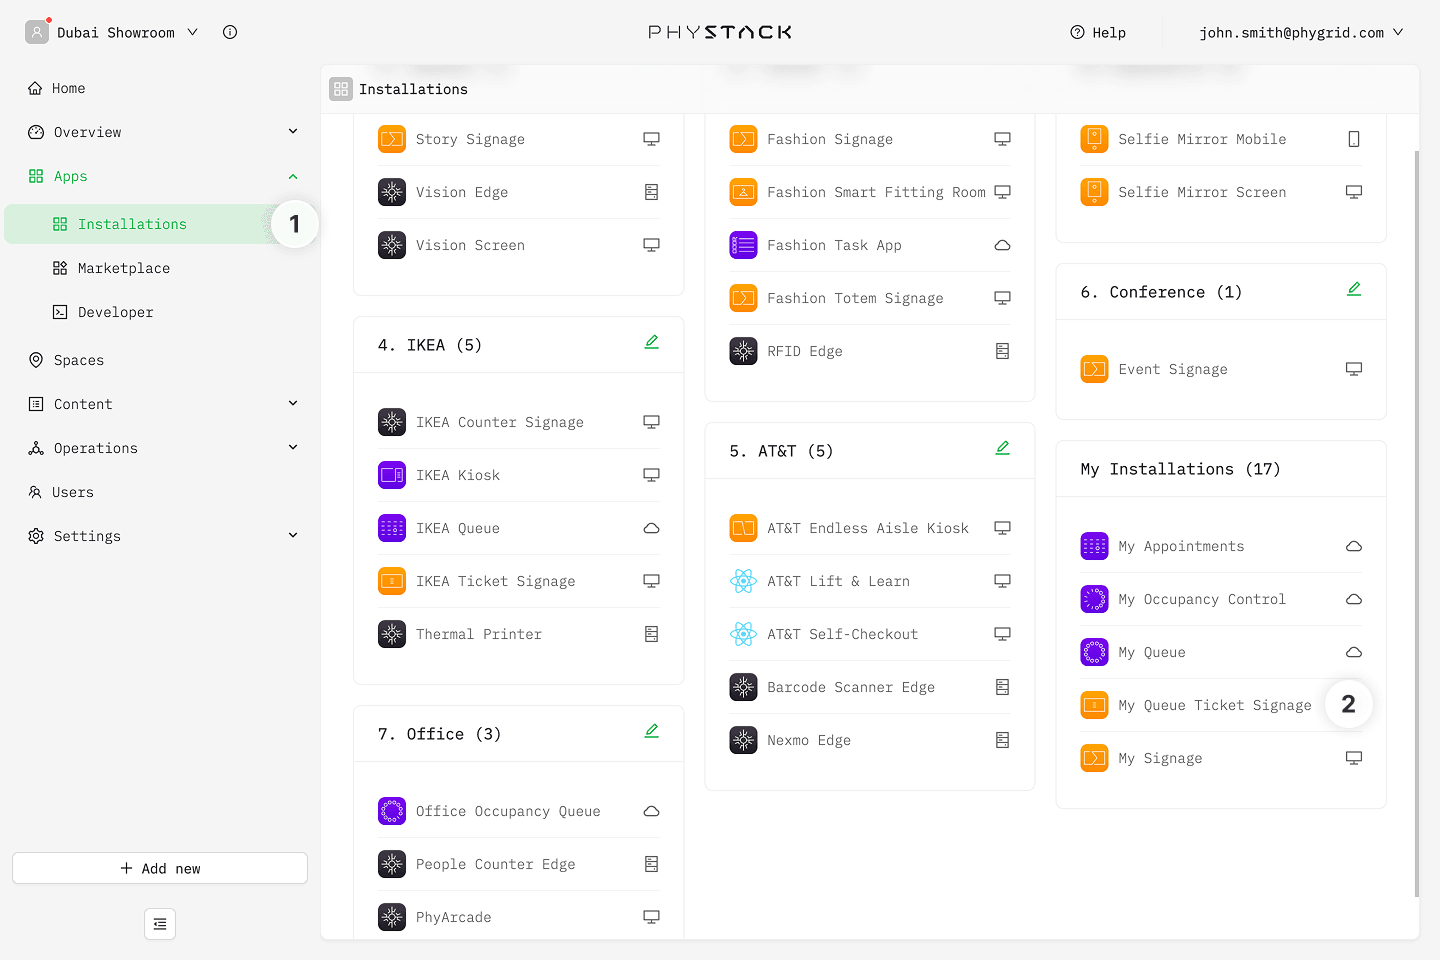
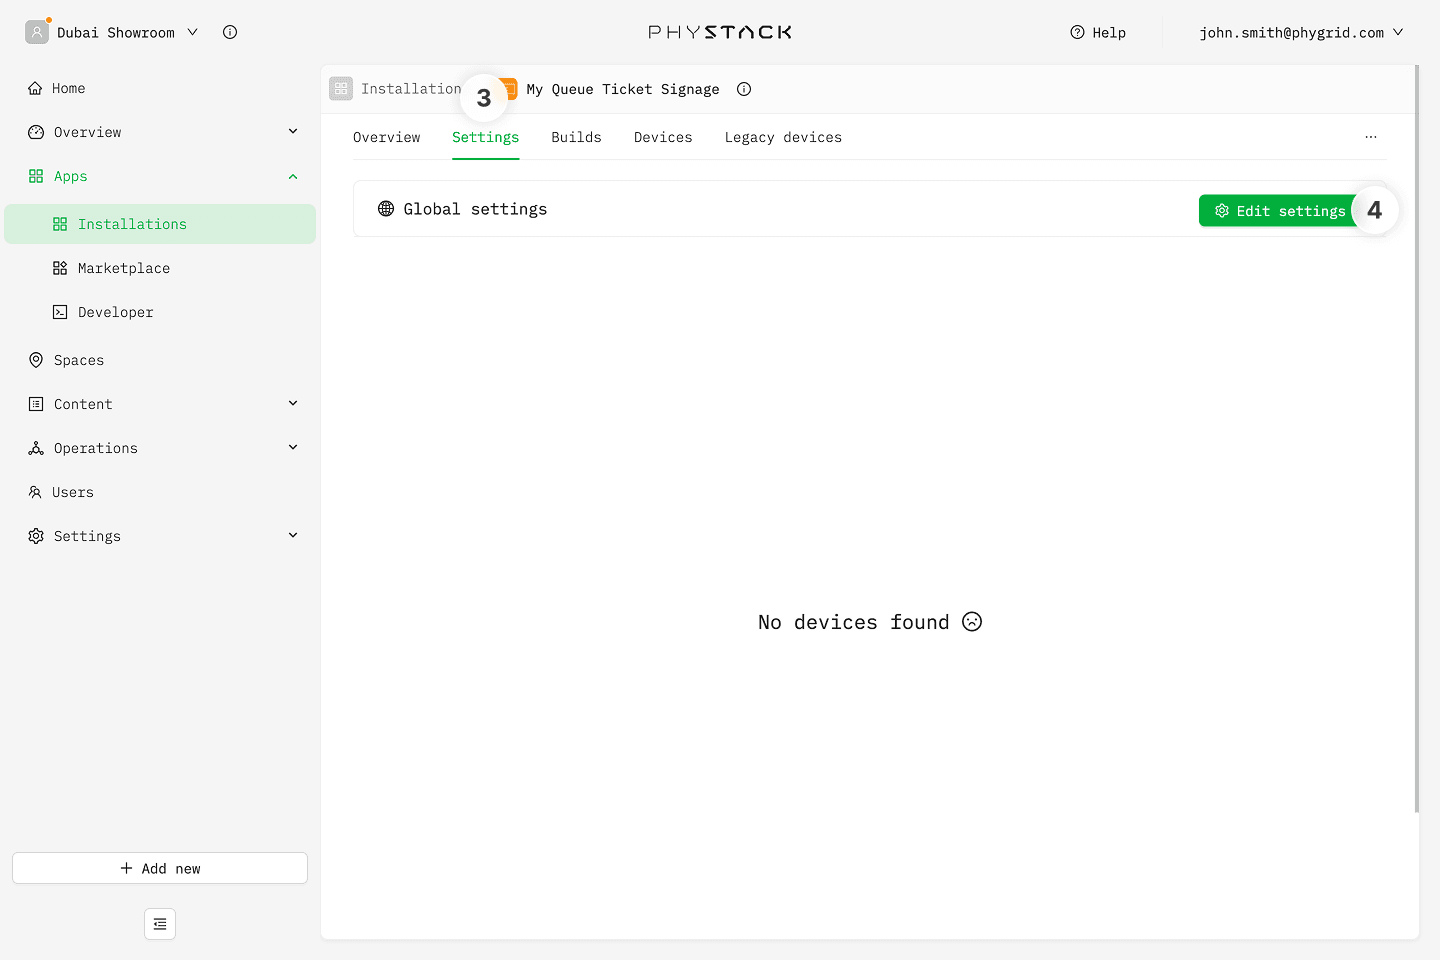
- Your new installation will be available in the sidebar under Apps → Installations
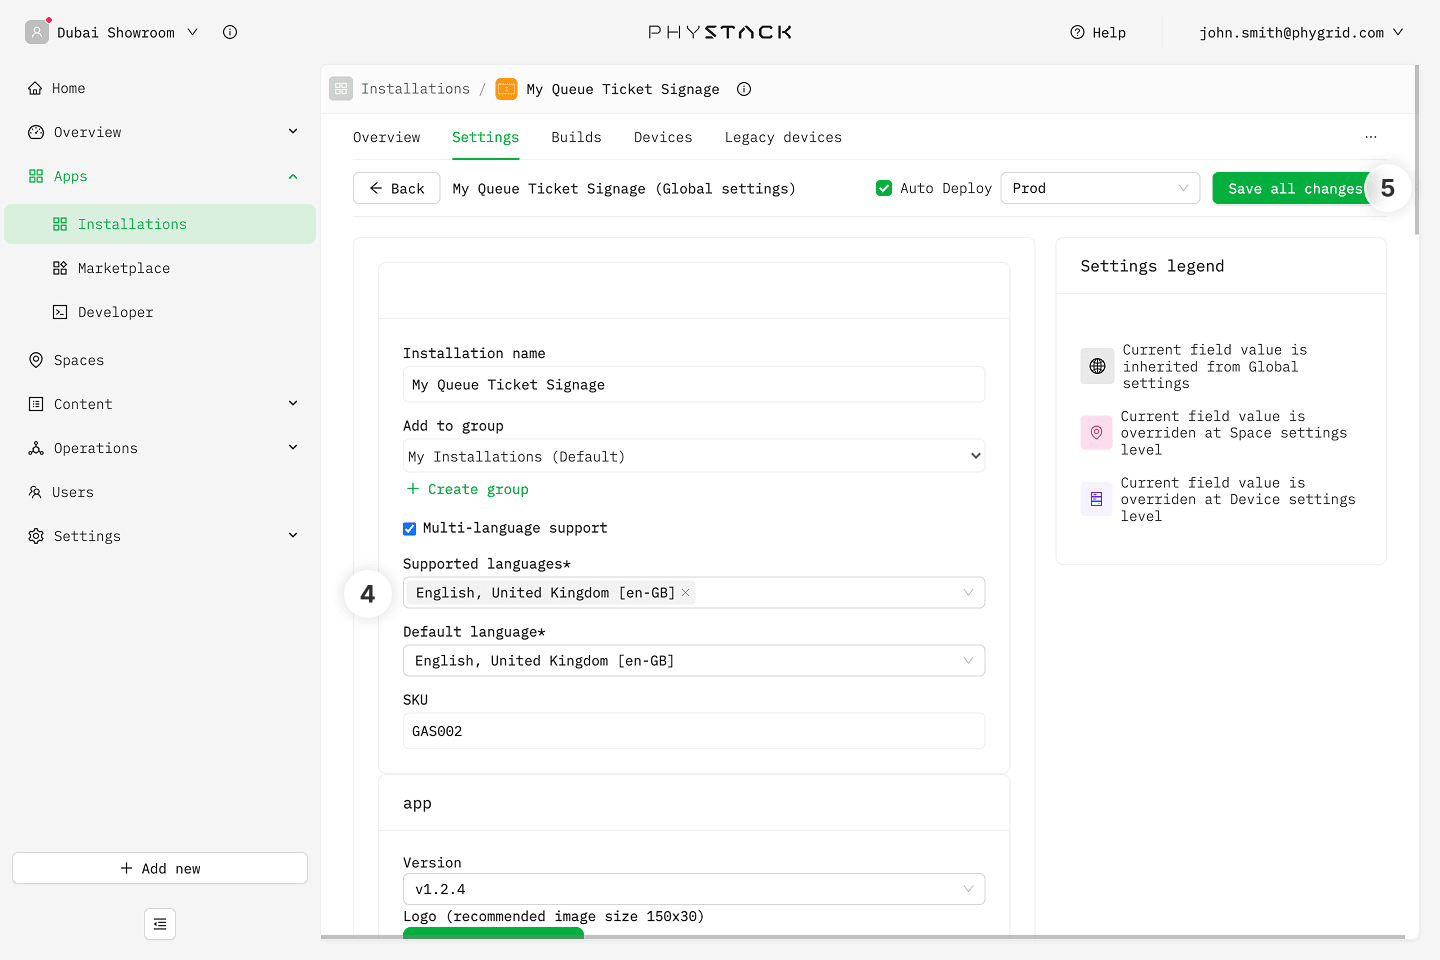
- Open the installation and select the Settings tab to access your queue's options
- For the initial setup, go to the Global Settings section and click Edit Settings. You will be able to provide device-specific overrides after you add devices to the installation.
How to configure Queue Ticket Signage basics
Make sure all the required fields are properly set in order to make the Ticket Signage app work correctly.
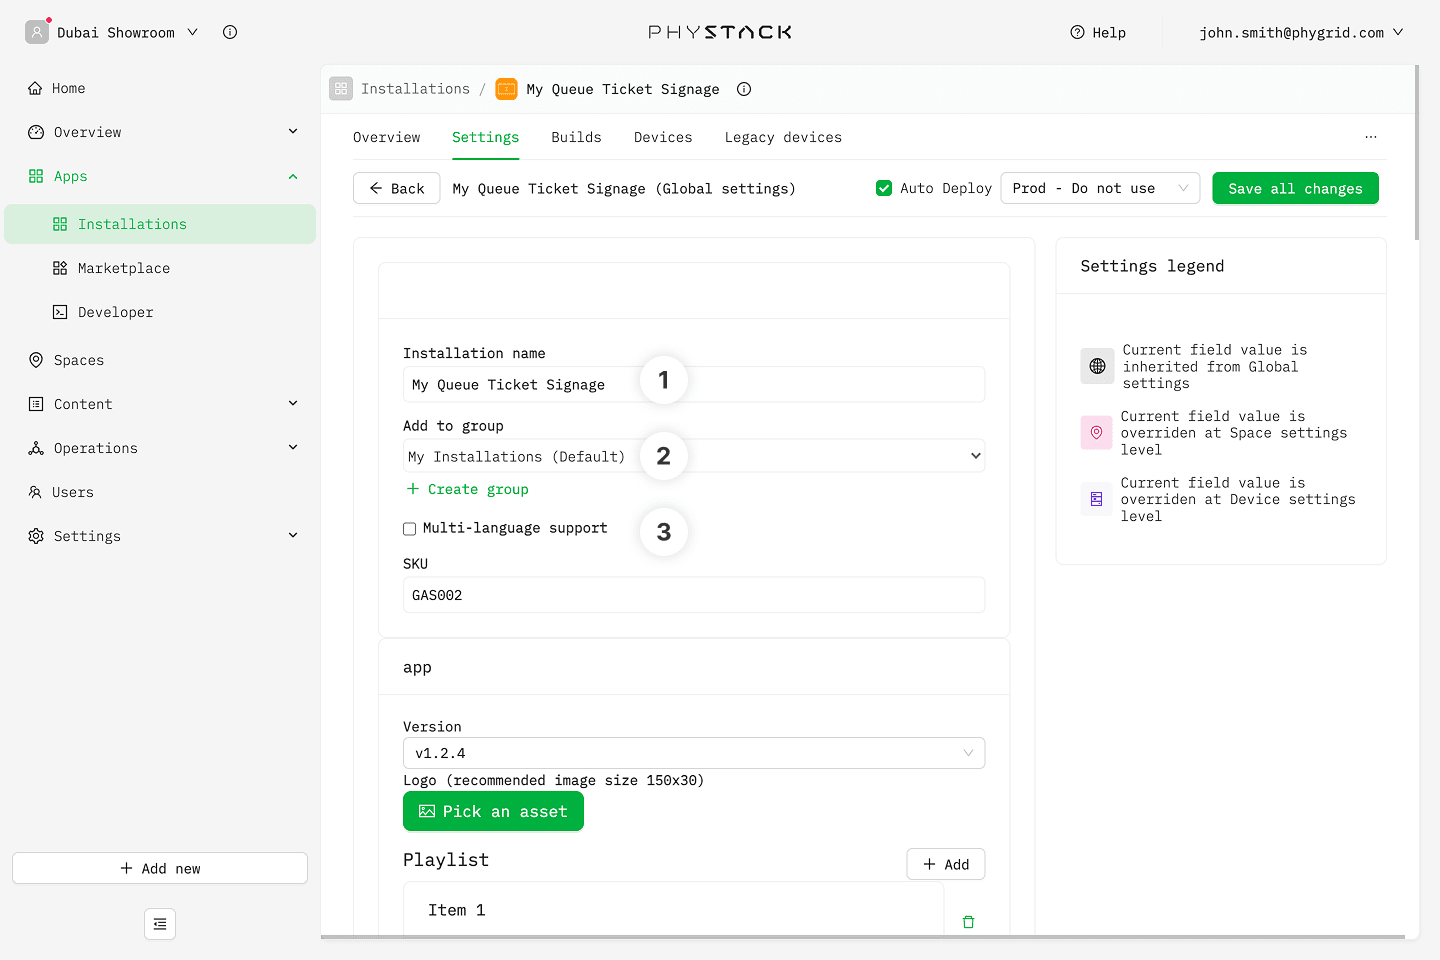
- Set or change the installation name for the queue installation. This is the title visible in Apps → Installations
- Pick an existing or create a new installation group that this installation belongs to. This is also visible in Apps → Installations
- Enable at least one language for the app by clicking on Multi-language support
- Select the language(s) for the app and choose the default language
- Save the changes and refresh the page to properly enable language support
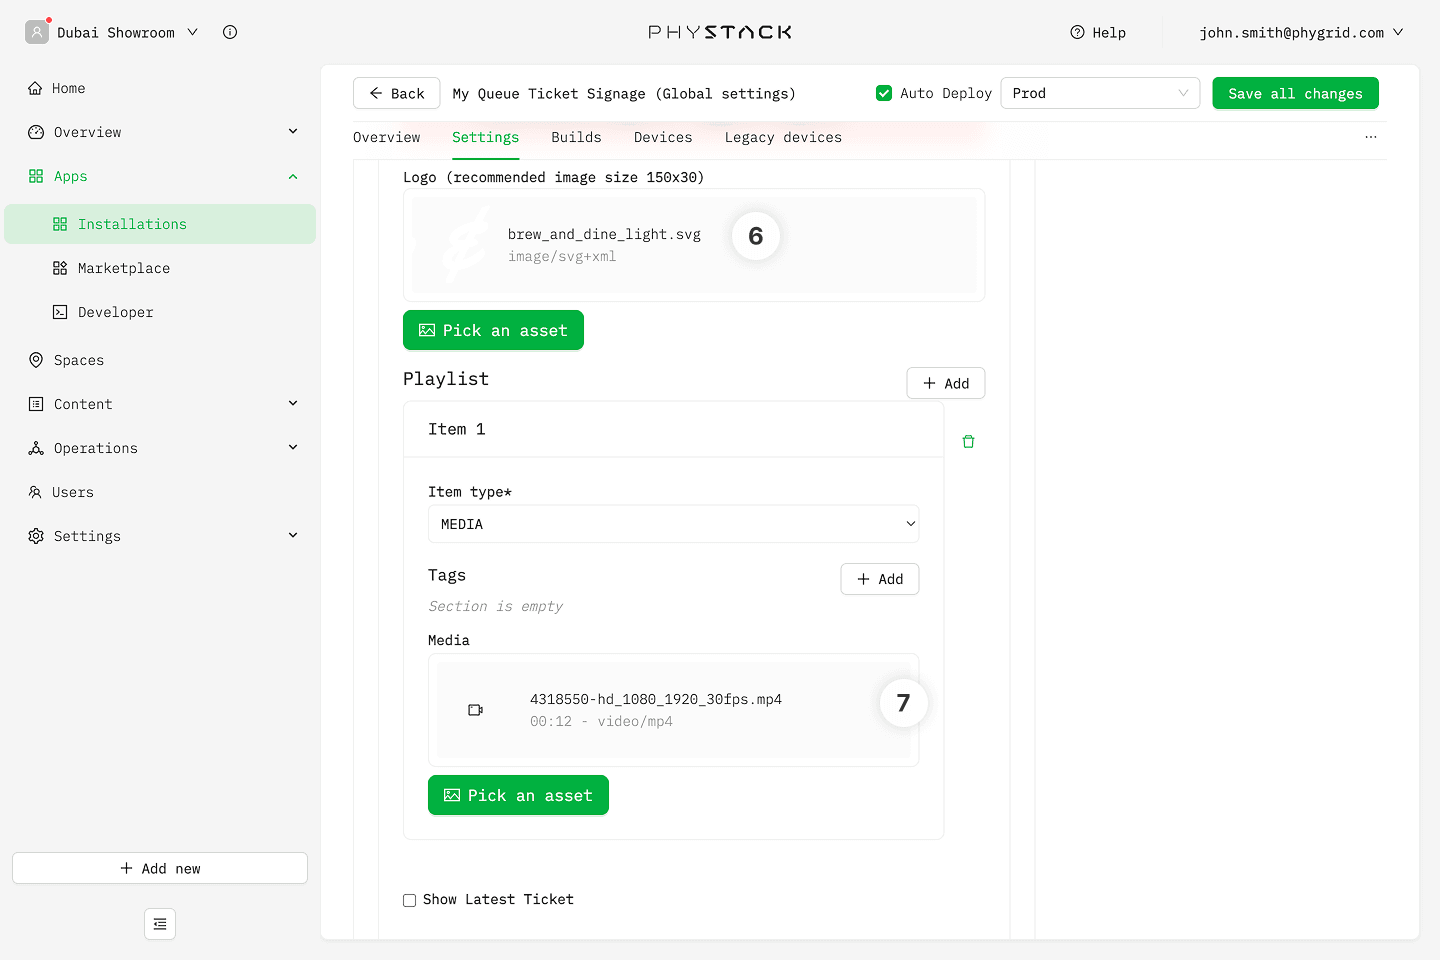
- Scroll down to the app settings and set the logo
- Select at least one playlist item. You can add multiple videos or images to play in the signage app
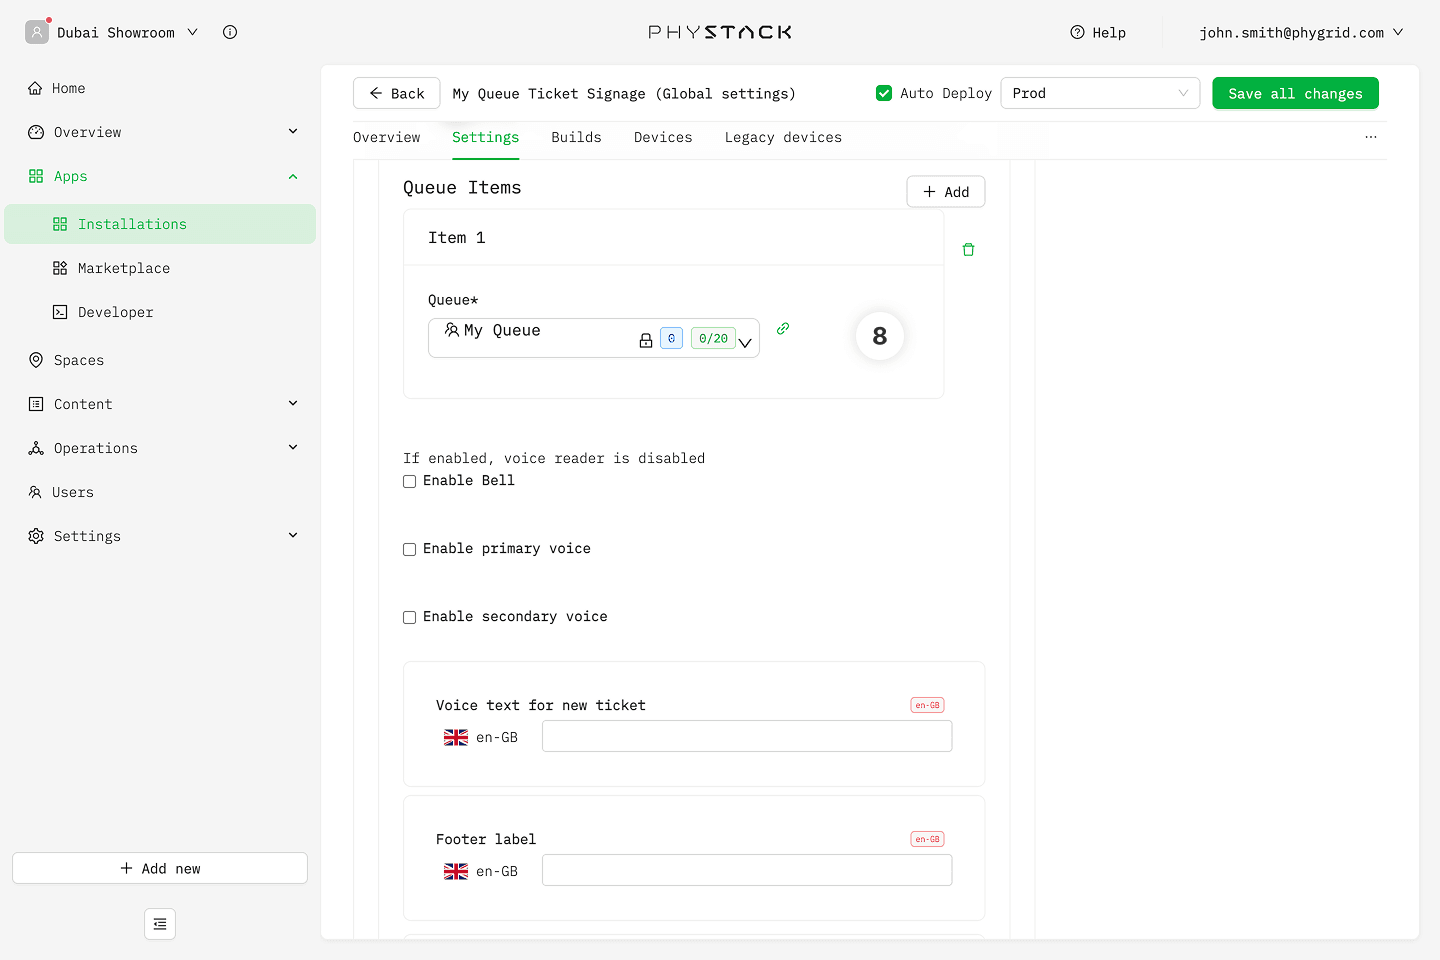
- Select at least one Queue Item - Ticket Signage installation will display tickets from the queue(s) selected here
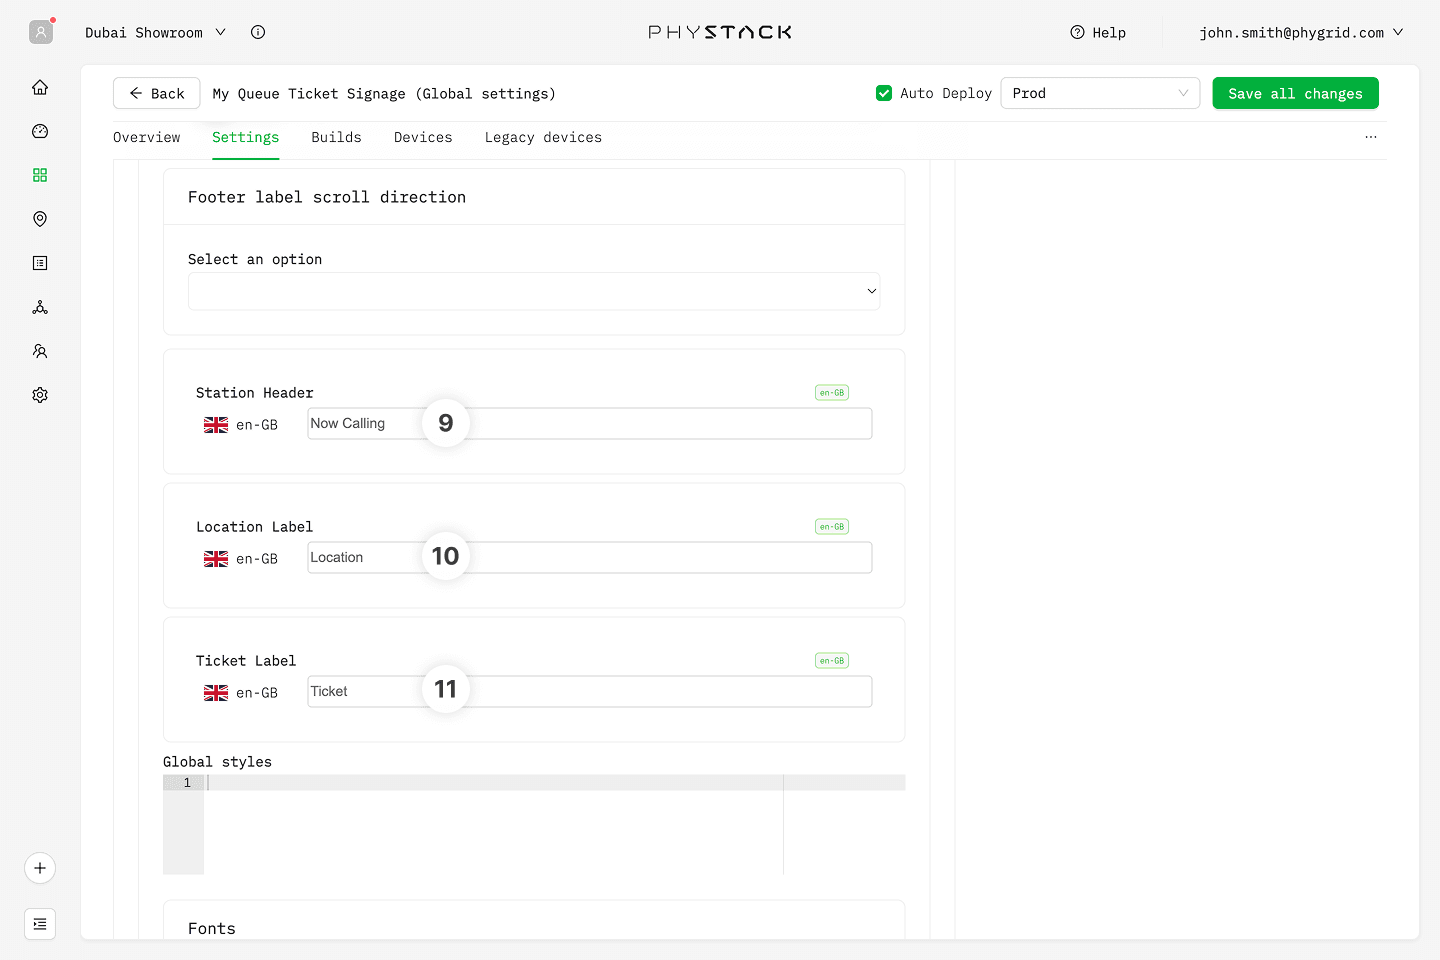
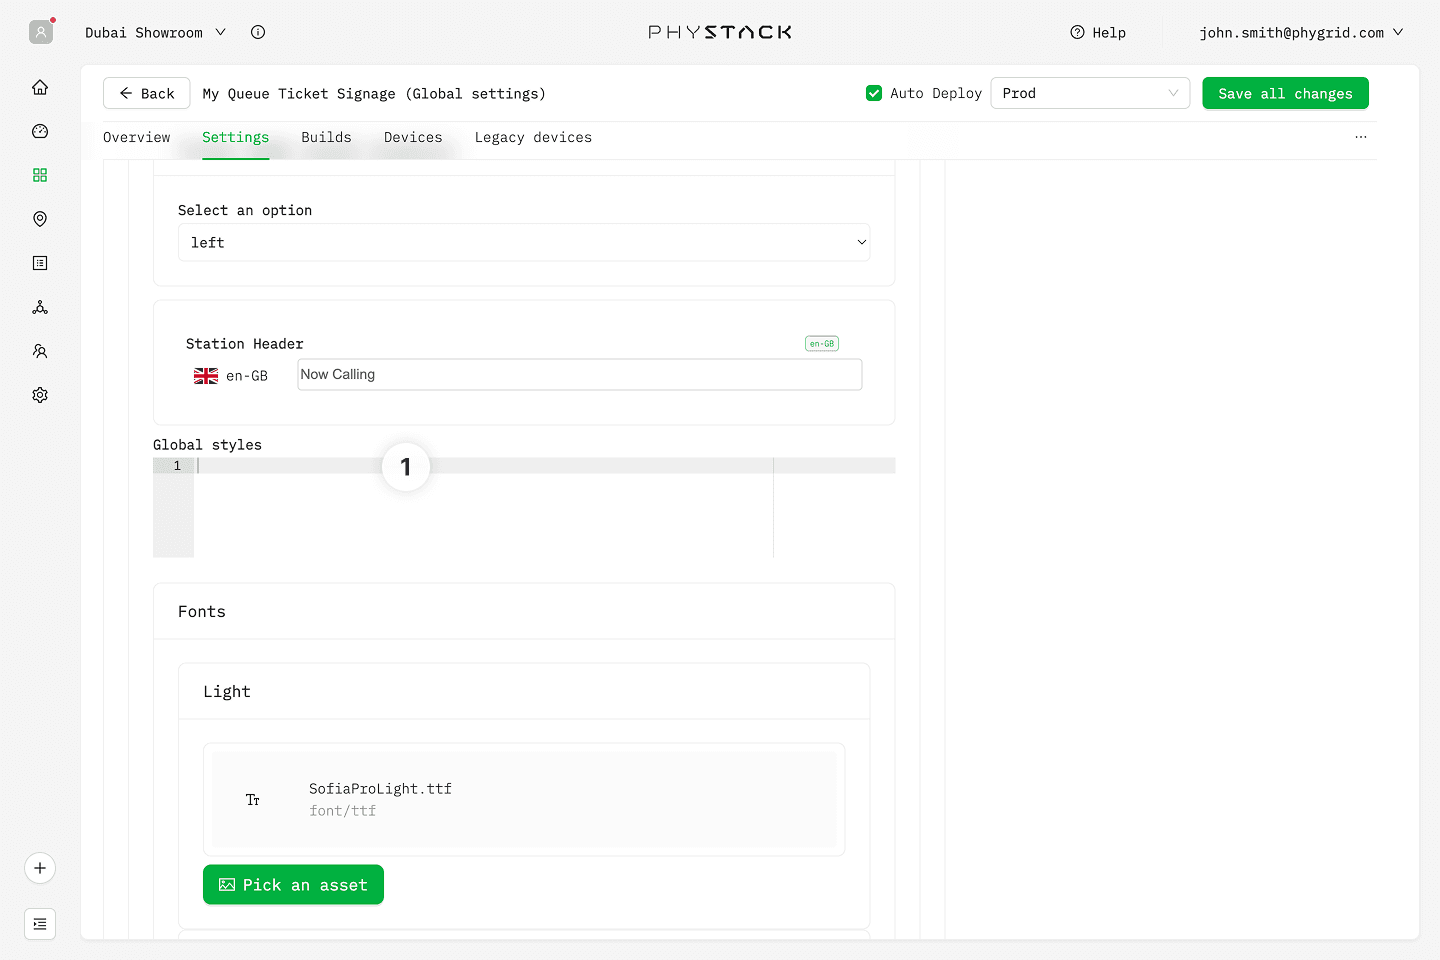
- Set the station header
- Customize the location label
- Customize the ticket label
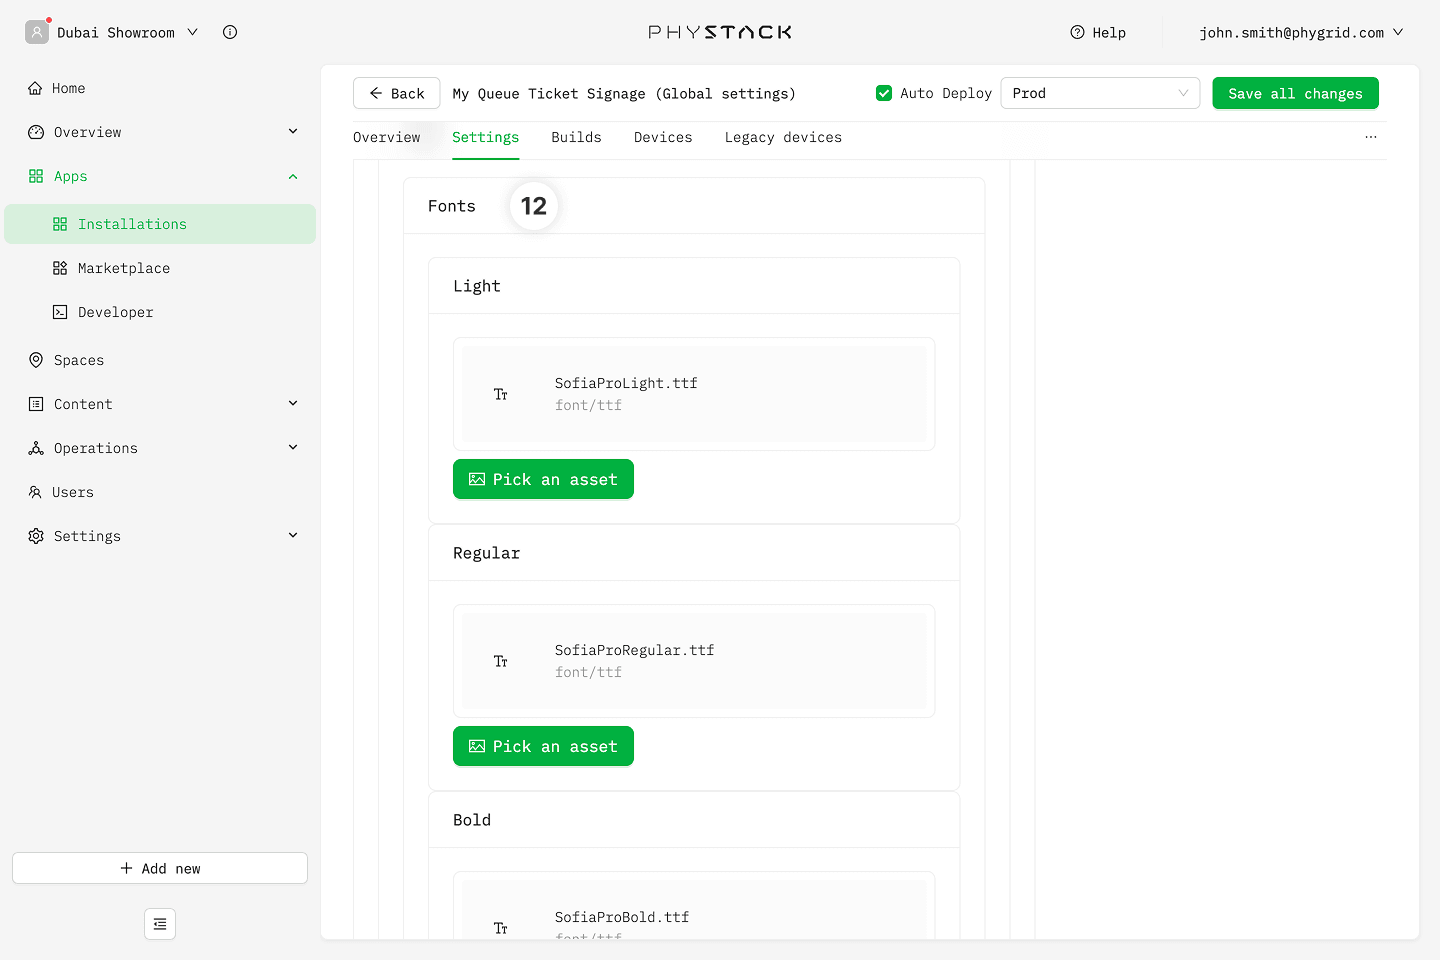
- Upload custom fonts for the installation
How to enable additional options for your Queue Ticket Signage installation
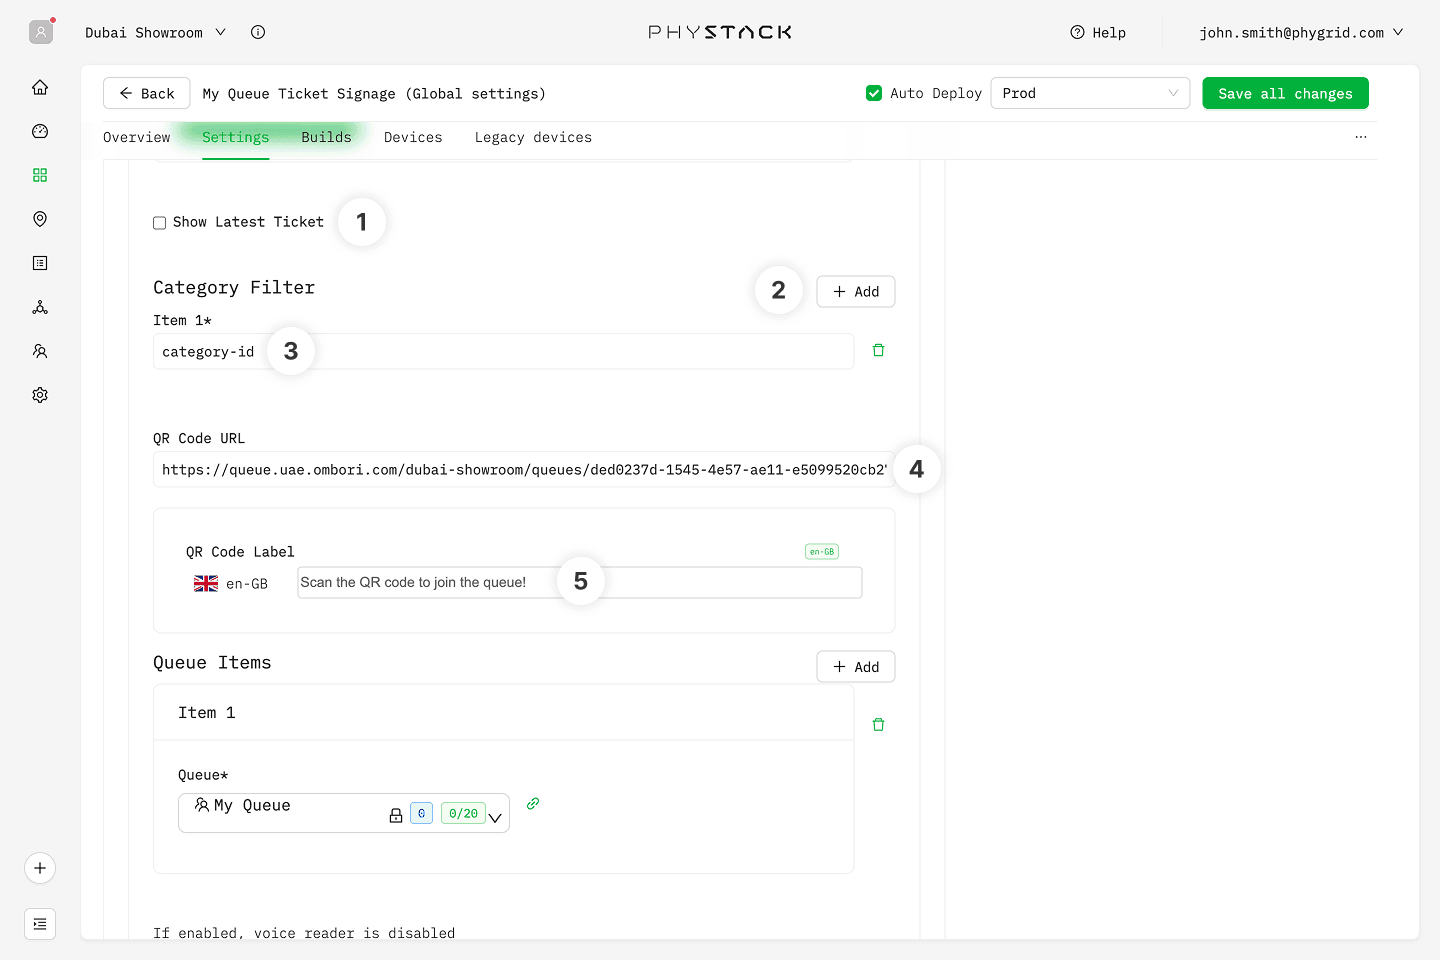
- If you want the signage to always show the last called ticket, check the option to Show Latest Ticket
- If you want to filter the signage to show only tickets from specified categories, click Add in the Category Filter section
- Set the Category ID for the categories you want to see shown on the signage display. You can get the category ID from the Queue Management settings' user registration field section
- You can display a QR code in the corner of the screen by entering the QR Code URL
- If you want the QR code to serve as the 'join queue' link, copy the Queue Manager link from the queue settings, and remove /admin from the end of the URL
- Set a descriptive label for the QR code
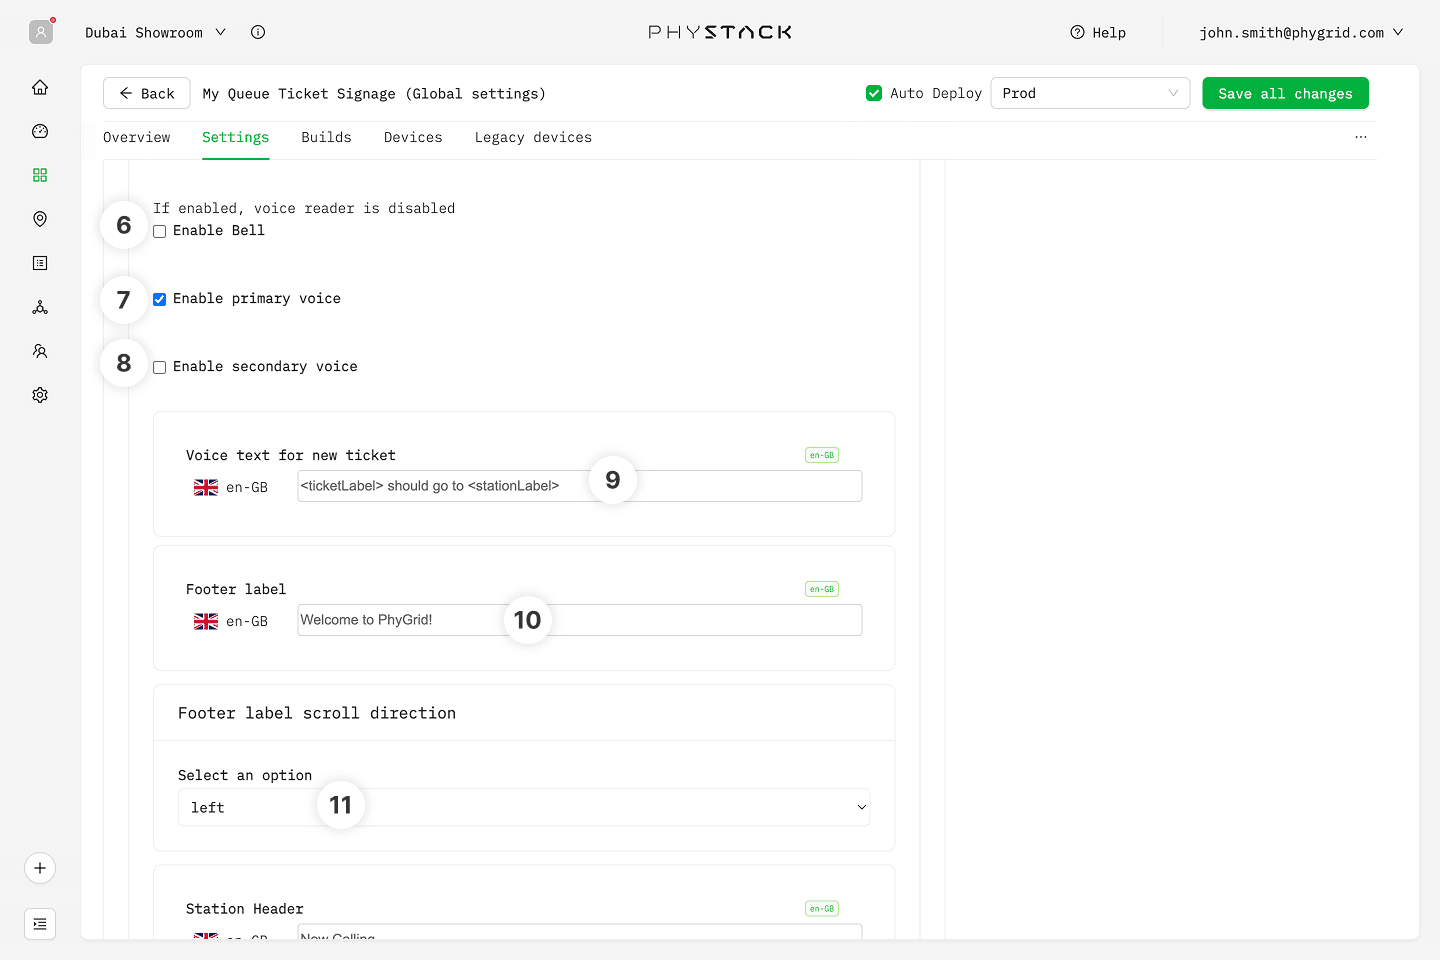
- Enable Bell if you want to play a bell sound any time a new ticket is being called
- You can also enable voice calling by enabling primary voice. Note that the bell option needs to be disabled for the voice calling to work
- You can enable secondary voice calling by checking the secondary voice option
- Enter the copy that should be read out any time a new ticket is being called. You can use
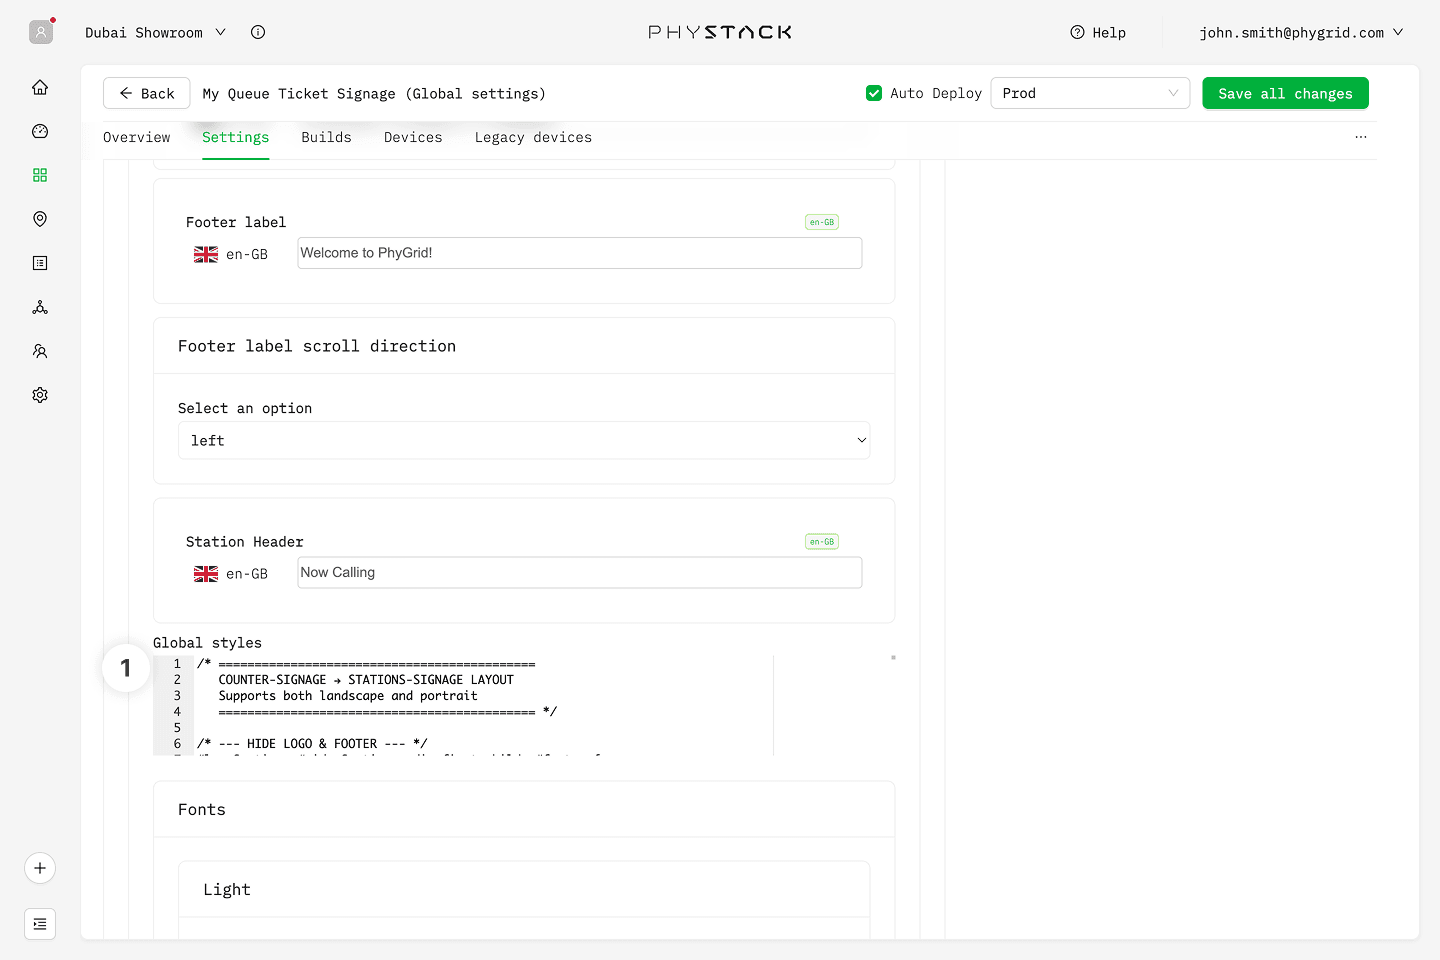
<ticketLabel>and<stationLabel>as placeholders for the ticket number and station copy - You can set a footer label that will be displayed beneath the playlist area
- Set the scroll direction of the footer label
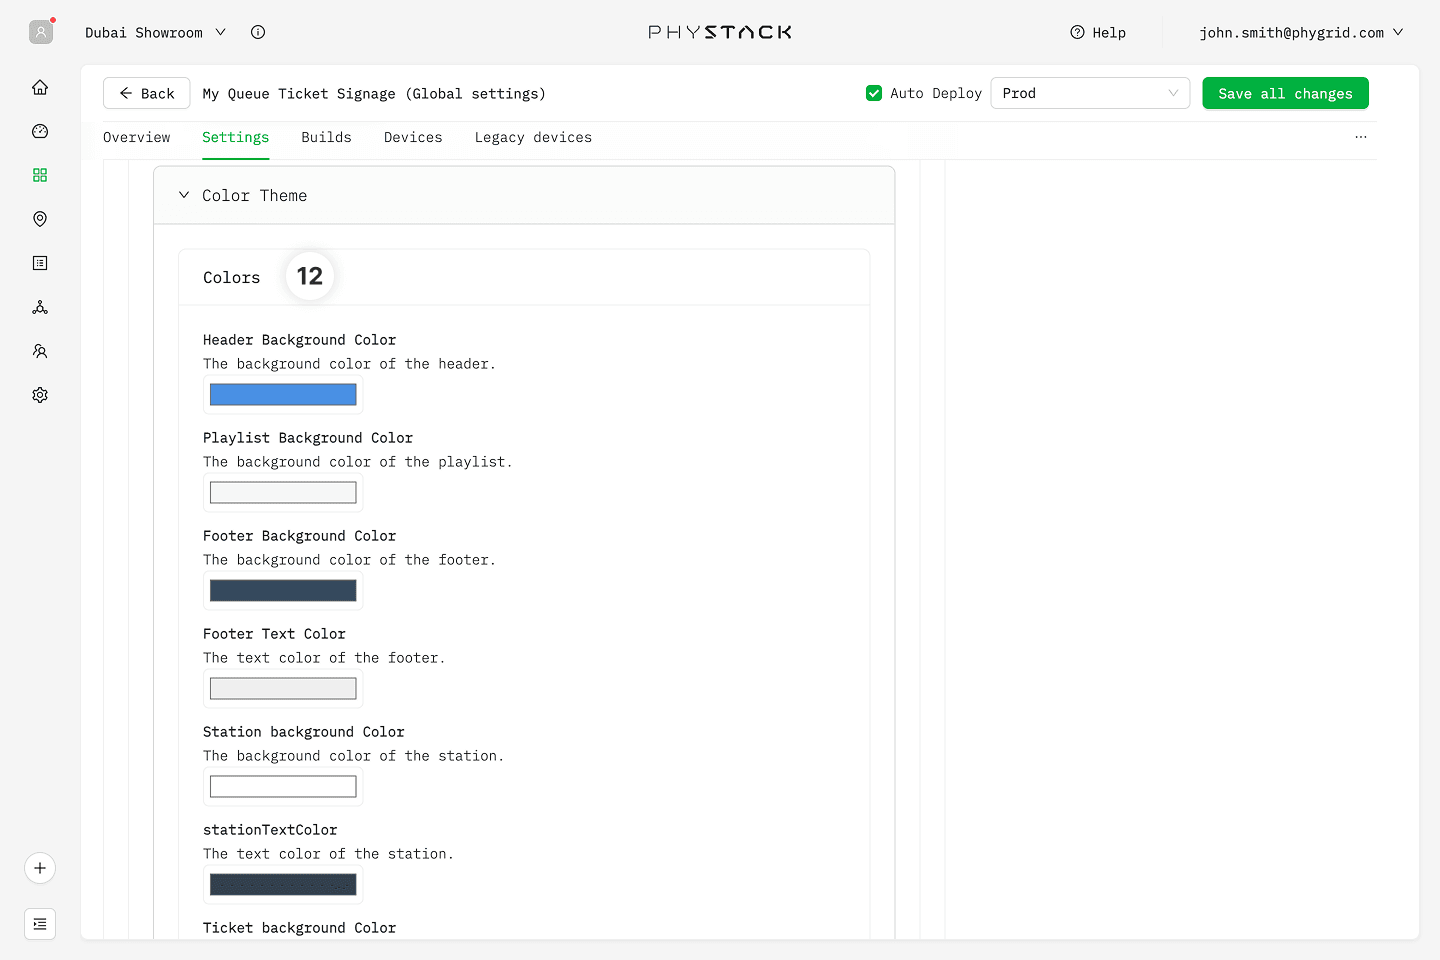
- Adjust the colors for different elements of the screen
How to customize the appearance of the Queue Ticket Signage installation using CSS
- You can customize the appearance of the installation by modifying the CSS for the following IDs and entering them into the Global Styles section of the settings:
#container— Main wrapper div for the entire signage display#ticketSection— Left sidebar section containing ticket/counter info#ticketHeader— Header area within the ticket section (shows "Ticket" / station name / "Location")#ticketList— The list element containing individual ticket items#contentSection— Right-side main content area (video/playlist, ~70% width)#videoSection— Section wrapping the logo and video content#videoContainer— Container for the playlist/video playback#footer— Footer element with marquee scrolling text#qrCode— Fixed-position QR code container (bottom-right)#qrLabel— Label text displayed alongside the QR code
How to enable the simple legacy layout
- Download legacy layout CSS and copy its contents into the Global Styles custom CSS field
- Enabling the simple legacy layout will hide the logo, footer, and QR code, and move the video to the background
- You can customize the fonts via the settings, but you will need to use the CSS to customize colors
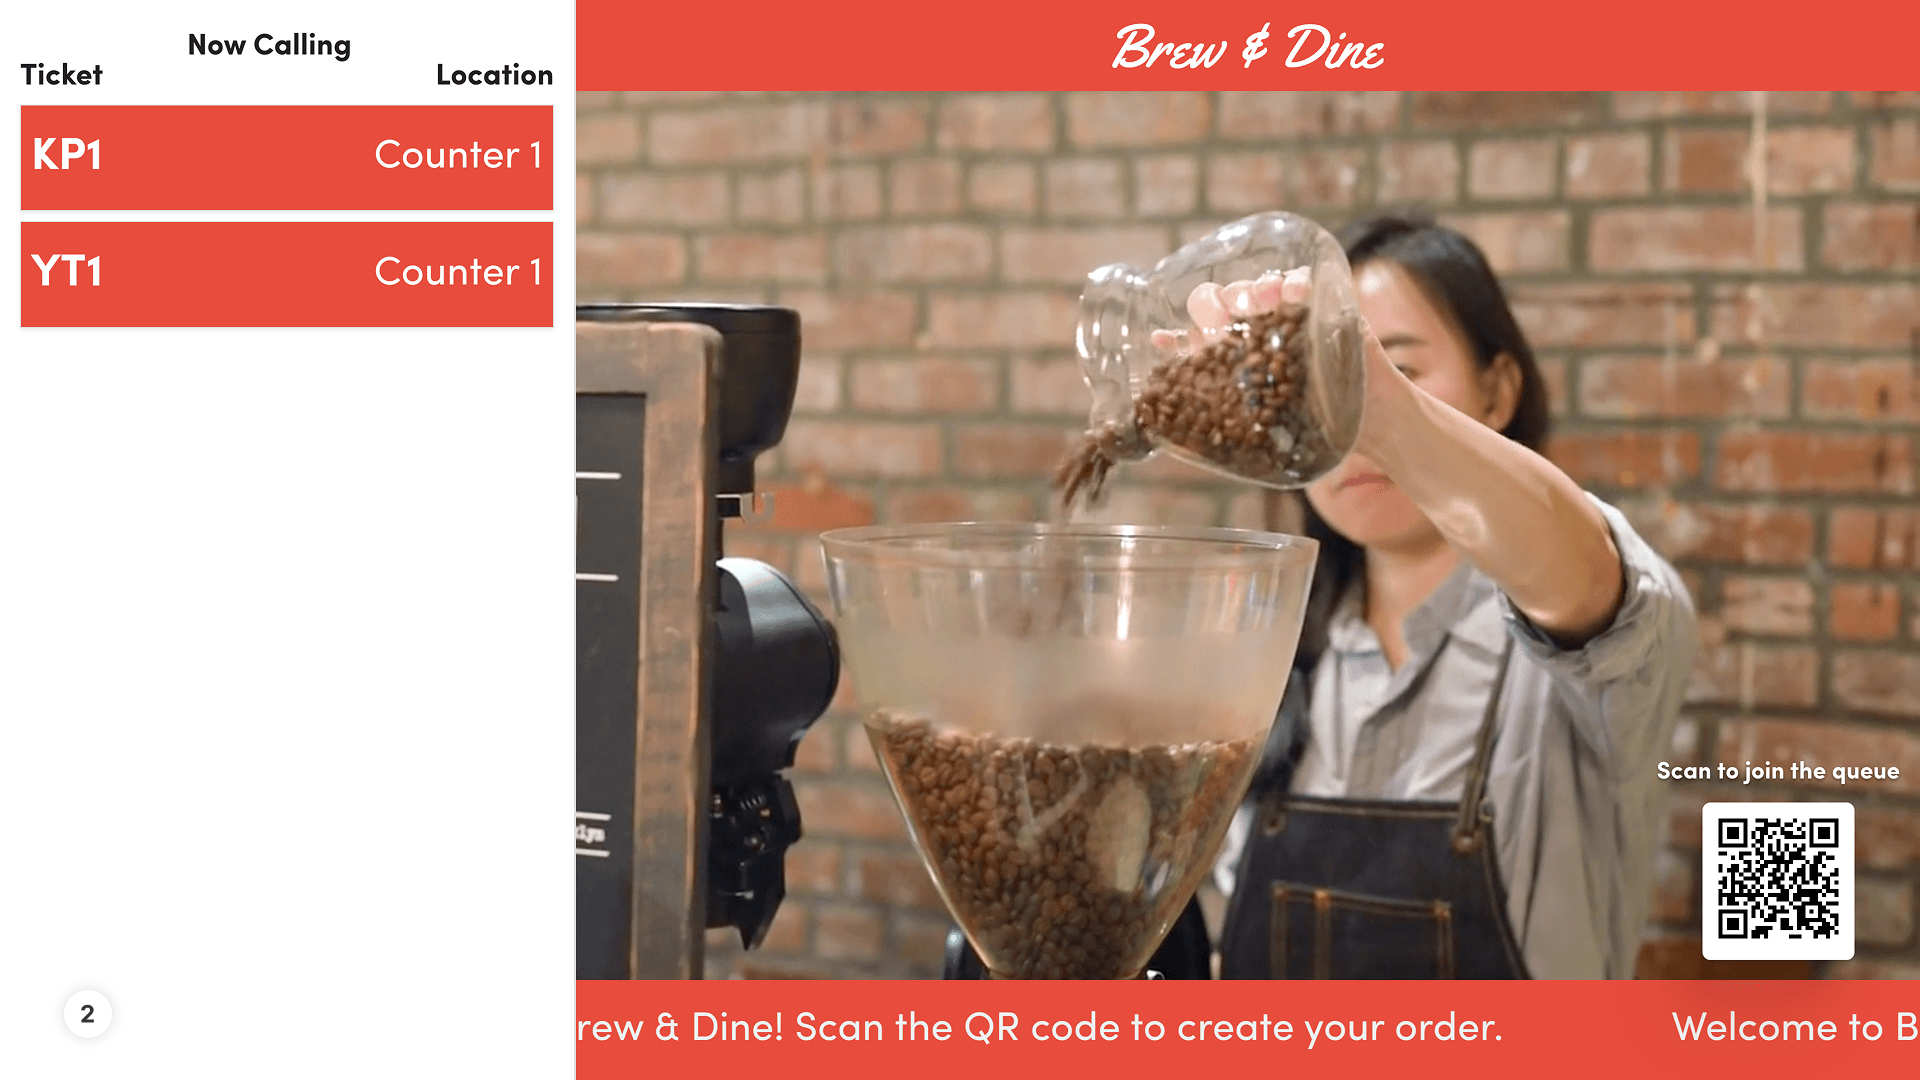
- Preview of the Queue Ticket Signage installation using the default styles
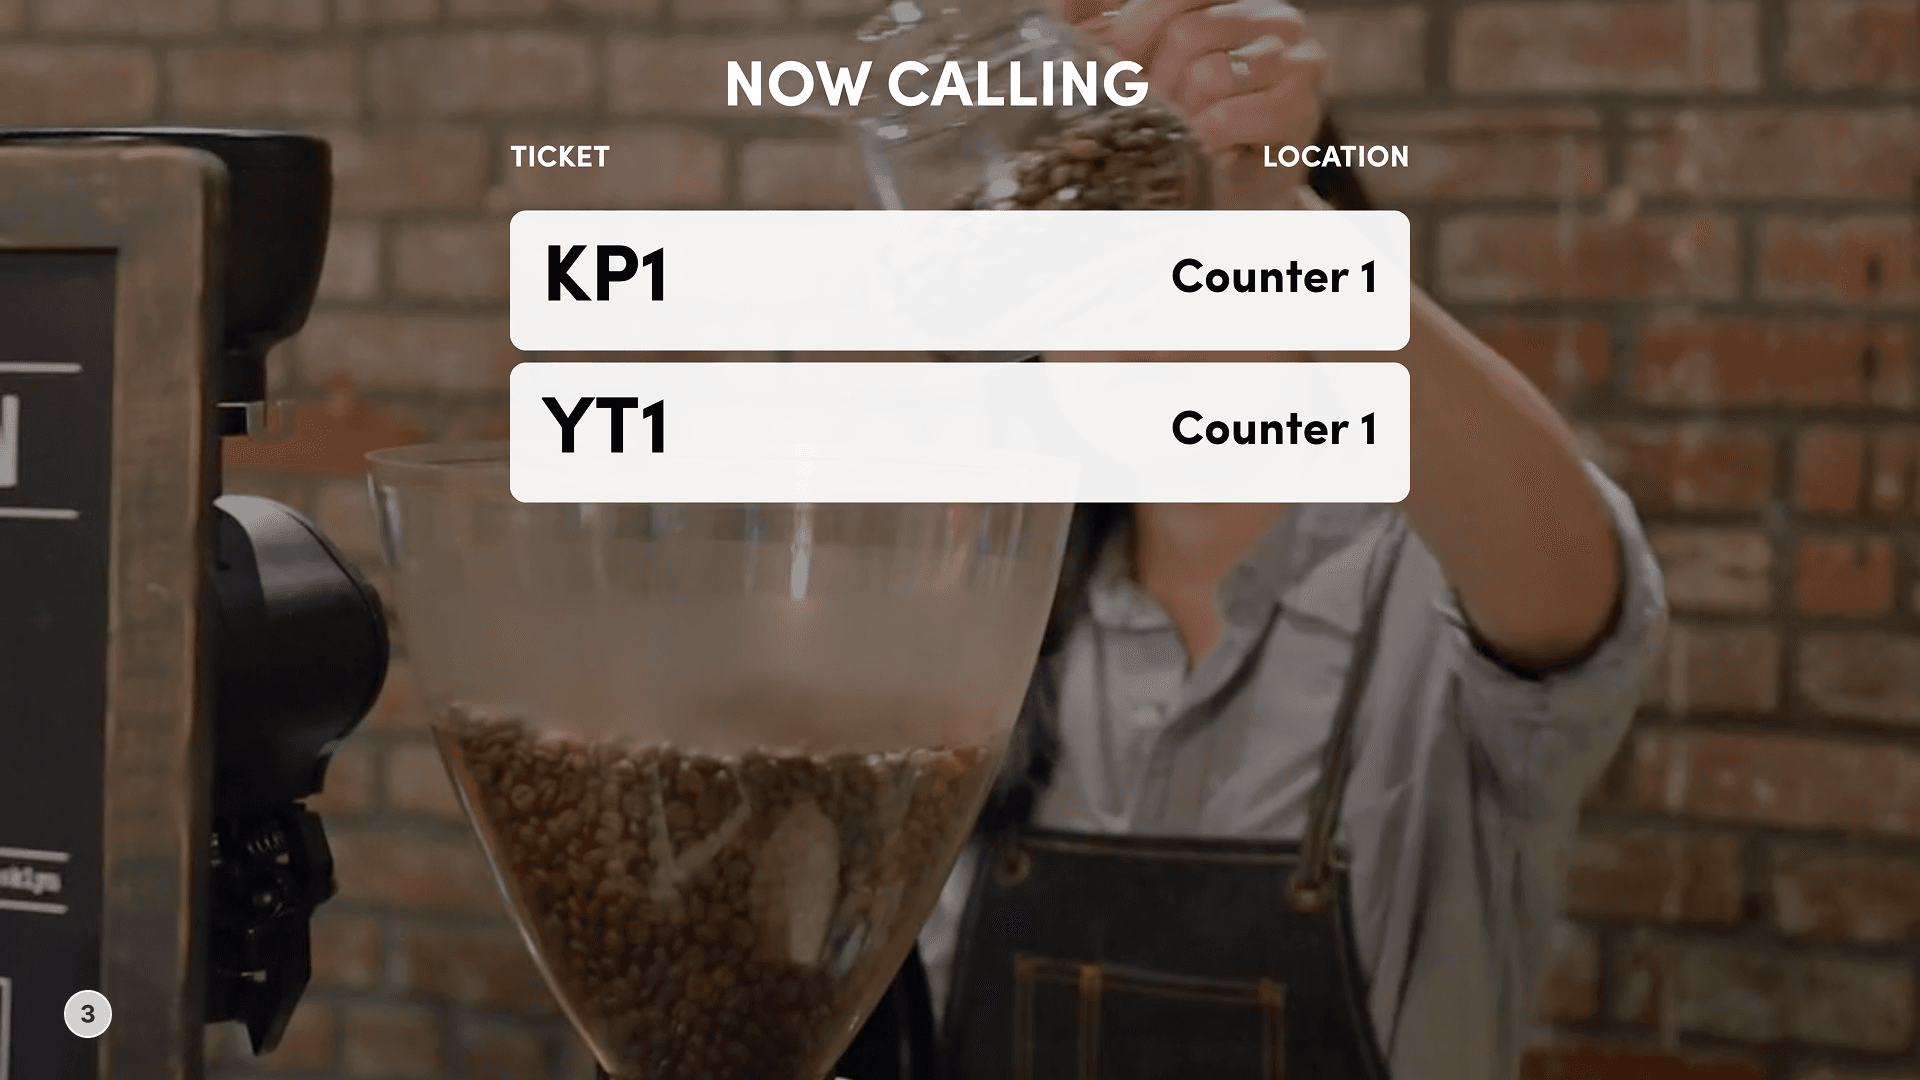
- Preview of the Queue Ticket Signage installation using the simple legacy layout