How to install Queue Kiosk
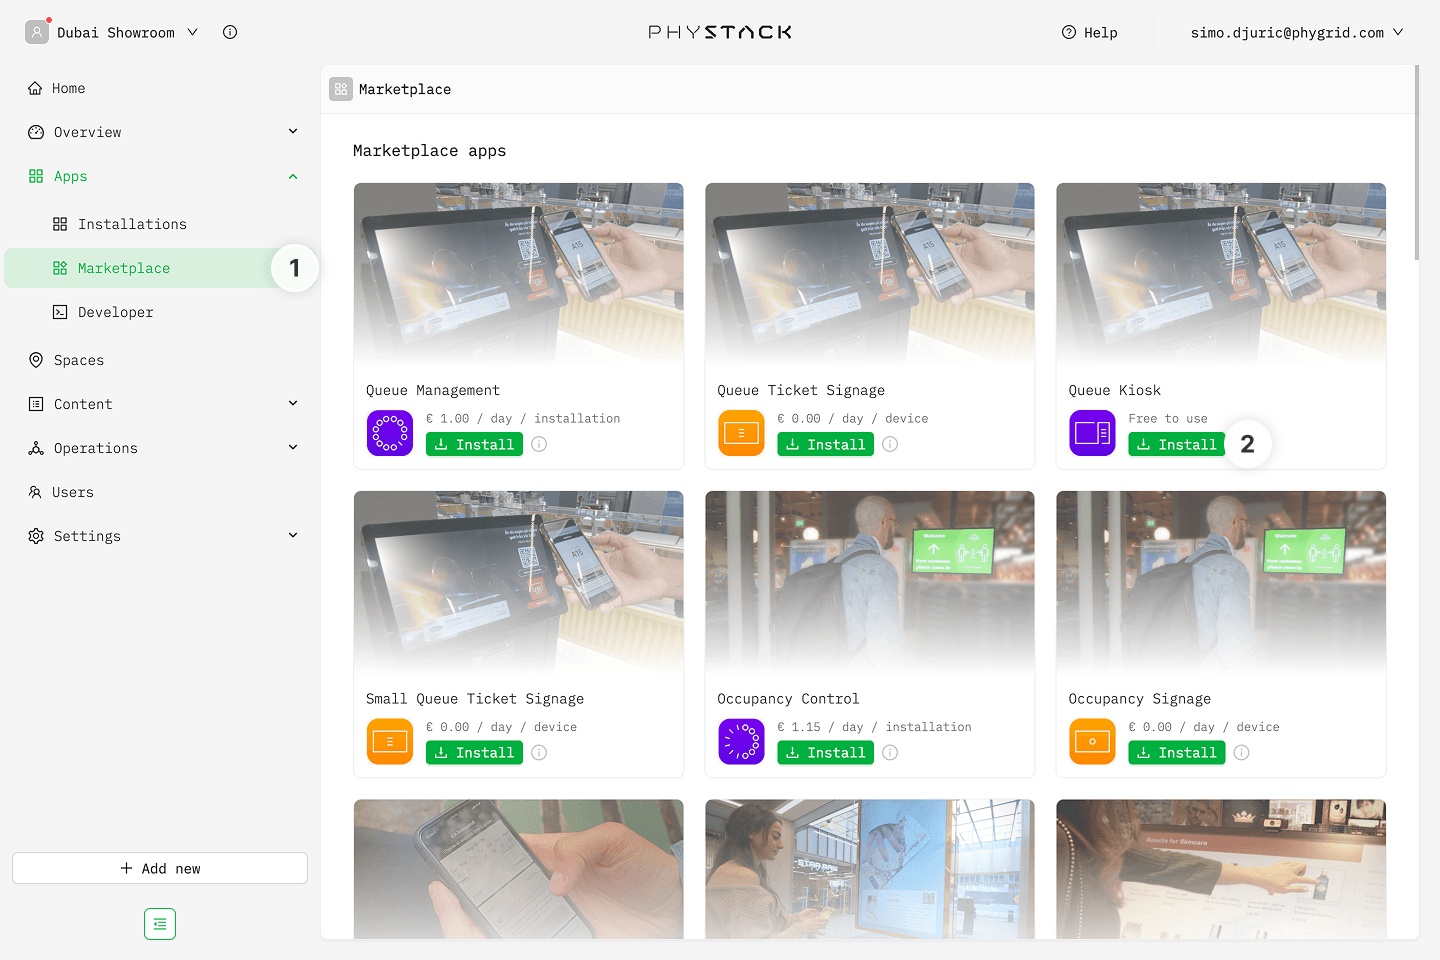
- In the sidebar, navigate to Apps → Marketplace
- Look for Queue Kiosk in the list of applications and click on the Install button to open the installation dialog
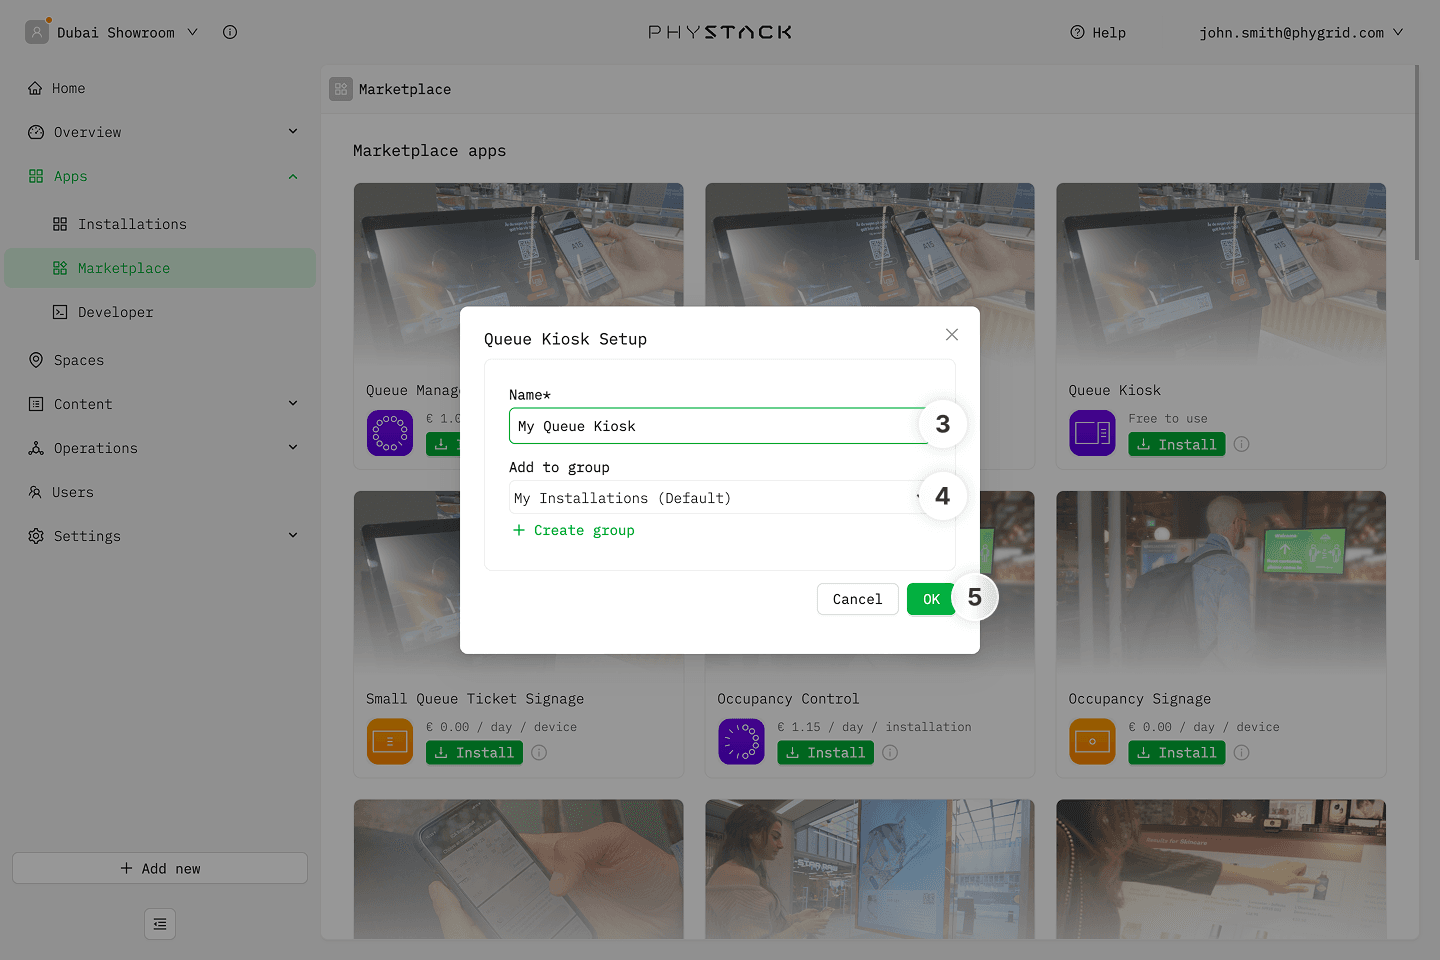
- In the installation form, enter a Name for your Queue Kiosk installation
- Optionally, select a Group to organize your installations
- Click OK to create the Queue Kiosk installation
How to access Queue Kiosk settings
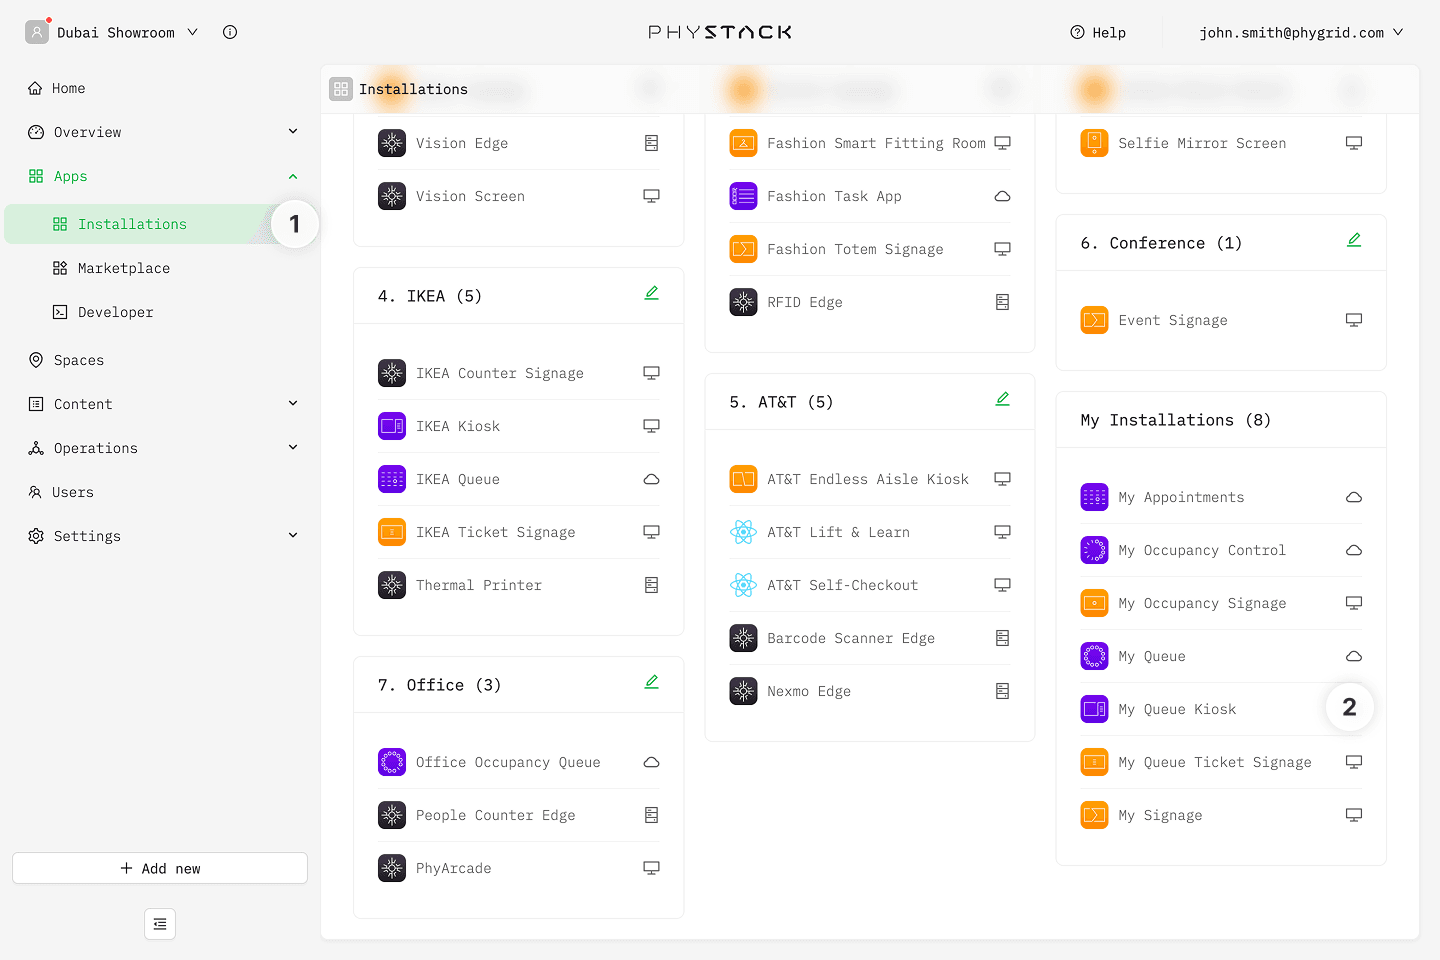
- Your new installation will be available in the sidebar under Apps → Installations
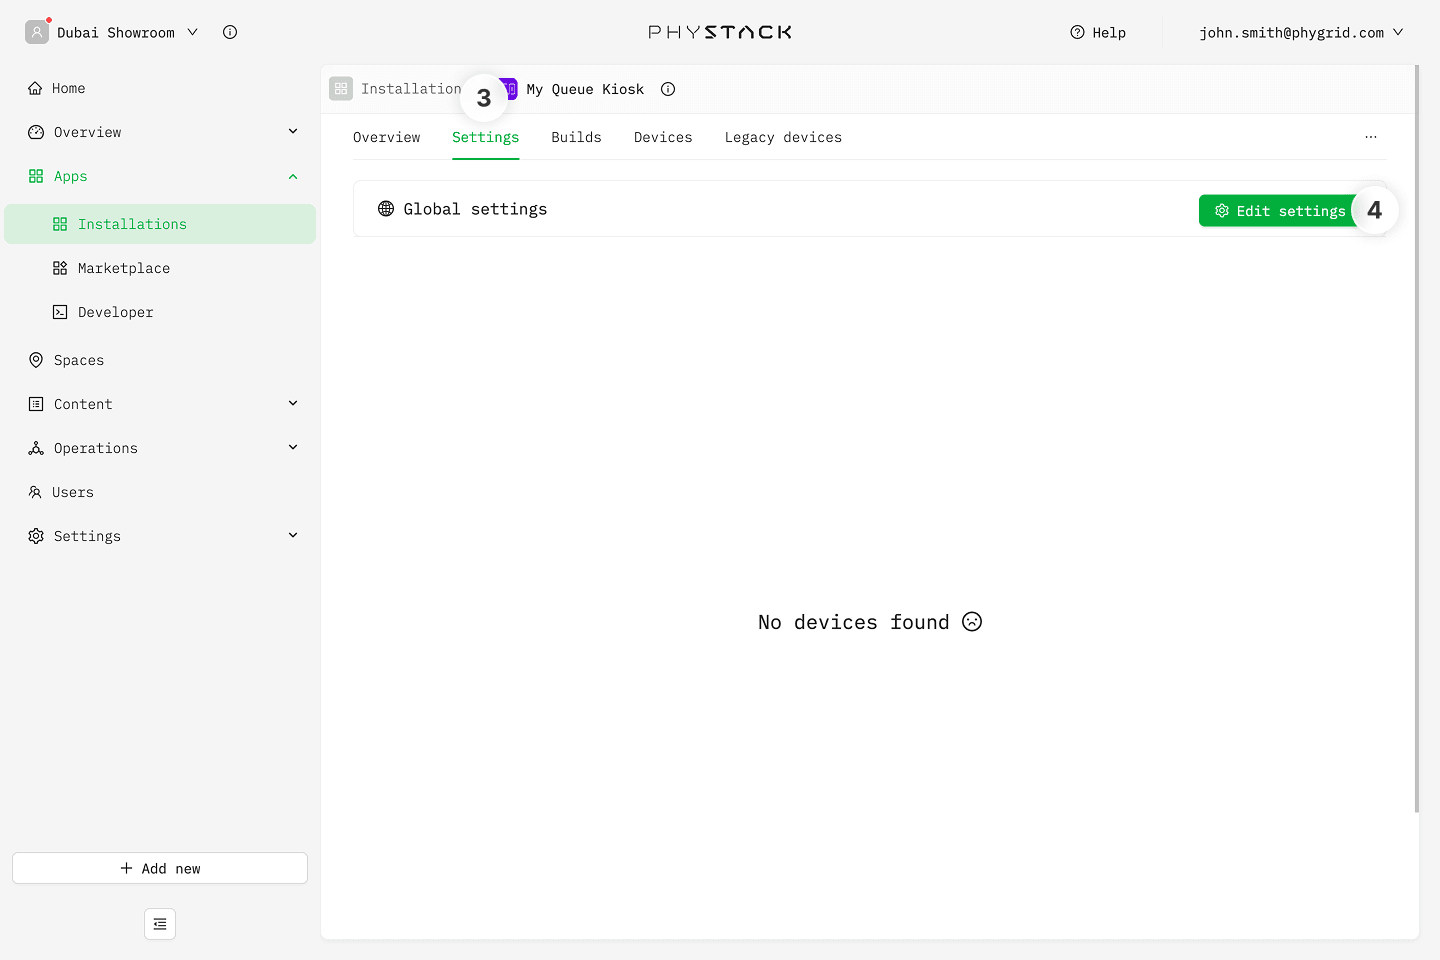
- Open the installation and select the Settings tab to access your queue's options
- For the initial setup, go to the Global Settings section and click Edit Settings. You will be able to provide device-specific overrides after you add devices to the installation.
How to configure Queue Kiosk basics
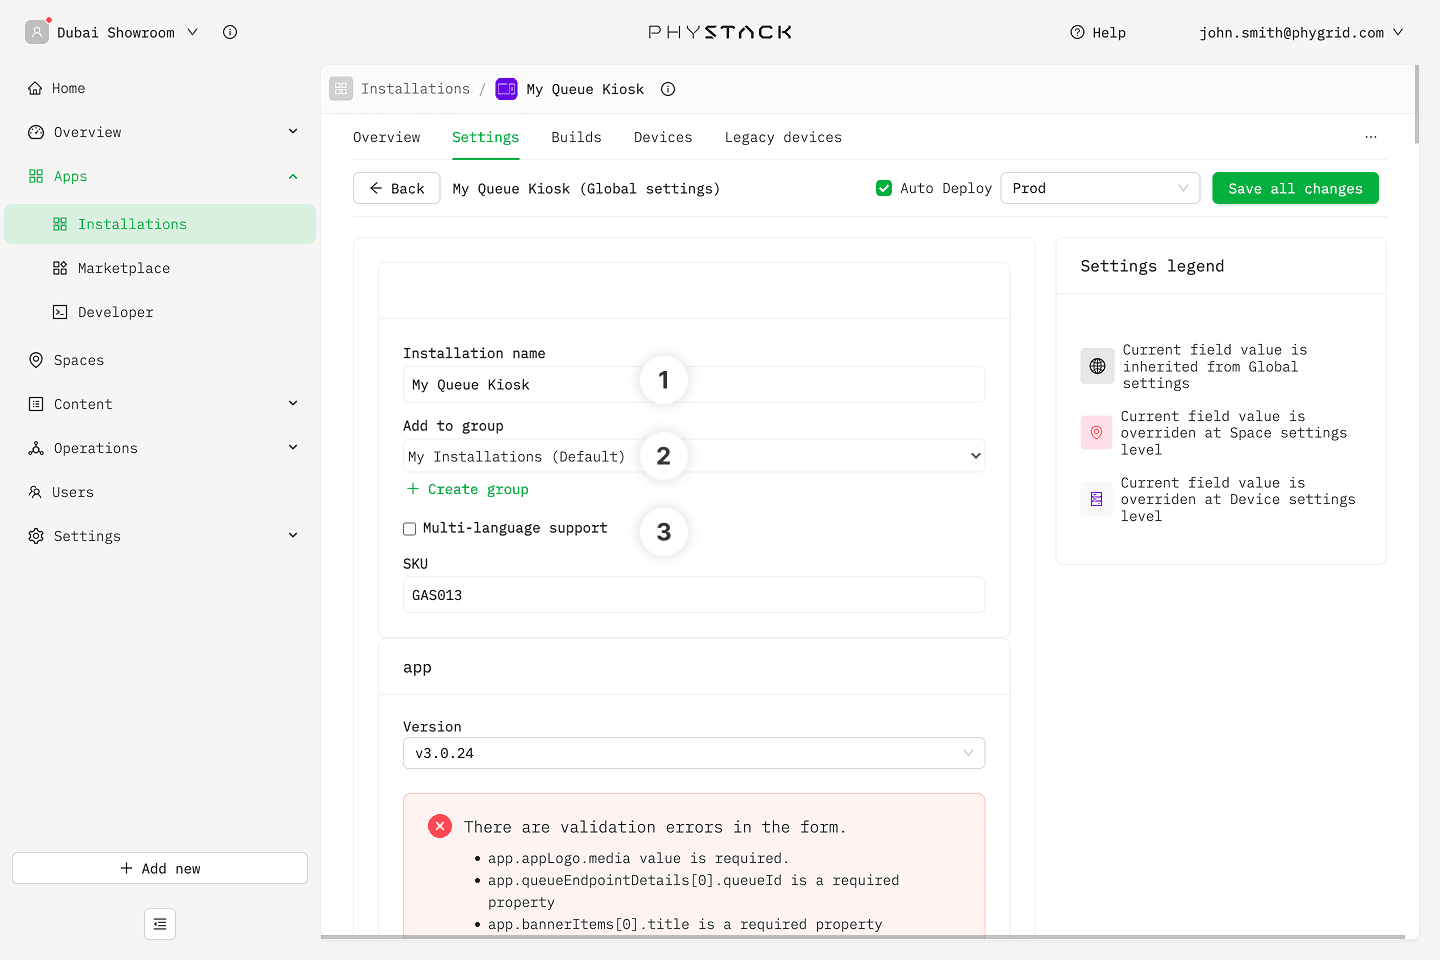
Make sure all the required fields are properly set in order to make the Kiosk app work correctly.
- Set or change the installation name for the queue installation. This is the title visible in Apps → Installations
- Pick an existing or create a new installation group that this installation belongs to. This is also visible in Apps → Installations
- Enable at least one language for the queue by clicking on Multi-language support
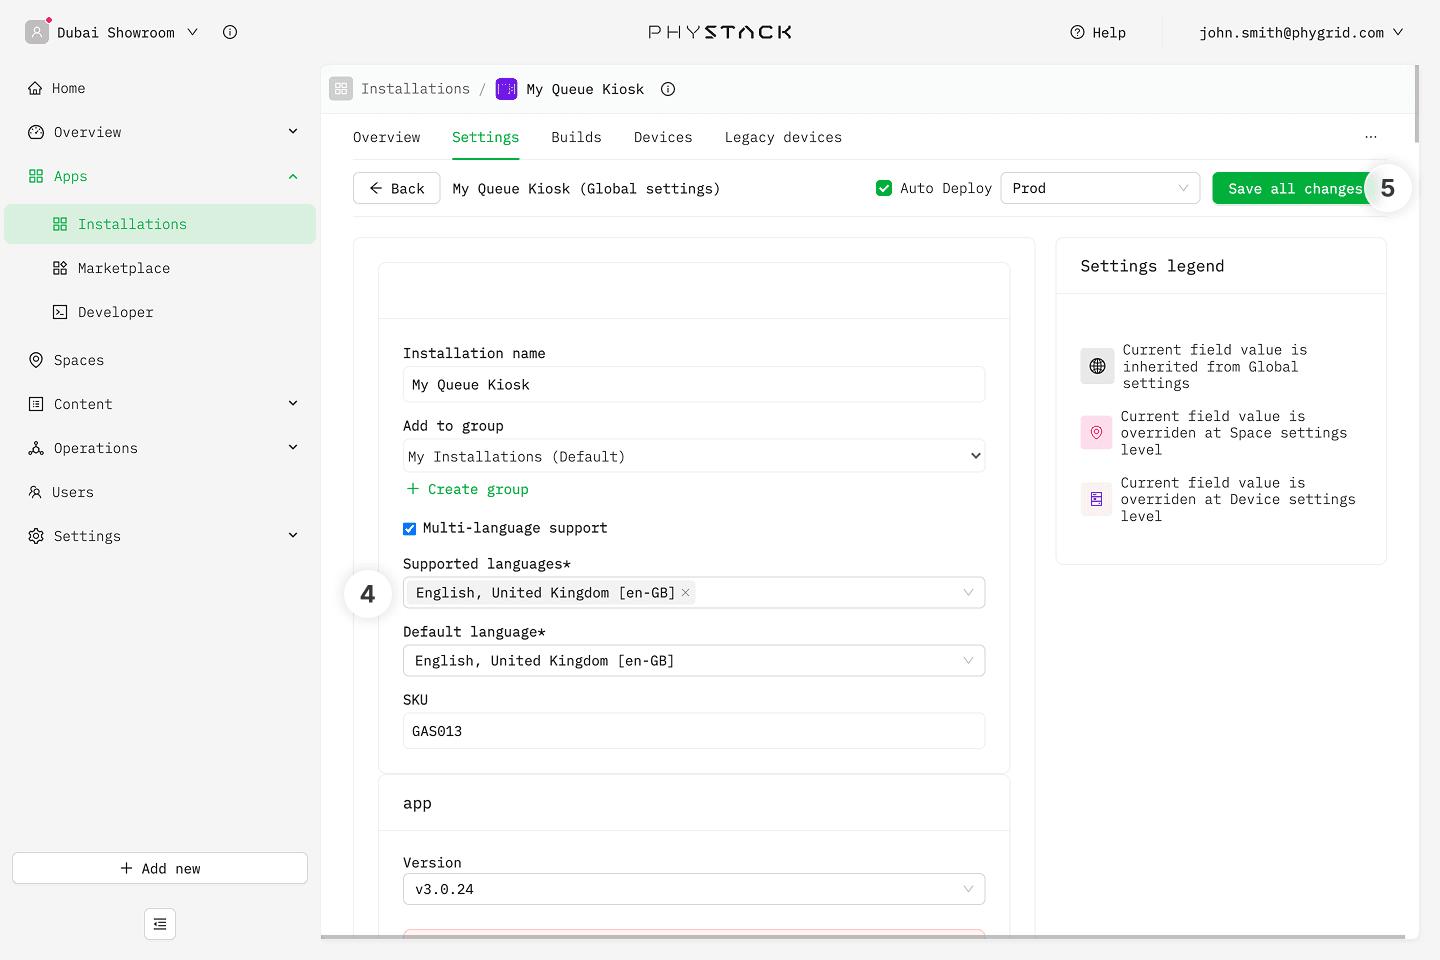
- Select the language(s) for the app and choose the default language
- Save the changes and refresh the page to properly enable language support
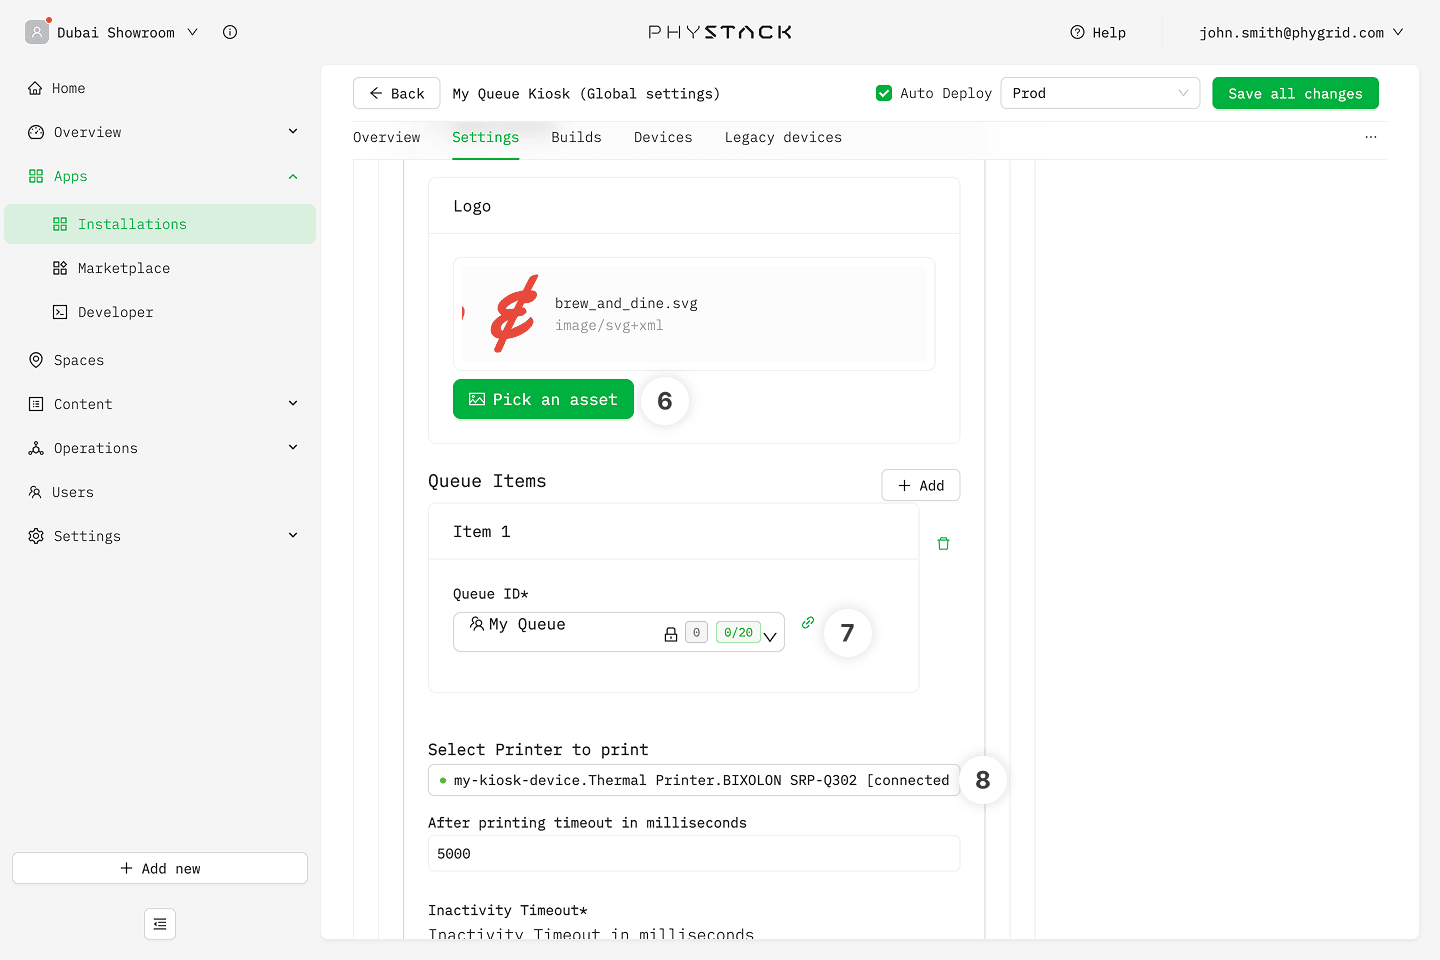
- Scroll down to the app settings and set the logo
- Select at least one Queue Item - Queue Kiosk lets you list multiple queues
- Set the proper printer for the Queue Kiosk
- The dropdown option will show all printers across all devices available in the tenant. For Queue Kiosks, you will most likely want to select the one that is physically attached to the kiosk
- If you are setting up a fresh device, learn how to connect a device to your installation and how to connect a peripheral to your device
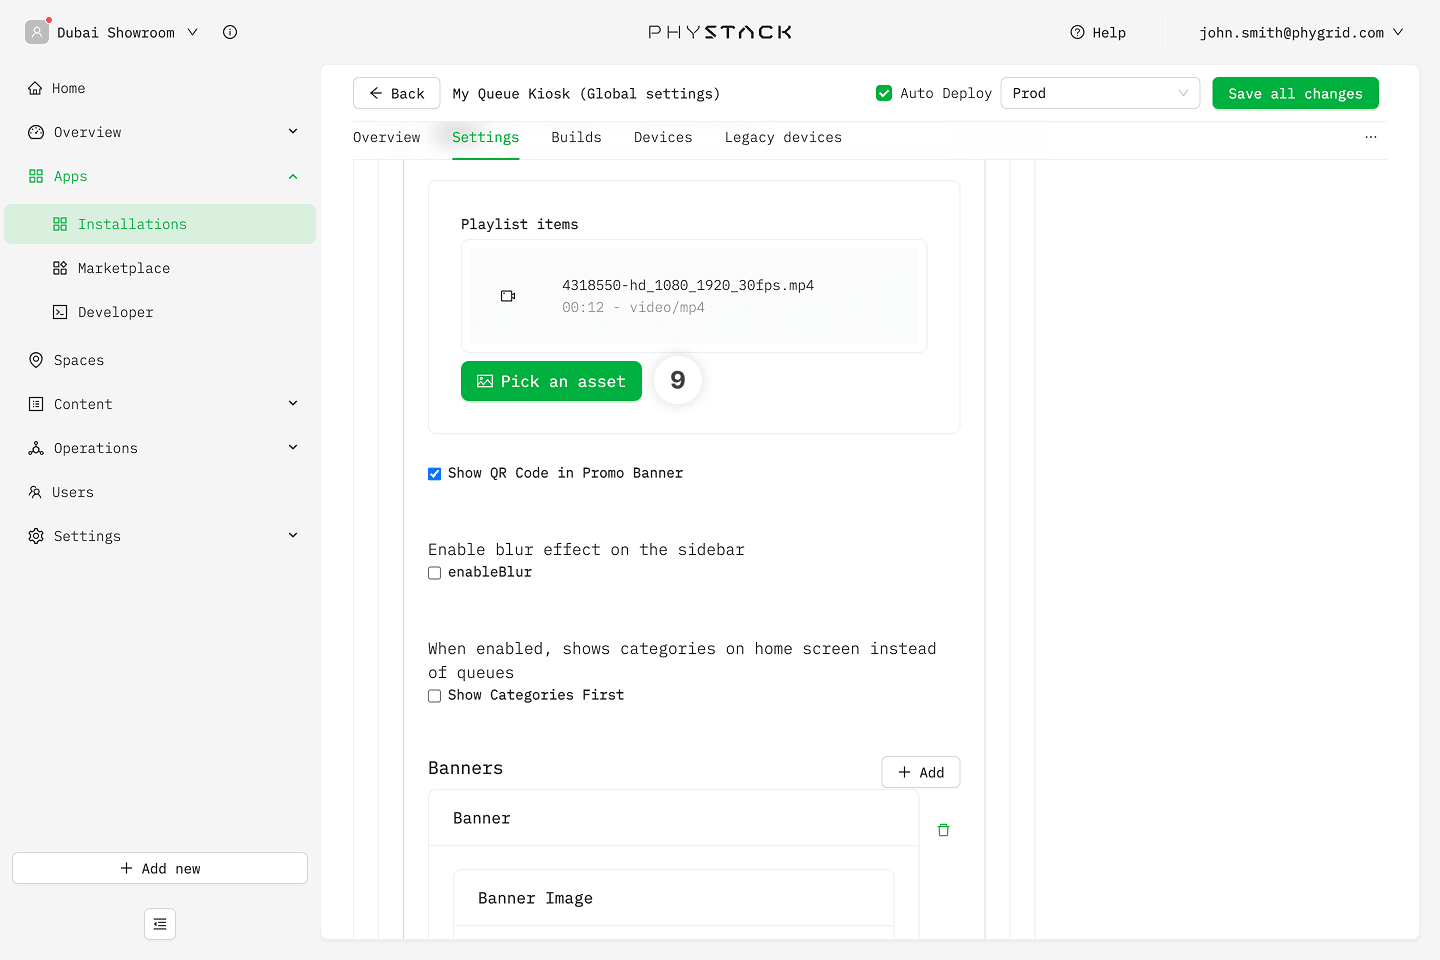
- Select a playlist item which will play in the background of the kiosk screen
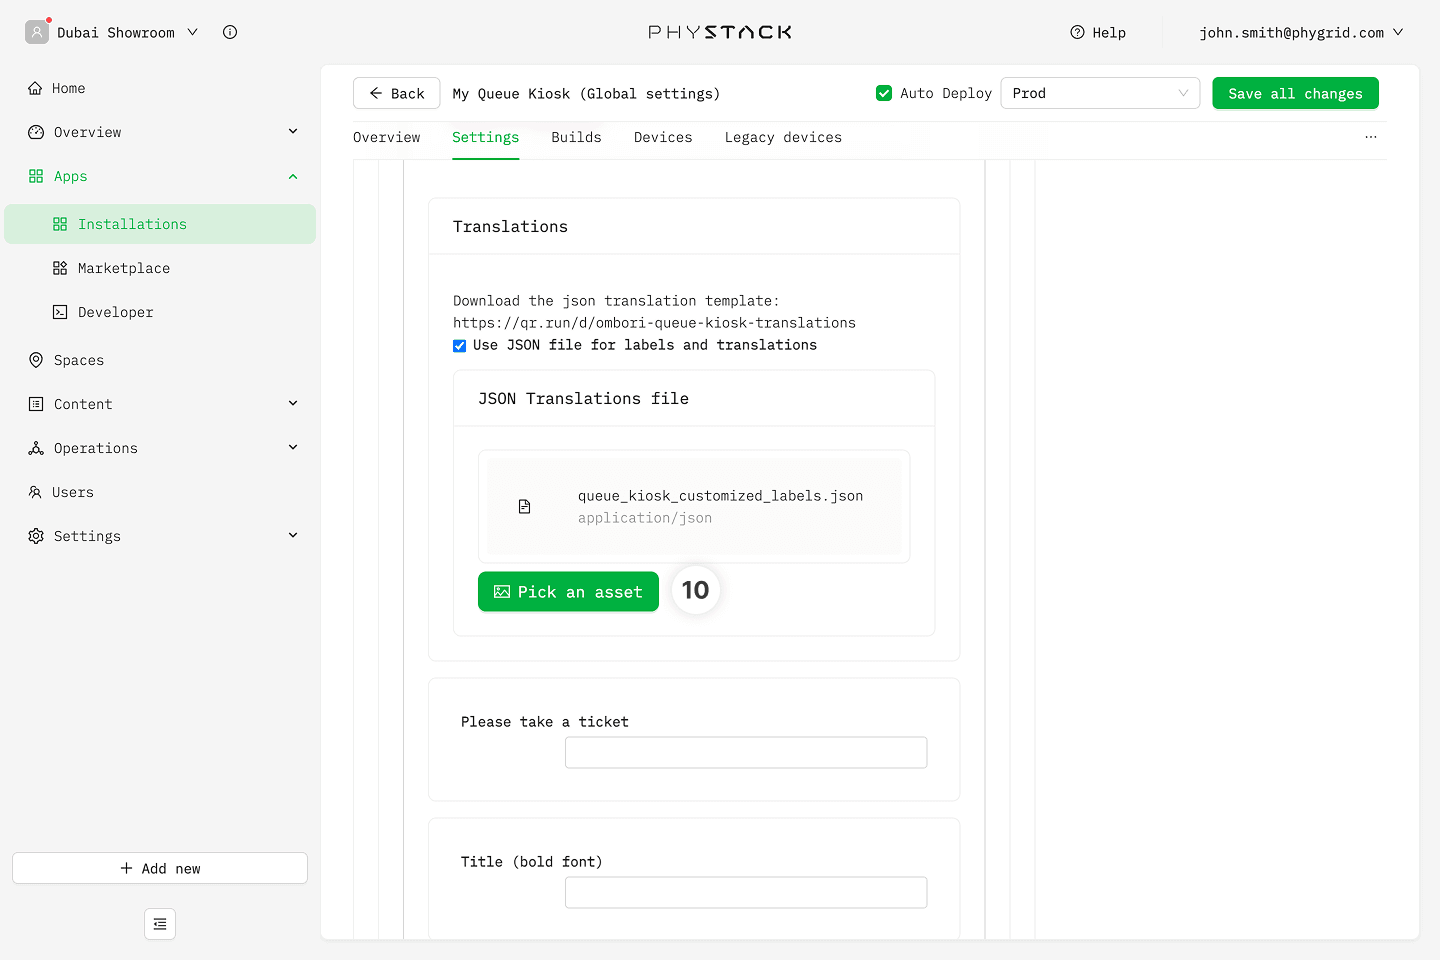
- Queue Kiosk lets you customize various text labels in the interface. Customizing said labels can be complicated if you are using multiple languages in the kiosk, as it requires you to switch constantly between source and target language in the interface. This can be made easier for Queue Kiosk by downloading the translation reference file, customizing the content of the file, then enabling the option to use JSON file for labels and translations and selecting the customized file
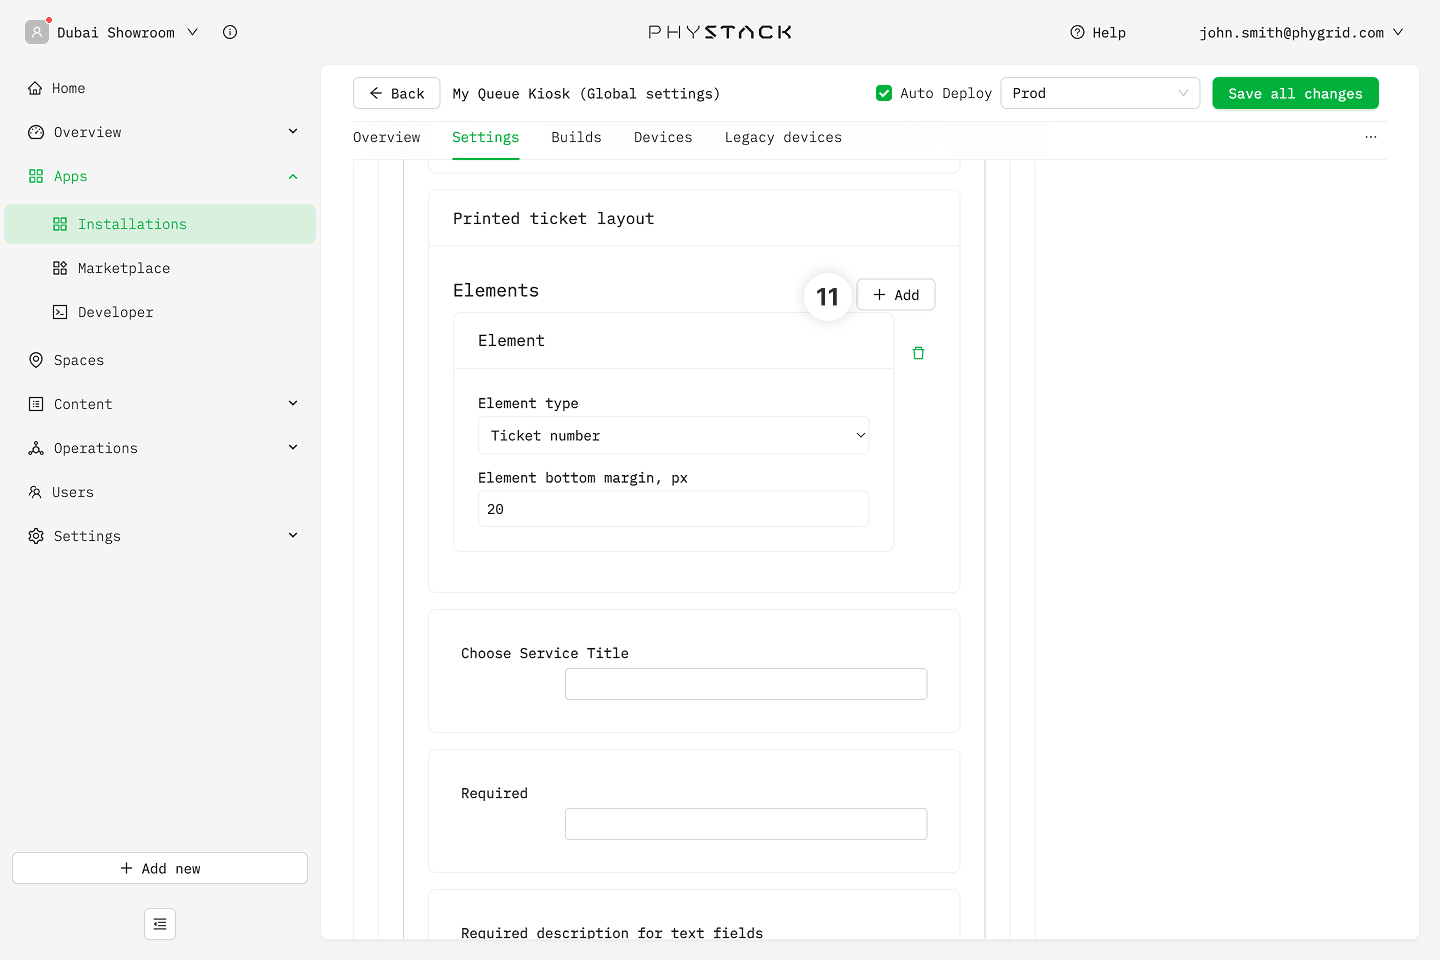
- Customize the printed ticket layout by adding and reordering different ticket elements. Most importantly, make sure that you have ticket number selected
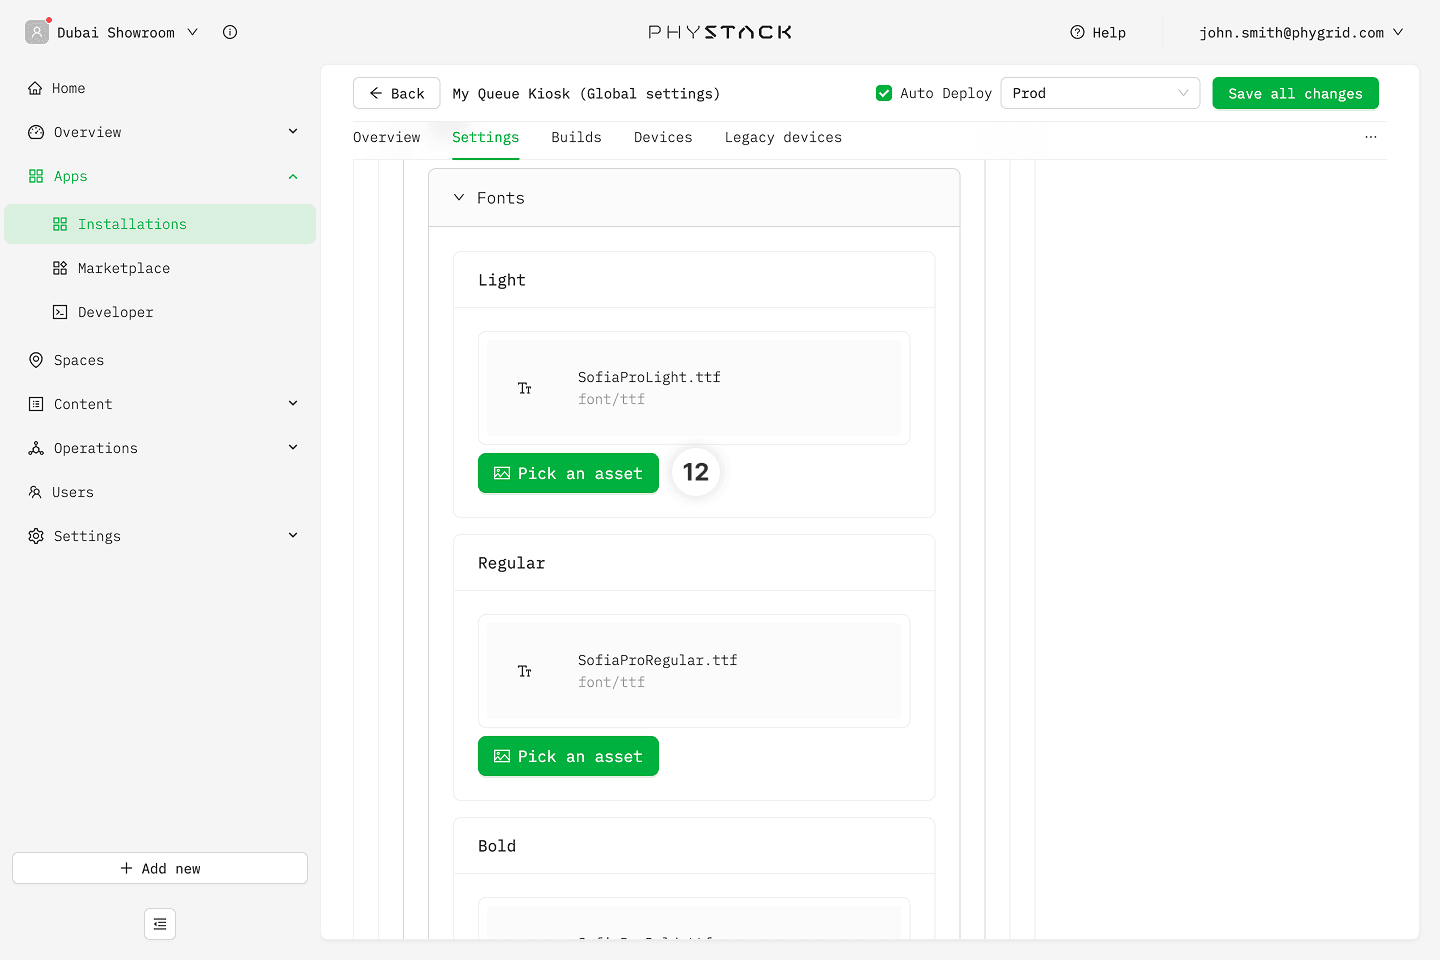
- Upload custom fonts for the installation
How to create promotional banners on the Queue Kiosk
- Queue Kiosk can display promotional banners in the video area. In order to create a new banner, go to the Banners section and click Add
- Upload a banner image
- Set the title for the banner
- Set the description for the banner
- Enter the url for the website that will be shown once the visitors scan the promo banner
- If you have multiple banners, you can use the arrow buttons to reorder them
- If you want to delete a banner, click on the trash bin button

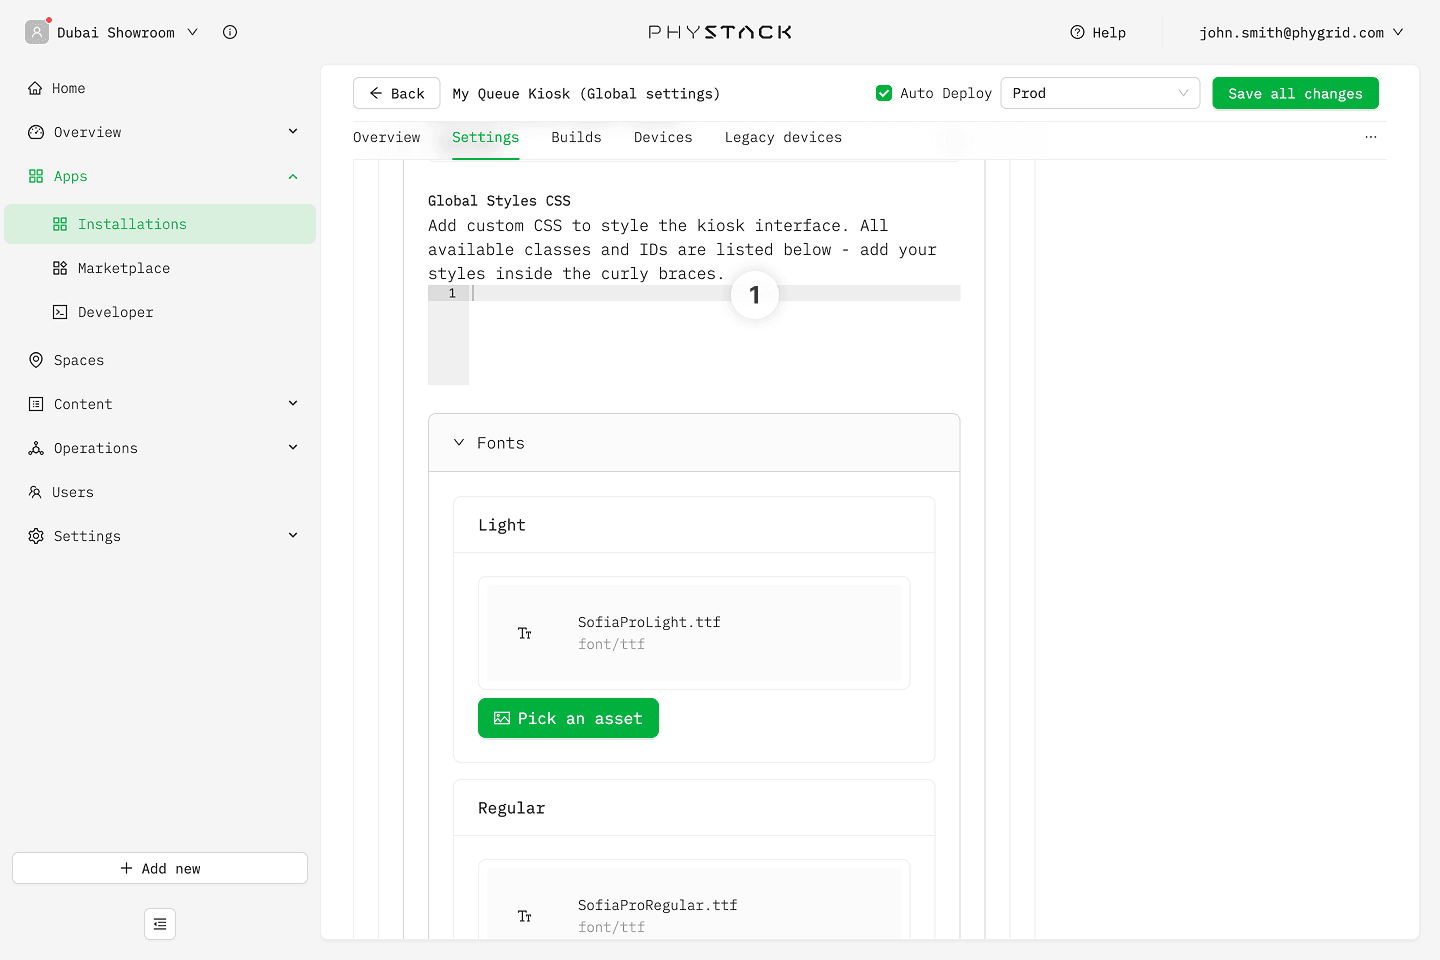
How to customize the appearance of the Queue Kiosk installation using CSS
- You can customize the appearance of the installation by modifying the CSS for the following IDs and classes and entering them into the Global Styles section of the settings:
#root— React root element wrapping the entire application#app-body— Main content area containing the logo and banners#app-logo— App logo wrapper section#kiosk-logo-image— The logo image element#app-sidebar— Sidebar panel with queues, categories, forms, and print views#home-container— Home view wrapper (queue list + QR code)#qr-section— QR code call-to-action area#kiosk-qr-title— Bold title above the QR code (e.g. "Scan to get a phone ticket")#kiosk-qr-description— Description text below the QR title#qr-code-wrapper— Container around the QR code image#categories-first-wrapper— Wrapper for the category/queue selection area#kiosk-category-title— Heading for queue/category selection (e.g. "Select Category")#kiosk-category-description— Description text below the category title#print-section— Print status view (thank you / error screens)#footer-container— Footer area with language selector and brand logo#language-flags— Language flag buttons container#language-container— Wrapper around the language selector#brand-footer-logo— Brand footer logo image.kiosk-category-list— Container wrapping the list of queue/category buttons.kiosk-category-button— Individual queue or category button.kiosk-category-button-text— Text label inside a queue/category button