Setting up a queue
Setting up a queue is very easy using the Marketplace. Find the Queue Management application and open it.
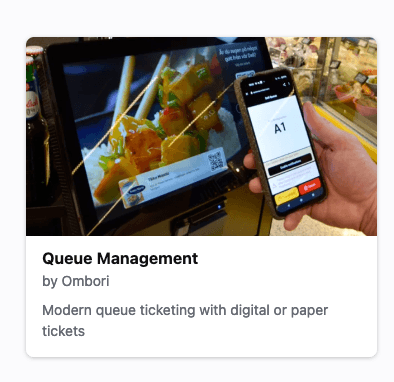
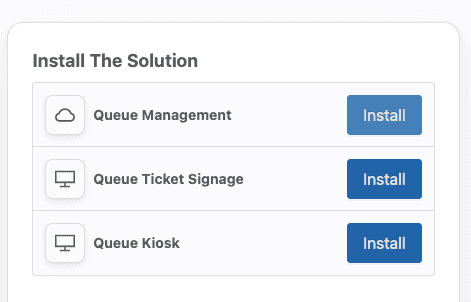
On the Queue Management page, you'll see an installation section with several options. But to get the queue up and running you'll only need the first one (Queue Management)
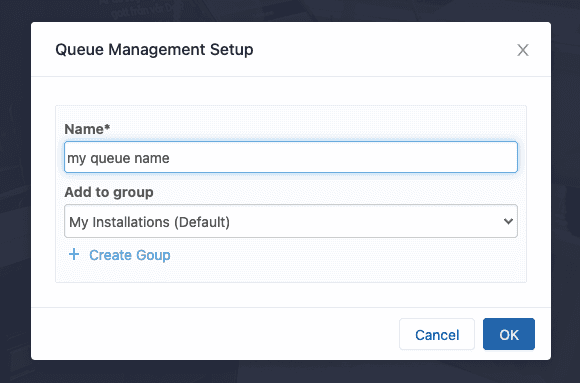
When you press Install behind the Queue Management option you'll get a dialog asking you to name it, and where to place your queue installation.
Once you've clicked OK in the dialog your installation is done and you will be redirected to the installation page. It will also appear in the sidebar at the position (grouped or not) where you've chosen the installation to be.
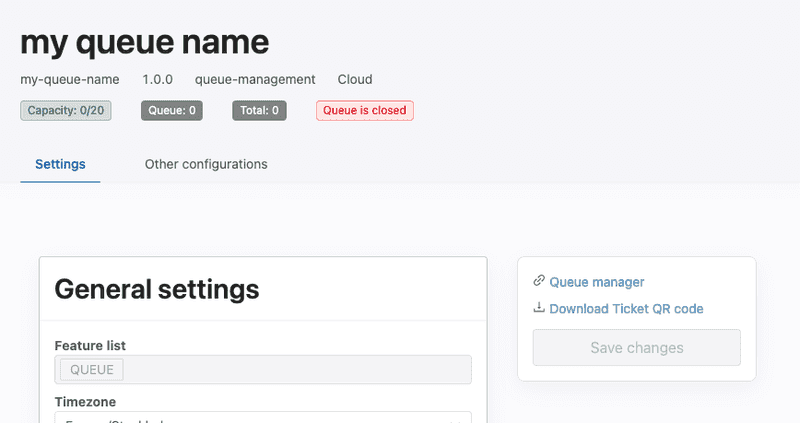
Getting into the management screen
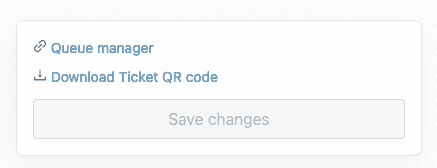
As you can see in the screenshot above, everything is already up and running and works out of the box. To get into the management screen, click the button on the right which says Queue Manager. This will bring you to the queue manager where you can see currently queueing people.
However, you might notice there's a Pincode required to enter. This Pincode has been randomly generated with the creation of the queue, you can find this Pincode in the console inside the queue you generated. Enter this Pincode and proceed.
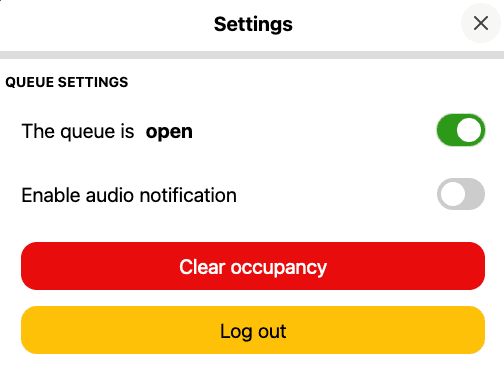
Once you're in, all you need to do is open the queue, and people can start making tickets. For this, you need to press the gear icon on the top right, and then flip the toggle next to Queue is closed.
Customizing Queue Management
You can customize queue management in the console, there are many options including pre-booked tickets, capacity, labels, and more. To learn more about this refer to our guides for it.
As of now, the guides are still to be written, but if you want more information please ask on Slack and we can help you out and point you to further information.
Letting people generate tickets.
By default, there's a QR code generated to be used for people to scan. You can access this QR code on the right-hand side in the console when in the queue setup screen. This QR code can be printed or put on a display so people can scan it with their phones.

Another way of generating tickets is by also installing a queue kiosk. This can connect to a printer and print tickets for your customers. You can find the queue kiosk inside the Queue Management Marketplace page.
Adding Queue Ticket Signage
Next to the queue kiosk, there's also Queue Ticket Signage. This can also be found on the Queue Management Marketplace page.
Want to learn more about integrating signage? The documentation for this is still being written, but you can ask in Slack!
Customize the appearance of the Booking page
You can customize the appearance of the booking page by using CSS.
Enter your custom CSS into the Add brand guidelines with CSS to your queue solution UI input field inside the Settings of your Queue.
Elements are targeted via data-theme attributes.
Available attributes
List of available data-theme attributes and the corresponding elements. Look at examples to see how to use the properties inside css. Check the screenshots section for reference to each number
| # | data-theme attribute | Description |
|---|---|---|
| 1 | booking-page__wrapper | page background |
| 2 | queue-common__header | logo and title area |
| 3 | booking-page__subtitle | subtitle area |
| 4 | booking-page__card | the main content area |
| 5 | booking-page__datepicker | datepicker header |
| 6 | booking-page__datepicker__choose-week | header week area |
| 7 | booking-page__datepicker__weekdays | header days listing |
| 8 | booking-page__datepicker__weekdays__day--selected | header active day selection |
| 9 | booking-page__datepicker__weekdays__day | header non-active day |
| 10 | booking-page__list | available timeslots listing |
| 11 | booking-page__timeslot | single timeslot |
| 12 | booking-page__timeslot__form__info | info box on the active timeslot |
| 13 | booking-page__timeslot__form | input fields on the active timeslot |
| 14 | booking-page__timeslot_form__submit | submit button on the active timeslot |
Reference Screenshots
On these screenshots every number refers to an attribute as specified in the table above.
 |  |
|---|---|
 |  |
Examples
For using the data-theme attribute, take a look at the example below. This is how you format the attribute inside css.
[data-theme="booking-page__datepicker"] {
  background: lightblue;
}
This will change the datepicker header color to lightblue

To edit the CSS of a particular element that doesn’t have an assigned data-theme attribute, you can target that element in reference to an element that does have an assigned attribute
[data-theme="booking-page__timeslot"] > button span:nth-child(2) {
  background: lightblue;
}
Customize the appearance of the Confirmed Booking ticket page
Confirmed Booking ticket page is the page that the user sees after booking an appointment.

You can customize the appearance of this page by using CSS.
Enter your custom CSS into the Add brand guidelines with CSS to your queue solution UI input field inside the Settings of your Queue.
Elements are targeted via data-theme attributes.
Available attributes
List of available data-theme attributes and the corresponding elements. Look at examples to see how to use the properties inside css. Check the screenshots section for reference to each number.
| # | data-theme attribute | Description |
|---|---|---|
| 1 | page__position | page background |
| 2 | queue-common__header | logo and title area |
| 3 | page-position__confirmation-message | booking confirmation message |
| 4 | page-position__booking-info | content area |
| 5 | page-position__booking-info__date | booking date |
| 6 | page-position__booking-info__time | booking time |
| 7 | page-position__booking-info__visitors | booking visitor |
| 8 | page-position__booking-info__location | booking location |
| 9 | page-position__booking-info__warning | booking warning message |
| 10 | page-position__position-actions | buttons area |
| 11 | page-position__button-reschedule | reschedule button |
| 12 | page-position__button-cancel | cancel button |
Reference Screenshots
On this screenshot every number refers to an attribute as specified in the table above.

Examples
For using the data-theme attribute, take a look at the example below. This is how you format the attribute inside css.
[data-theme="queue-common__header"] {
  background: lightblue;
}
This will change the header background color to lightblue.
Customize the appearance of the Walk-in ticket page
Walk-in ticket page is the page that the user sees after creating a walk in (by scanning QR code) ticket.

You can customize the appearance of this page by using CSS.
Enter your custom CSS into the Add brand guidelines with CSS to your queue solution UI input field inside the Settings of your Queue.
Elements are targeted via data-theme attributes.
Available attributes
List of available data-theme attributes and the corresponding elements. Look at examples to see how to use the properties inside css. Check the screenshots section for reference to each number.
| # | data-theme attribute | Description |
|---|---|---|
| 1 | page__position | page background |
| 2 | queue-common__header | logo and title area |
| 3 | queue-common__position-ticket | ticket info area |
| 4 | queue-common__position-ticket__number | ticket number |
| 5 | queue-common__position-ticket__people-ahead | people ahead |
| 6 | queue-common__position-ticket__visitors-amount | amount of visitor (only visible if amount of visitors is not editable) |
| 7 | queue-common__position-ticket__people-number | amount of visitors that user can edit (only visible if amount of visitors is editable) |
| 8 | queue-common__position-ticket__notification-button | notification button |
| 9 | queue-common__info-message | safe distance warning message |
| 10 | page-position__position-actions | buttons area |
| 11 | page-position__button-reschedule | reschedule button |
| 12 | page-position__button-cancel | cancel button |
Reference Screenshots
On this screenshot every number refers to an attribute as specified in the table above.

Examples
For using the data-theme attribute, take a look at the example below. This is how you format the attribute inside css.
[data-theme="queue-common__header"] {
  background: lightblue;
}
This will change the header background color to lightblue.
Order Pickup
Curbside pickup is a solution that allows your customers to book a slot. You will need to send your customers a unique link to book the slot, which you can read about in our Vender Integration Documentation.
To install Order Pickup, visit the Ombori Grid Marketplace in the console and find the "Order Pickup" Application.
How to use order-pickup.
We've documented the administrator and customer user journeys to our documentation. Read more about how to use it there.
Check the sidebar after clicking the links above for more journeys.
Configuring opening times and capacity
Opening times are fundamental in configuring your pickup correctly. Opening time consists of a few configurations that are relevant to capacity and times.
First, there is "general settings". In this section, you can configure from when to when you are open. Multiple slots of time can be added per day, and days can be enabled/disabled separately. This section is the general store opening hours.

Next, there is a way to manage the capacity and the length of timeslots. This section is called "Curbside Pickup" in the settings overview.

Timeslot duration
This is the duration of the timeslot that will be displayed to the customer. For example, if you configure 30 minutes, then the customer can pick options like 10:00, 10:30, 11:00, etc. If you configure 5 minutes then the options will be 10:00, 10:05, 10:10, etc.
Timeslot capacity
This setting is for how many bookings you can allow per timeslot. If you configure 1, then only a pickup can be booked for that timeslot, this means if the next person tries to book a slot that option won't be visible.
Separate curbside pickup hours
This allows you to configure opening hours and capacity separately from the opening hours of your store.

As you can see in the image above we've configured to enable it on Monday only, and then also a custom capacity. This separate capacity field overrides the Timeslot capacity for the timeframe only.
Log-in Method
To get into the admin panel you can configure how to access it. By default PIN-based login is enabled, and a random pin was generated when Order Pickup was installed.
However, you can also opt-in to use email-based login, this is based on the available users added in your console. This way authentication is already handled.

Notification Settings

You can customize notification settings.
| Field | Description |
|---|---|
| Enable push notifications | Not Applicable for Order Pickup |
| Enable Apple Wallet | Not Applicable for Order Pickup |
| Enable SMS | Send SMS messages to your users, you can customize the messages separately |
| Enable E-mail notifications | Not Applicable for Order Pickup |
SMS customization
When you've enabled Enable SMS you will get additional fields you need to enter.
| Field | Description |
|---|---|
| Phone Number | Mandatory field. Phone number of the SMS gateway. Ask us for integration |
| Code | Not applicable for Order Pickup |
| Default Country | Set the default phone number country, this will make entering phone numbers easier, but users are still able to select a different country |
| Allowed phone number countries | Enter phone number countries you want to support, if empty all countries are present |
Text Customization
There are a lot of messages in the UI you can customize. You can find out about what each field means in our documentation.
Microsoft Teams Integration
Microsoft Teams Integrations allows your employees to receive notifications of users arriving. This setup requires our integration as a bot user needs to be configured as well. Contact us if you're interested.

Customizing the design
To customize the design of the screens involved in the order pickup, you can make a few changes.
Add a logo
At the General Settings you can configure the URL of the logo you want to display on the booking page. You can upload your image to the Media Library. Open the media item using the edit button and you can copy the URL from there.
Customizing CSS
You can provide custom CSS in the CSS field. For more information on how to customize this, contact us on Slack.